Summerween Nails: 12 Jaw-Dropping Spooky-Summer Mani Ideas
You want fun nails that mix summer brightness with Halloween vibes, and Summerween nails gives you that exact combo. You’ll learn easy, wearable ideas and smart upkeep tips so your spooky-summer mani looks fresh through heat, pool days, and late-night plans.
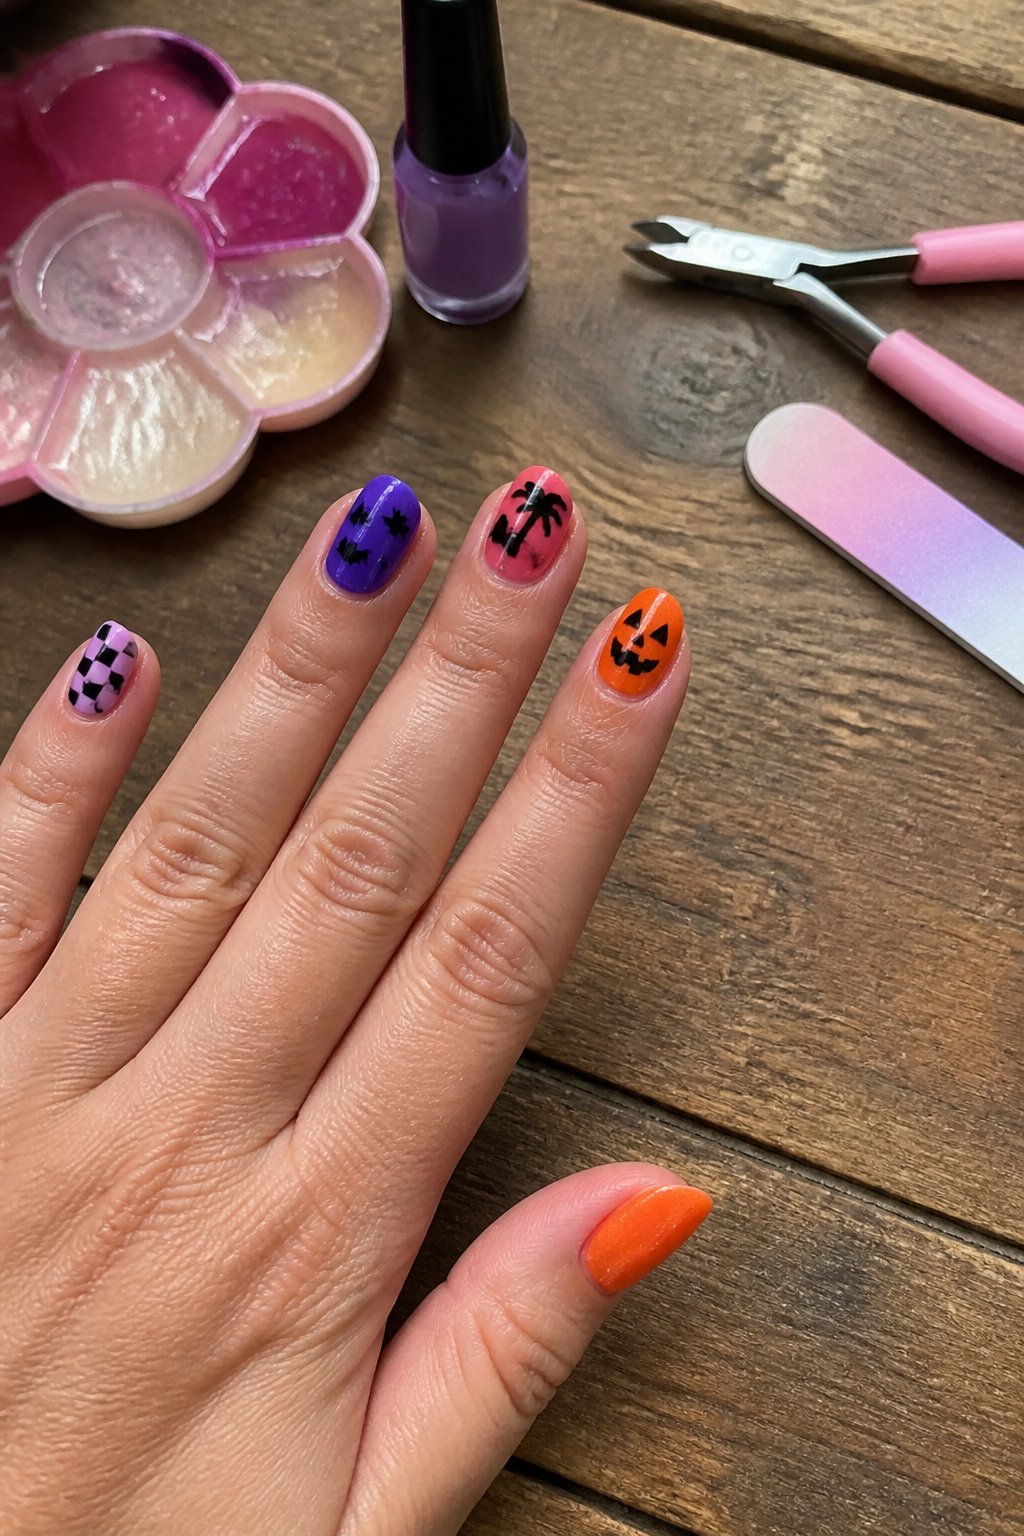
This article walks you through lively designs, from bright pumpkins to glow-in-the-dark moons, and shows common mistakes to avoid so your nails last longer. Expect clear how-tos, style tips, and maintenance advice that help you create bold looks without the fuss.
1. Classic Pumpkin Accent Nail with Matte Orange Base
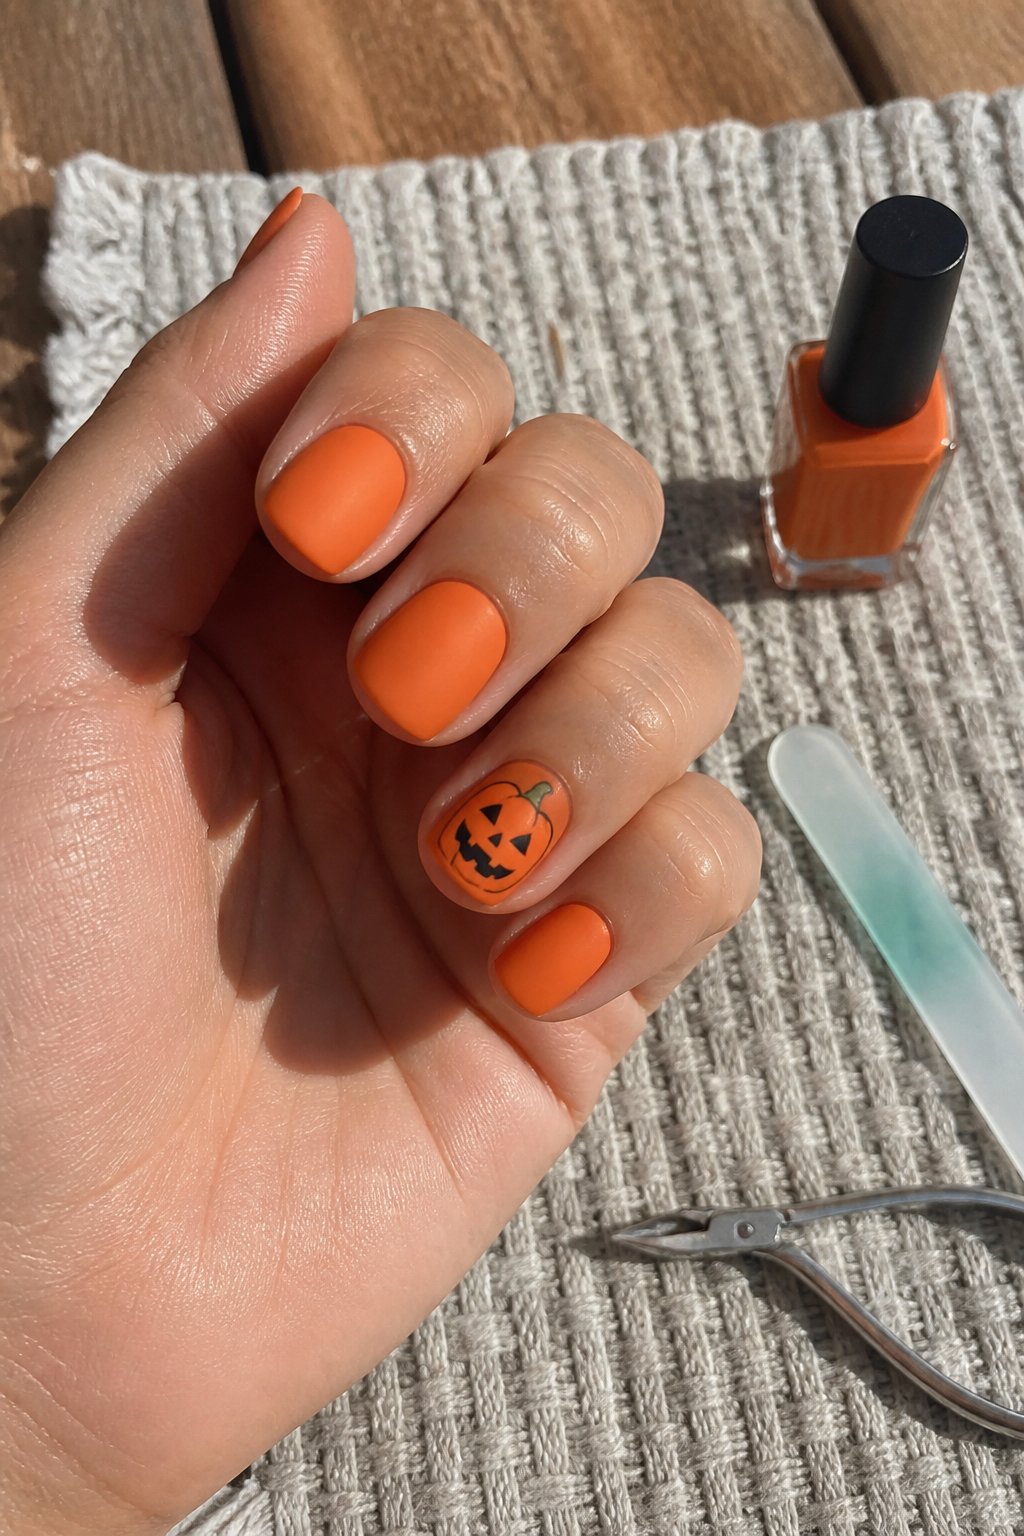
Intent: tutorial. Paint one nail as a pumpkin accent and keep the rest matte orange for a clean Summerween look.
Start with a matte burnt-orange base on all nails. Use two thin coats for even color; avoid thick layers that bubble or chip. Let each coat dry fully.
Choose your accent nail—ring finger works best. Paint a small pumpkin shape with a rounded, slightly flattened orange blob, then add a thin green stem and a few curved brown lines for ribs. Use a fine brush or a toothpick for control.
Common mistake: overworking the pumpkin details. Less is more; a simple, readable shape reads better at a distance. Seal the pumpkin with a glossy topcoat while leaving other nails matte, or use a matte topcoat overall and add glossy lacquer only on the accent for contrast and durability.
2. Watermelon-Pumpkin Hybrid Nail Art (pink-green-orange gradient)
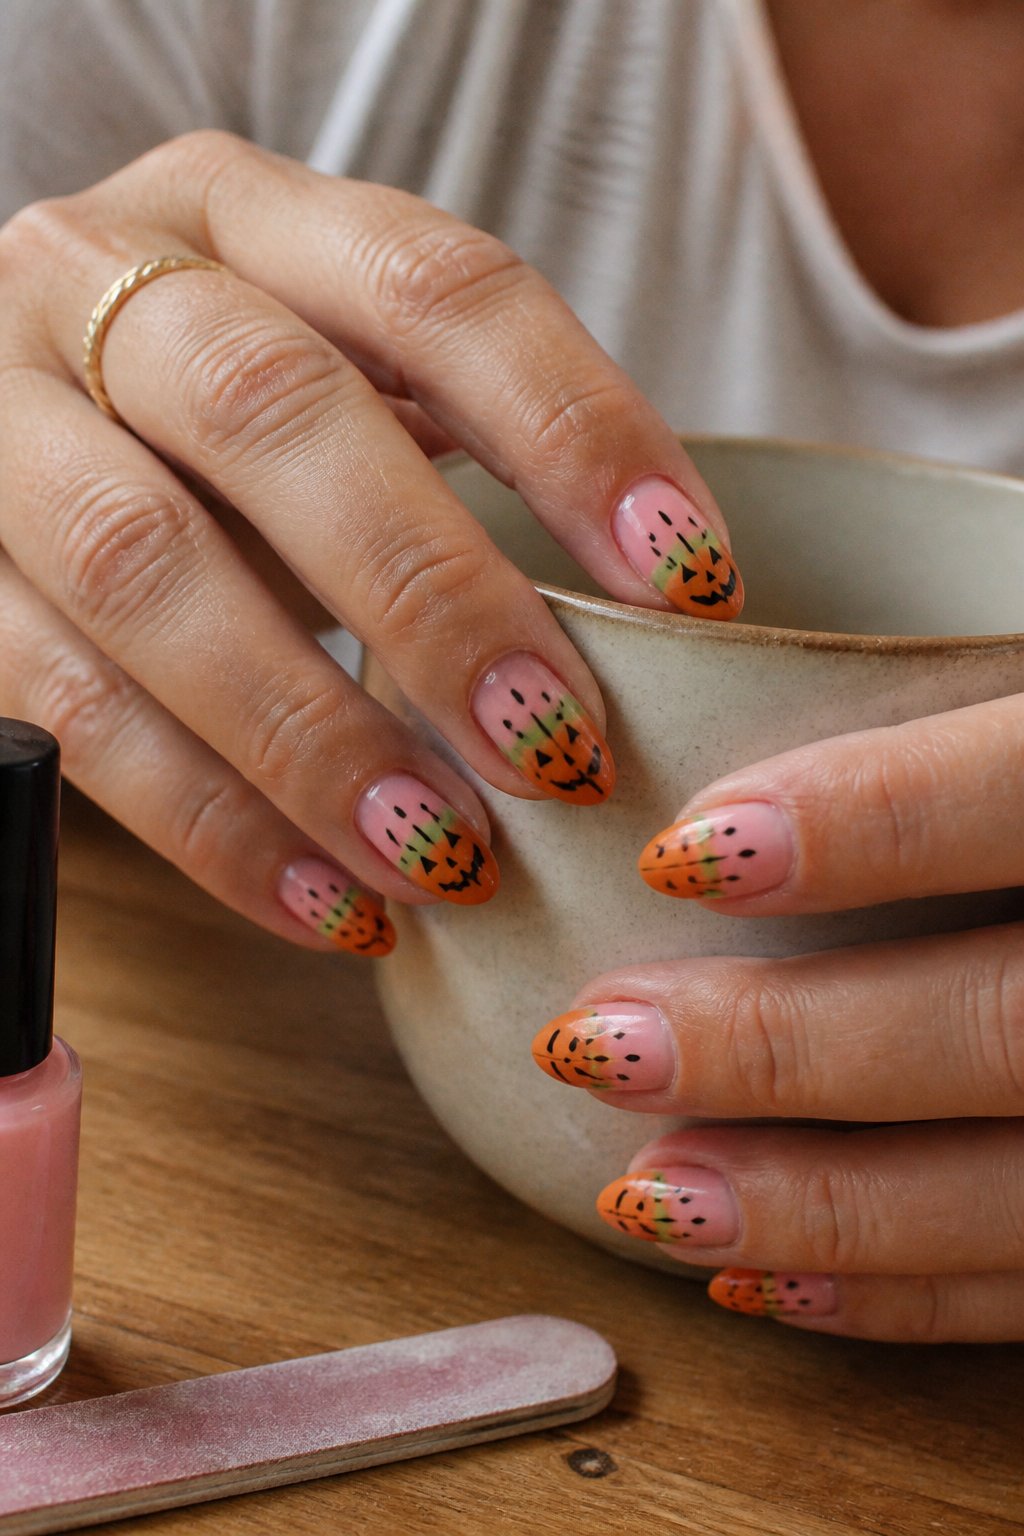
Intent: tutorial and idea. Try a pink-green-orange gradient that blends watermelon fun with pumpkin warmth for a true Summerween look.
Start with a light pink base for soft depth. Sponge on mid-pink toward the center, then add neon green at the tip and a thin orange band near the free edge to fuse the pumpkin tone. Blend with gentle dabbing to avoid harsh lines.
Add tiny black seed dots on the pink area for watermelon detail. For a pumpkin hint, paint a thin brown or dark green stem on one accent nail. Common mistake: overloading the sponge—work in thin layers to keep colors vivid.
Seal with glossy topcoat to make the gradient pop and last longer. Try this on short or medium nails; it reads playful without being too bold. Give this hybrid a test run on one hand first, then match the balance across all nails.
3. Ghosts in Sunglasses on Almond Nails
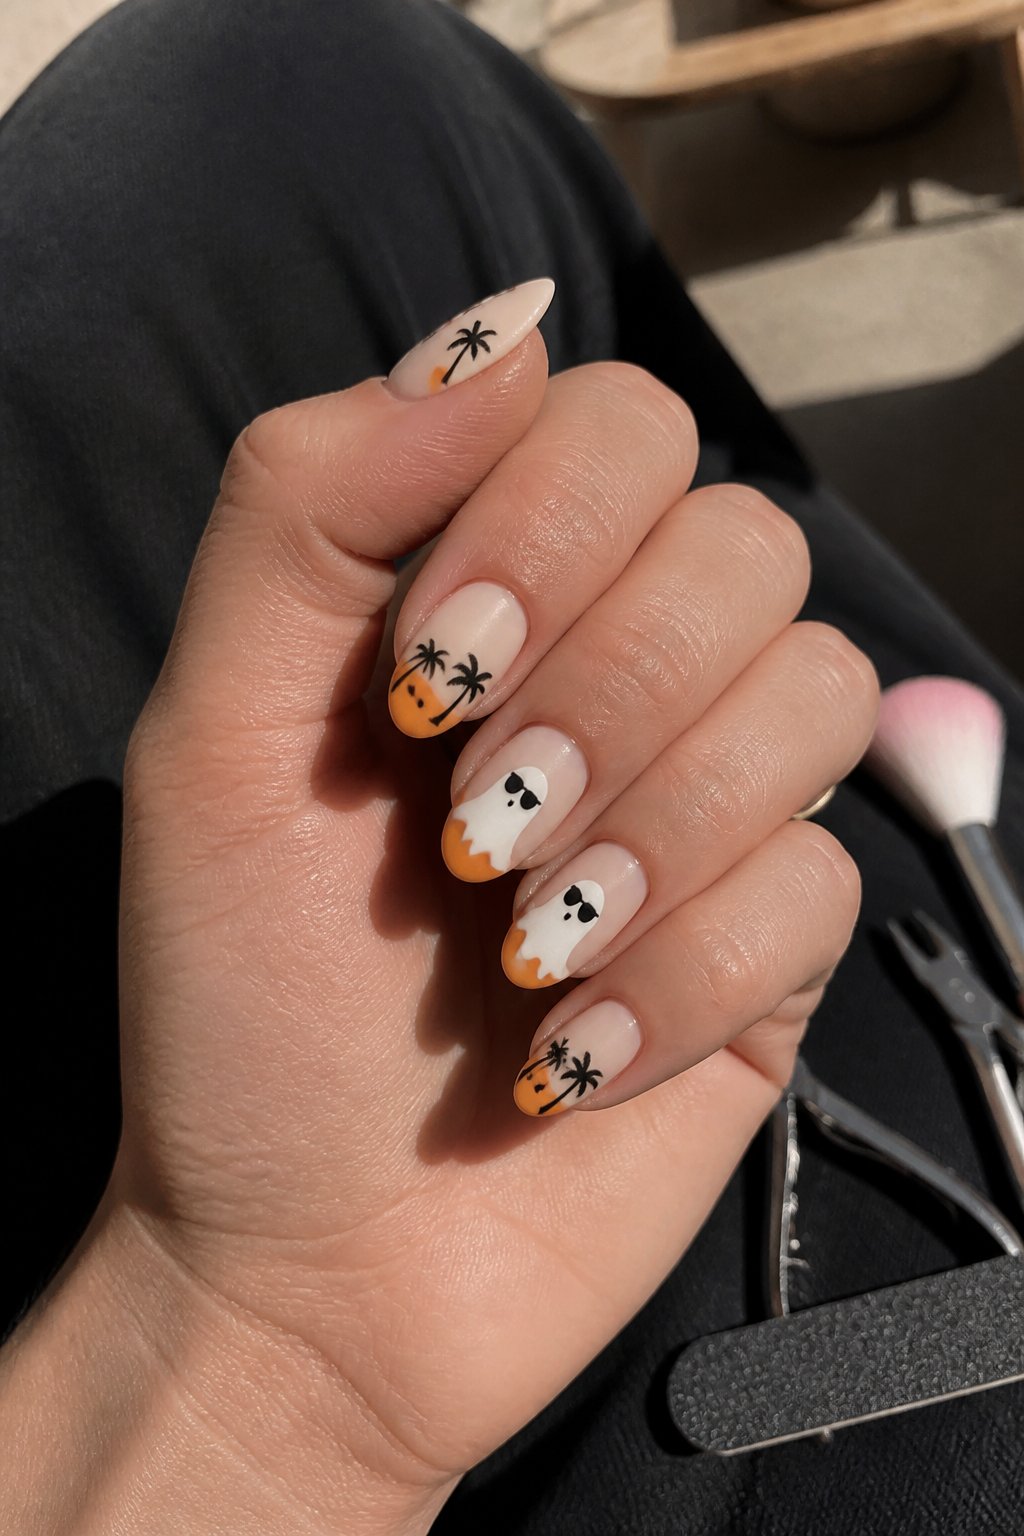
Tutorial intent: paint playful Summerween ghosts that feel chic on almond-shaped nails.
Start with a soft pastel base like mint or peach to make the ghost design pop. Paint the almond tips smoothly; use a thin brush for clean curves. Small stubs of white make quick ghost bodies—keep them short so they fit the nail shape.
Add tiny black dots for eyes, then paint tiny sunglasses with a thin black line and filled-in lenses. Try different sunglass styles—round, cat-eye, or square—to match your mood. Seal with gloss for shine or matte for a cool contrast.
Common mistake: overworking the small details. If lines wobble, wait for the base to dry and redo in one steady stroke. Practice on a nail wheel first to find the right brush pressure. Try a tiny palm tree or floatie accent on a ring finger for a summer touch.
4. Day-Glo Neon Cobwebs over Sheer Yellow
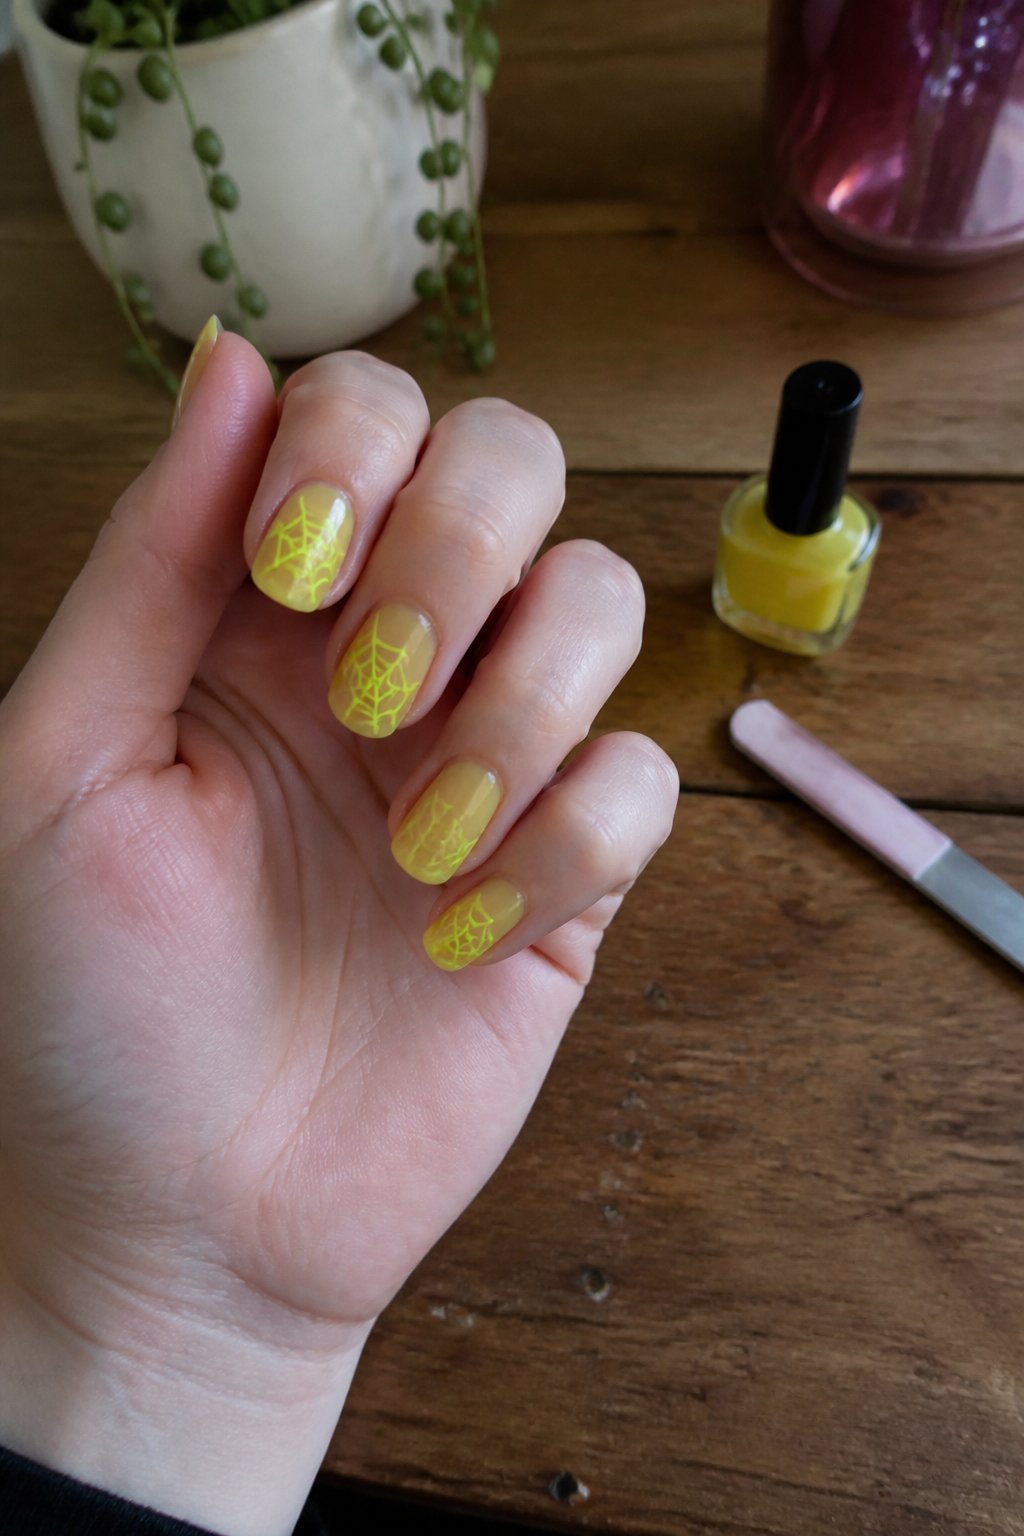
This is a tutorial-style idea to make a bold yet wearable Summerween look. Start with a sheer lemon base so your nails read soft in daylight but pop under UV light.
Paint two thin coats of a translucent yellow gel, letting each layer cure fully. Use a fine liner brush and neon orange or green gel to draw thin, irregular cobweb lines from the cuticle toward the tip. Keep lines slightly imperfect for a spooky, handmade vibe.
Avoid heavy top coats before the web lines cure; smudging is the most common mistake. If you want extra glow, add a tiny neon dot where lines intersect. Finish with a glossy top coat and cure to lock the design in place. Try this on one accent nail first to practice the web scale before doing the whole set.
5. Charli XCX–Inspired Gothic Sunburst French Tips
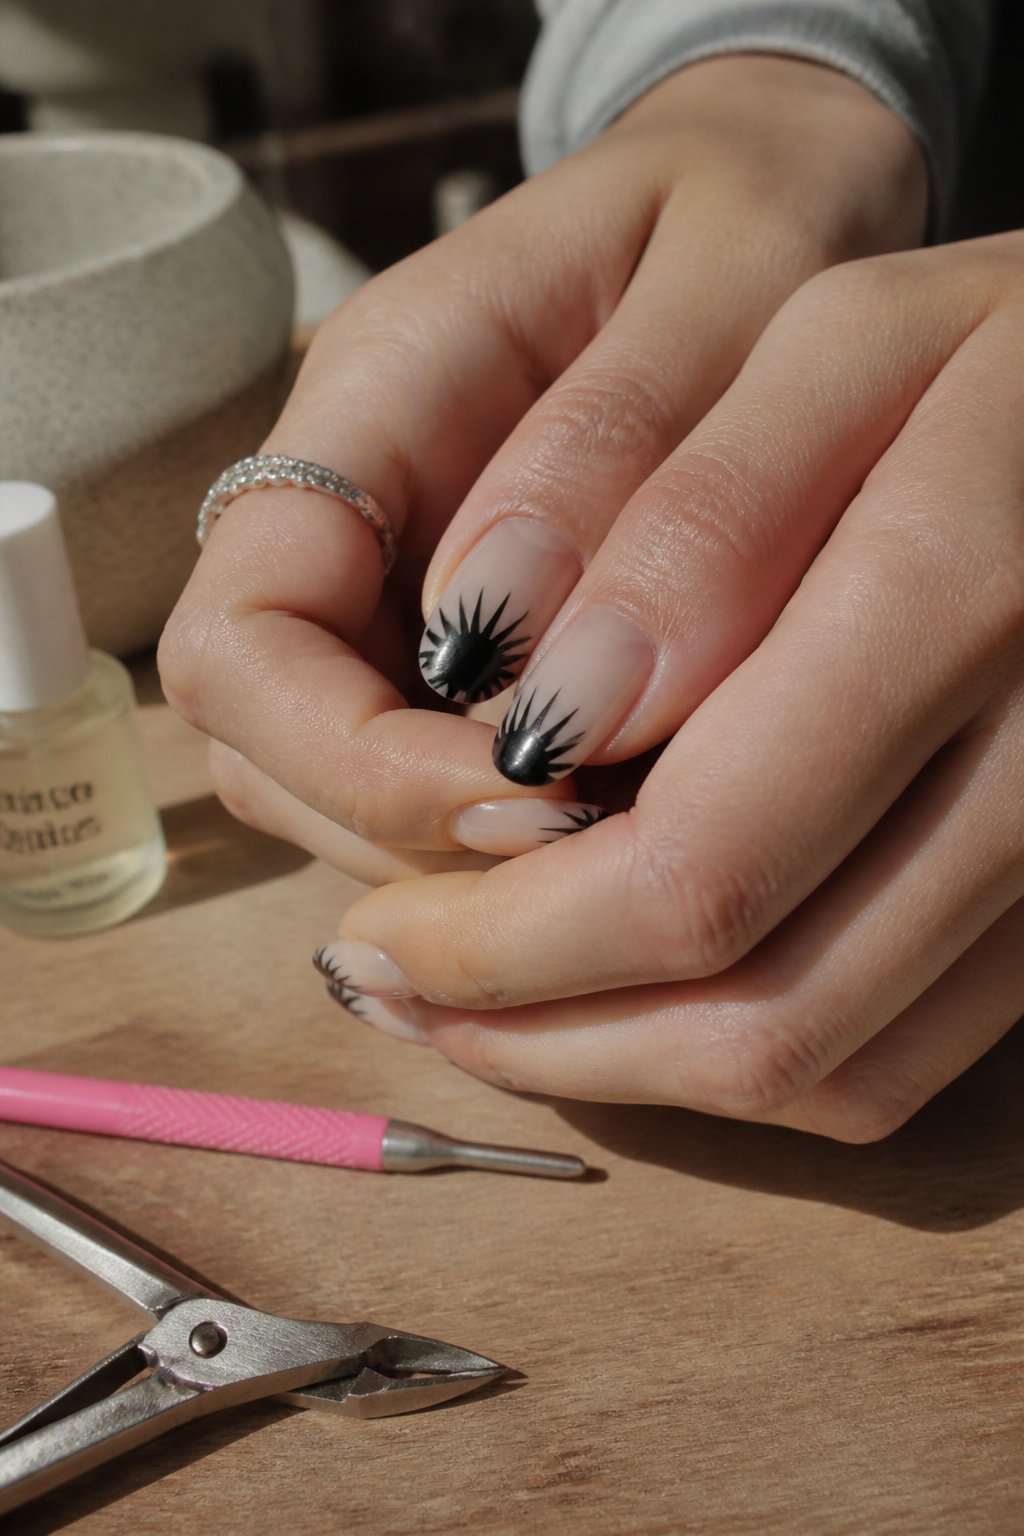
Tutorial: recreate a bold Gothic sunburst French with a punk-pop twist.
Start with a clean, nude base. Use a fine brush to paint thin black crescents at the tips, then add short radiating spikes from the center of each nail toward the cuticle for a sunburst effect. Keep spikes uneven for an edgy, handcrafted look.
Try adding chrome or deep purple accents between spikes to echo Charli XCX’s stage vibes. Common mistake: making spikes too symmetrical — that makes the design look stiff. Another pitfall is thick polish; thin layers keep detail crisp.
If you wear press-ons, sketch the sunburst on one nail as a template first. Practice on a plastic nail to build speed and confidence. Finish with glossy topcoat and a touch of matte on select nails for contrast. Try one hand matte, one glossy, or alternate accent nails to make the set feel modern and playful.
6. Mini Jack-o’-Lanterns on Short Square Nails
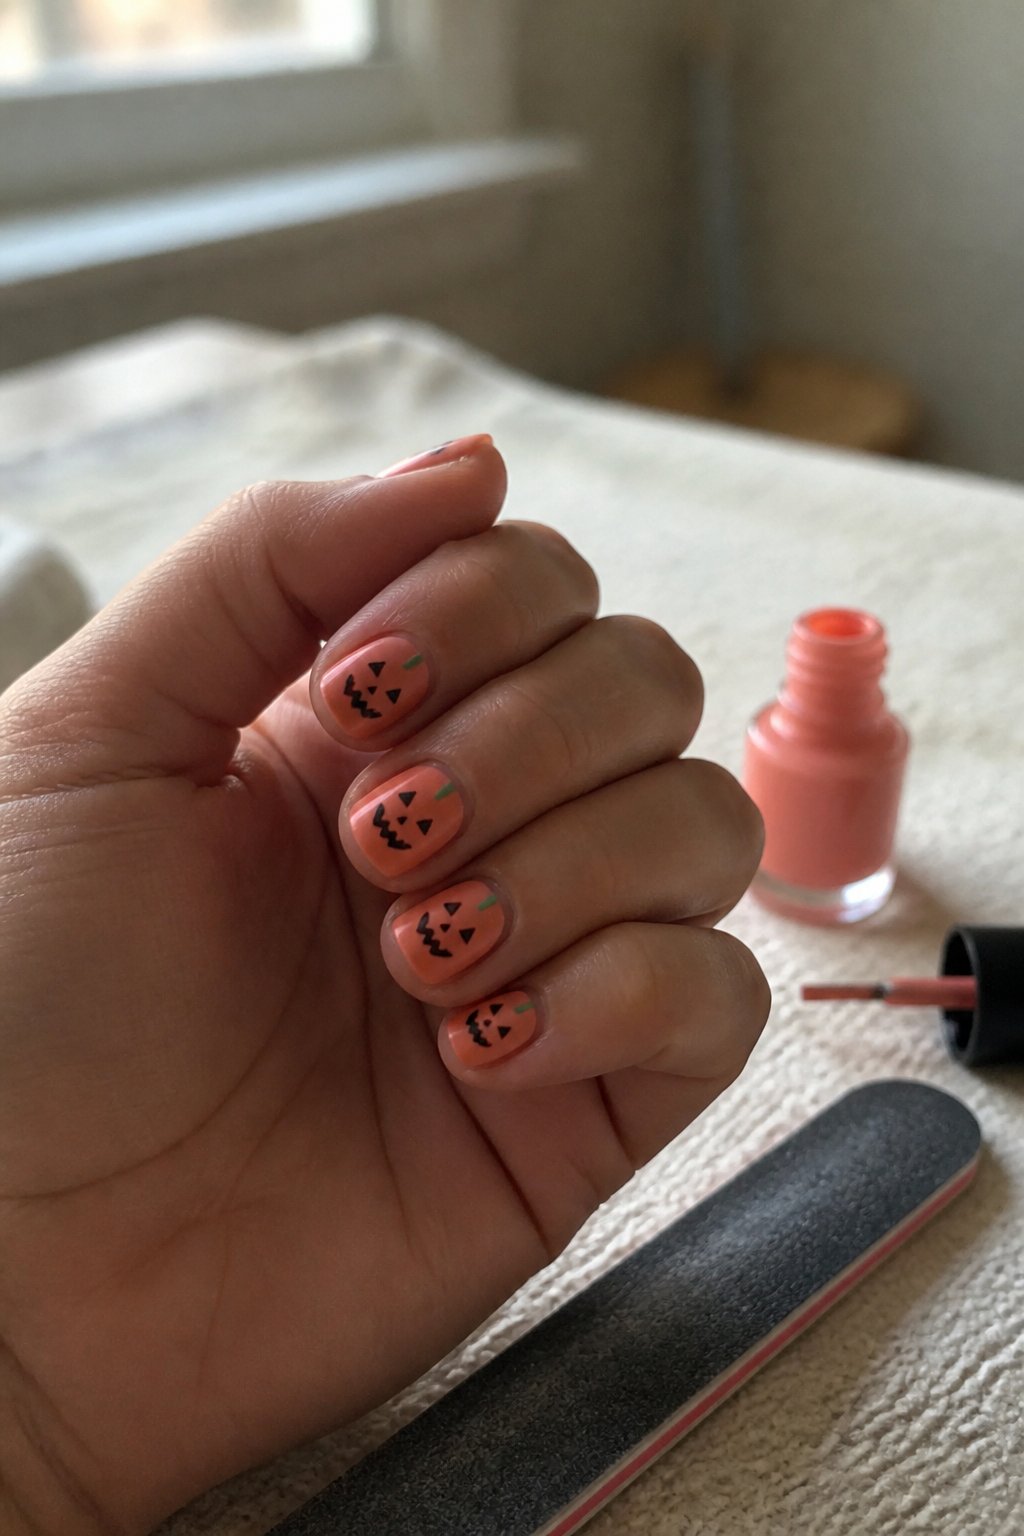
Tutorial: paint tiny pumpkins that pop on short square nails. Start with a sheer orange or coral base so the pumpkins read small but clear. Use a thin brush or dotting tool to add round pumpkin shapes near the tip or center of each nail.
Keep faces simple — two small triangles and a jagged smile — so they stay crisp on short nails. Add a short brown stem and a tiny green vine for detail. If freehand feels hard, try stamping or press-on decals and finish with a glossy topcoat.
Common mistake: crowding the nail with too many pumpkins. One or two mini jack-o’-lanterns look cleaner and last longer. Try mixing a neutral accent nail with pumpkin art to make the set wearable for daytime and summer events.
7. Skeletal Palm Tree Silhouettes on Teal Chrome
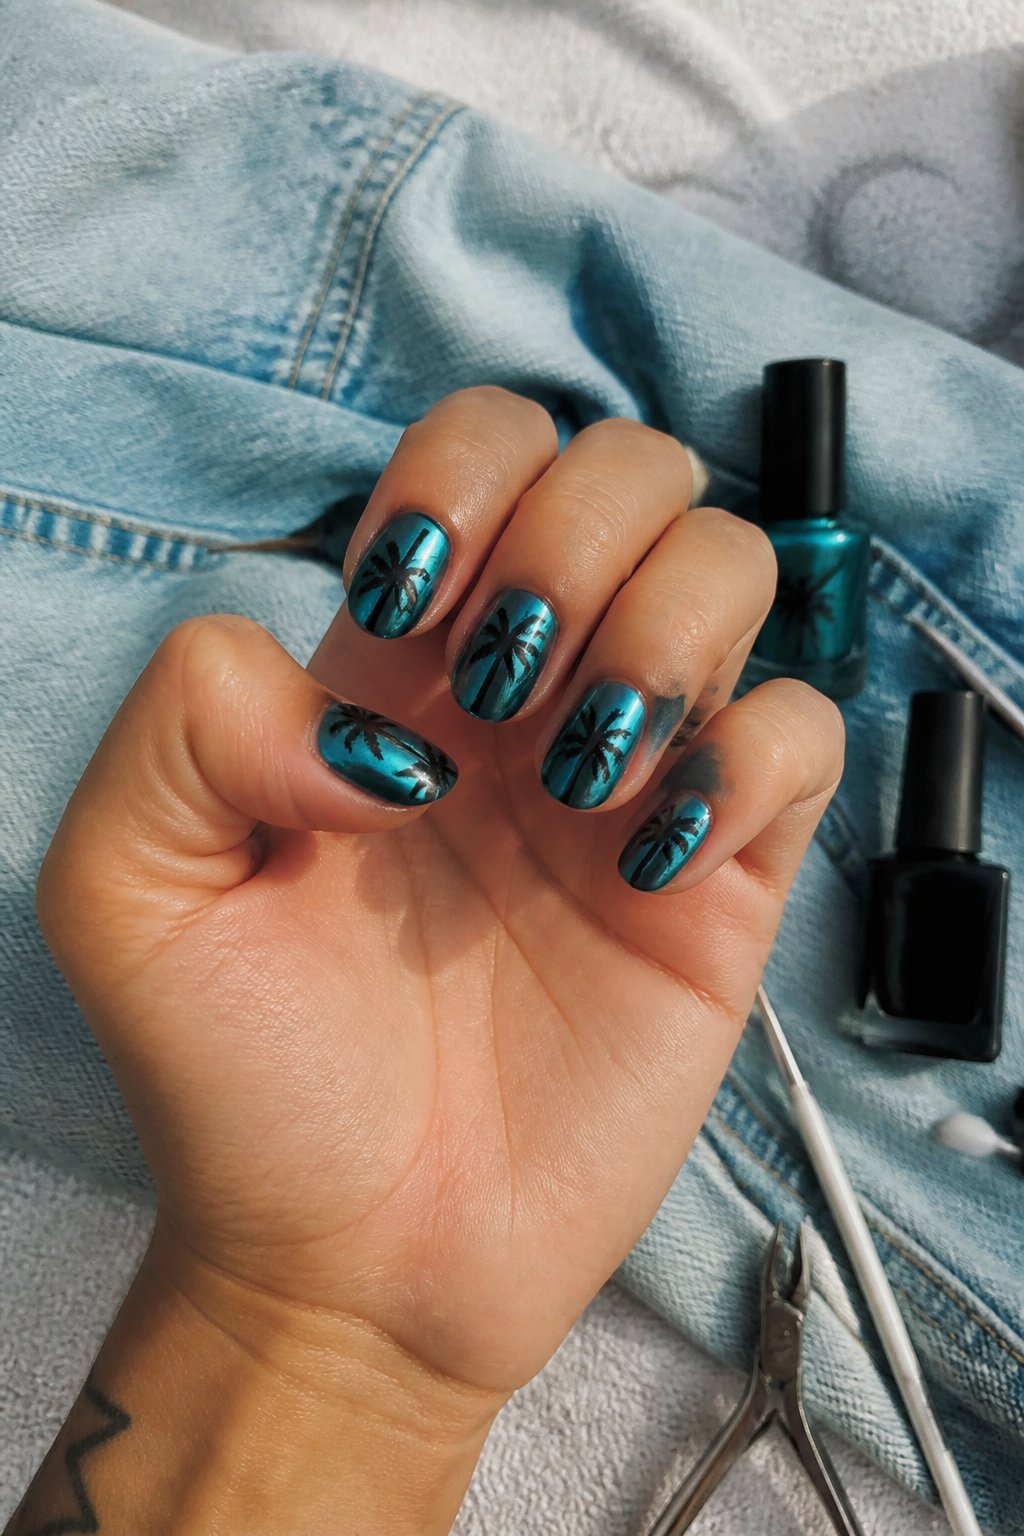
Intent: guide. Use teal chrome as your bold base, then layer thin, skeletal palm silhouettes for a spooky-summer twist you can wear to a party or a beach night.
Start with a smooth teal chrome polish. Let it cure fully; chrome shows every brush mark. Use a fine liner brush and jet-black gel to paint thin trunks and wispy fronds. Keep lines varied in length for a natural, skeletal look.
Common mistake: pressing too hard with the brush. That makes fat, clumsy fronds. Practice on a nail wheel first and thin your gel slightly if it drags.
For wearability, add a matte topcoat on one or two accent nails to contrast shine and texture. Try a micro-rhinestone at the base for subtle sparkle. If you like, swap black for deep navy for a softer silhouette.
Try this on almond or coffin shapes for best effect. Experiment on one hand before committing to the full set.
8. Candy Corn Ombre with Glossy Topcoat
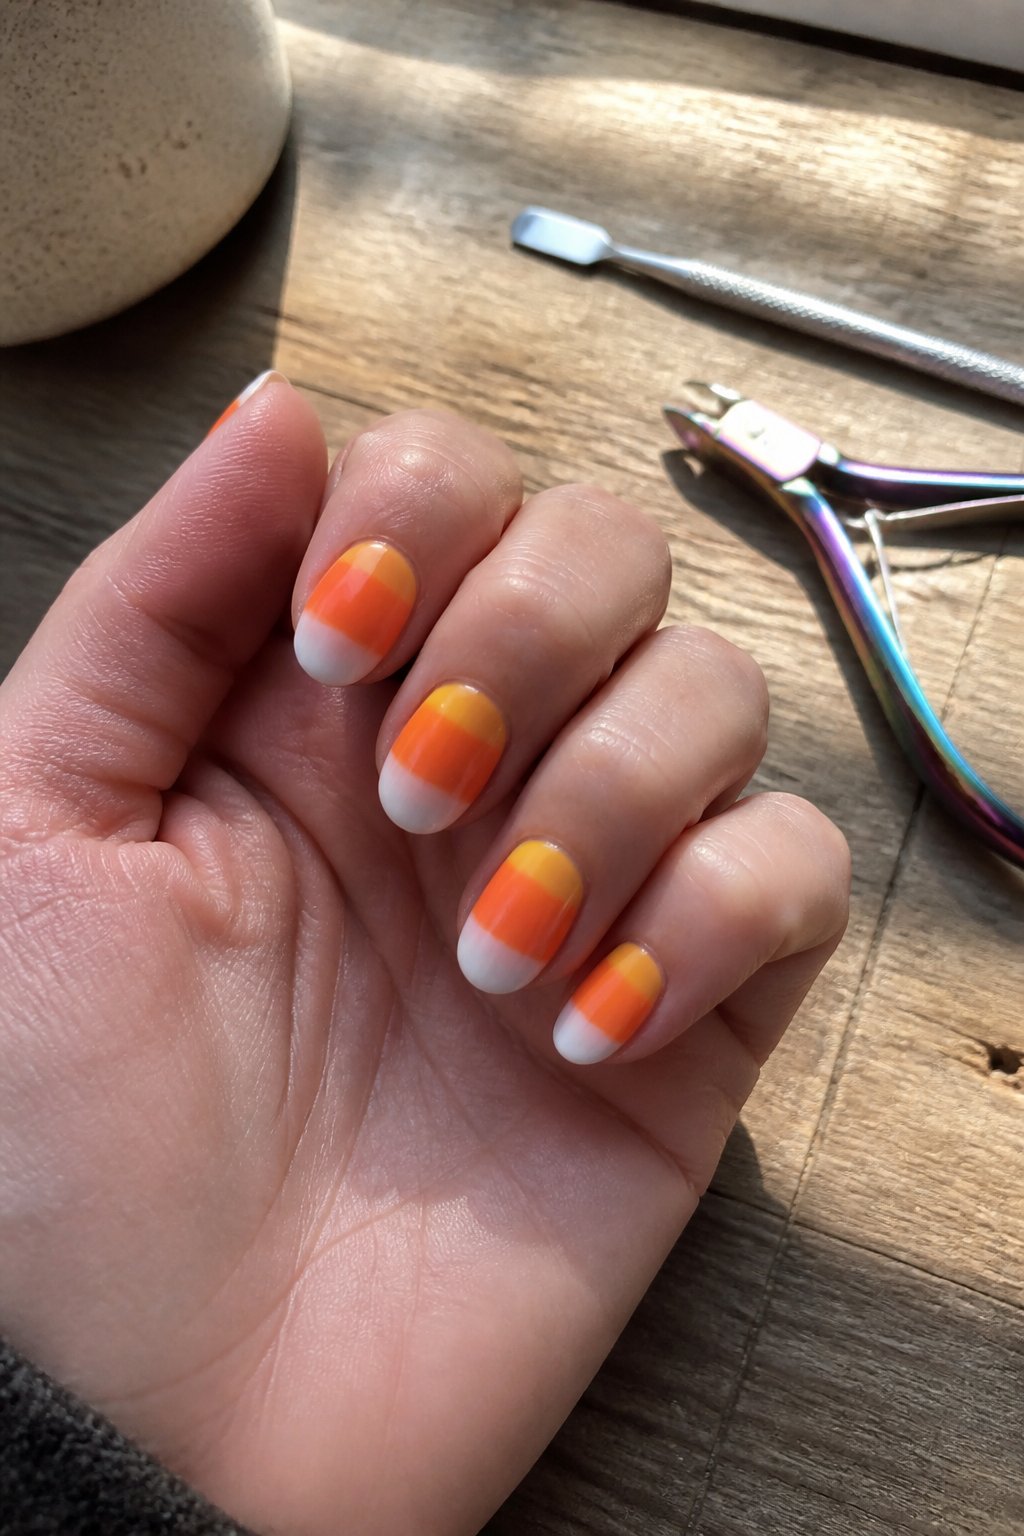
Guide: tutorial. Use this look to blend playful Halloween colors with summer polish.
Start with a clean base coat and thin stripes of yellow, orange, and white on a sponge. Lightly dab from cuticle to tip to create a smooth ombré; blend until the transition looks soft, not muddy. A common mistake is overloading the sponge—wipe excess polish first.
Cure or let dry, then add a glossy topcoat for shine and depth. The gloss boosts color contrast and makes rhinestones or tiny candy-corn decals pop. If you want a modern twist, finish one or two accent nails with matte instead of glossy for contrast.
Keep tools ready: a small brush for clean-up, acetone for edges, and a steady hand. Try this on short or medium nails for an easy, wearable Summerween vibe.
9. Black Lace Stamping over Coral Base
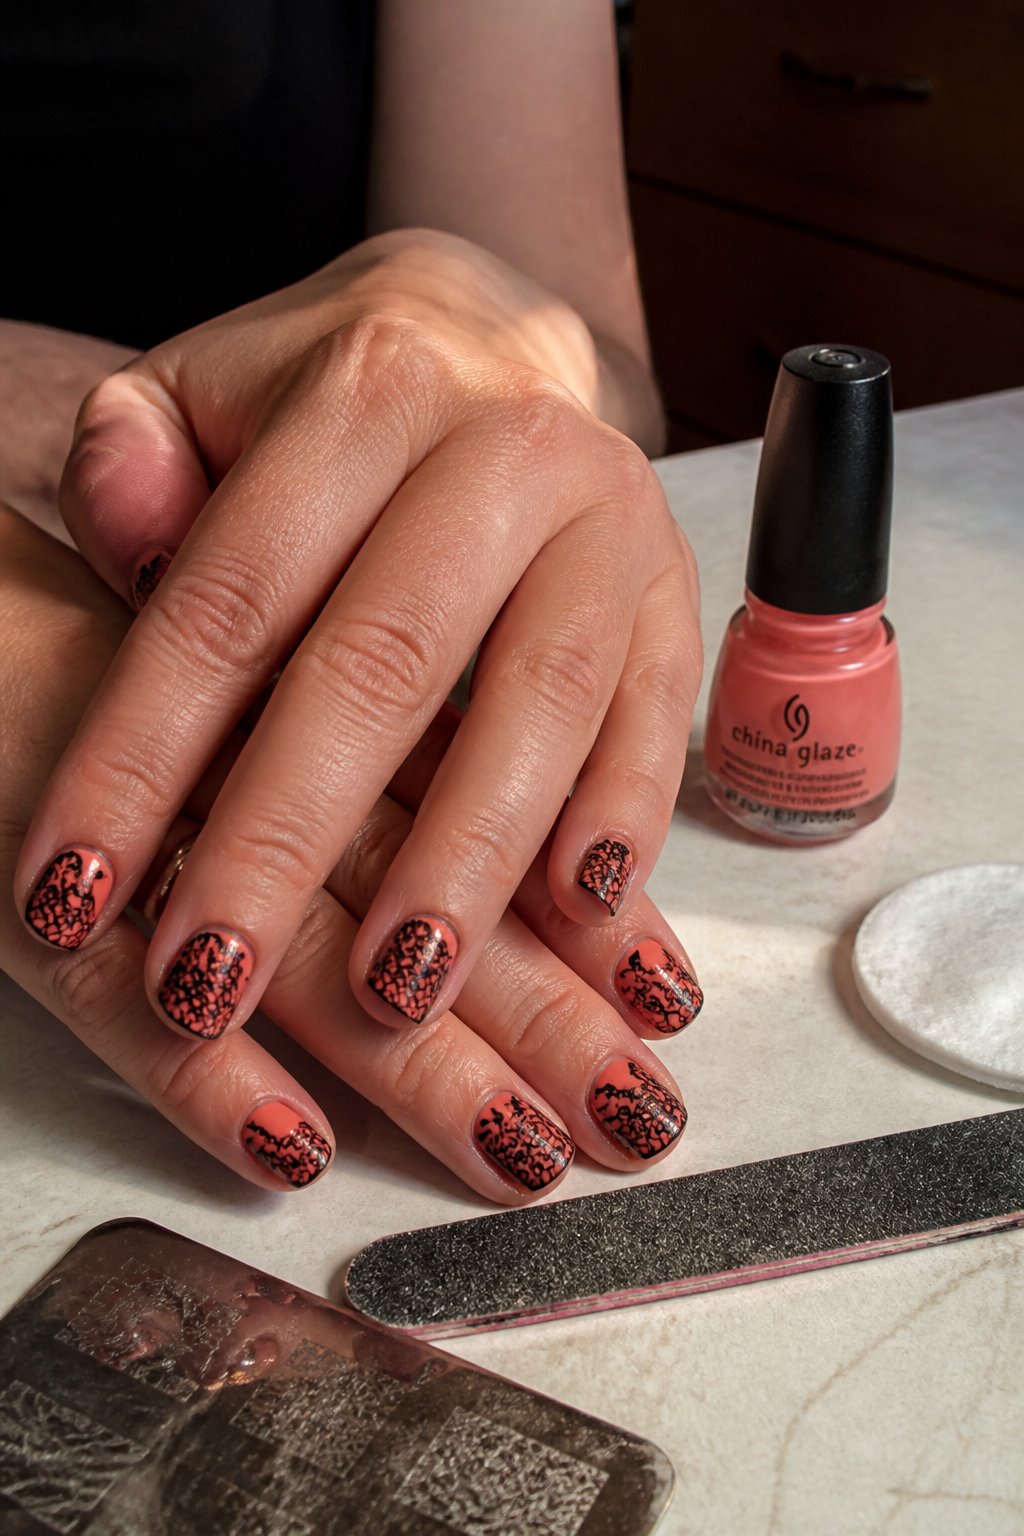
Intent: tutorial and idea. Start with a bright coral base to give your Summerween look warmth and contrast. Apply two thin coats and let them fully dry before stamping.
Choose a fine lace stamp plate and black stamping polish for sharp detail. Press slowly to avoid smudges; lifting too fast is a common mistake that blurs the pattern.
Try one or two lace accent nails rather than all ten to keep the design wearable. Add tiny gold foil flecks on an accent nail for a luxe touch that still reads spooky-summer.
Seal with a fast-dry topcoat applied in a single, steady swipe to protect the lace. If edges lift, lightly cure with a quick gel topcoat or touch up with a thin brush and coral polish.
10. Melon Slice Accent with Tiny Seed Rhinestones
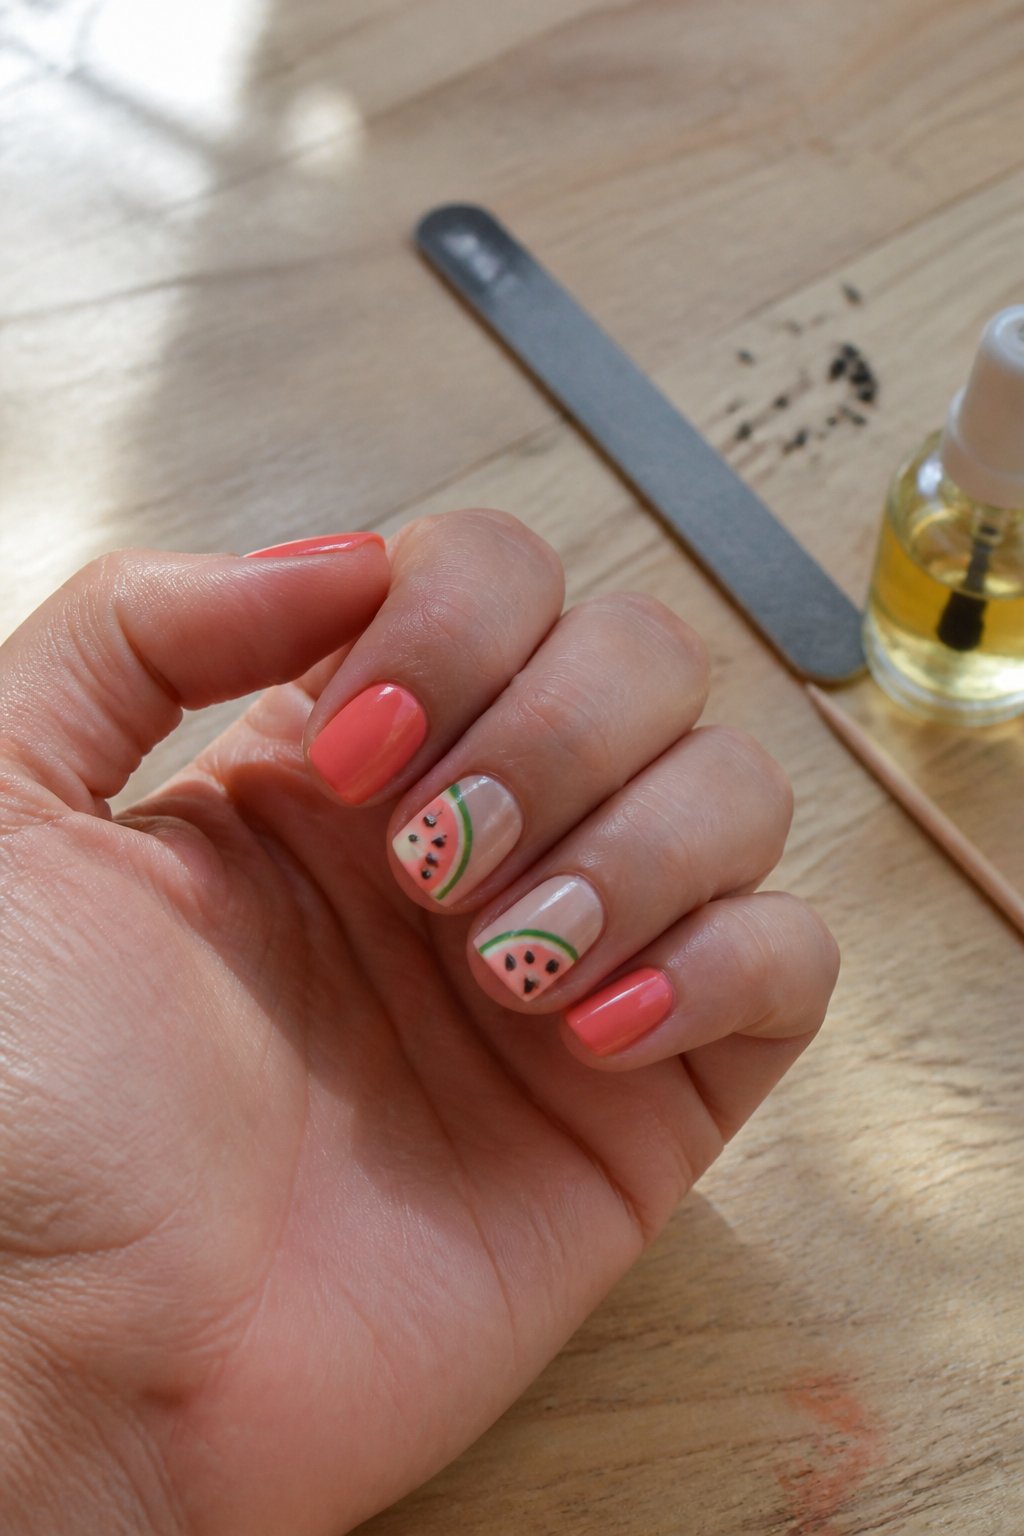
Tutorial: paint a glossy nude or soft pink base, then hand-paint a small melon slice on one or two accent nails. Keep the slice simple: green rind, thin white stripe, and a pink wedge.
Place tiny black or dark rhinestones as seeds along the pink area. Use a drop of clear gel to set each rhinestone so they stay put. Too many stones makes the nail heavy, so space them out for balance.
If you work on short nails, scale the slice down and use one rhinestone seed for a hint of sparkle. A common mistake is overfilling the design; test placement on a practice tip first.
Finish with a tacky-free topcoat over the rhinestones for durability. Try this look on one hand to start, then mirror it if you love the result.
11. Glow-in-the-Dark Moon Phases on Nude Base
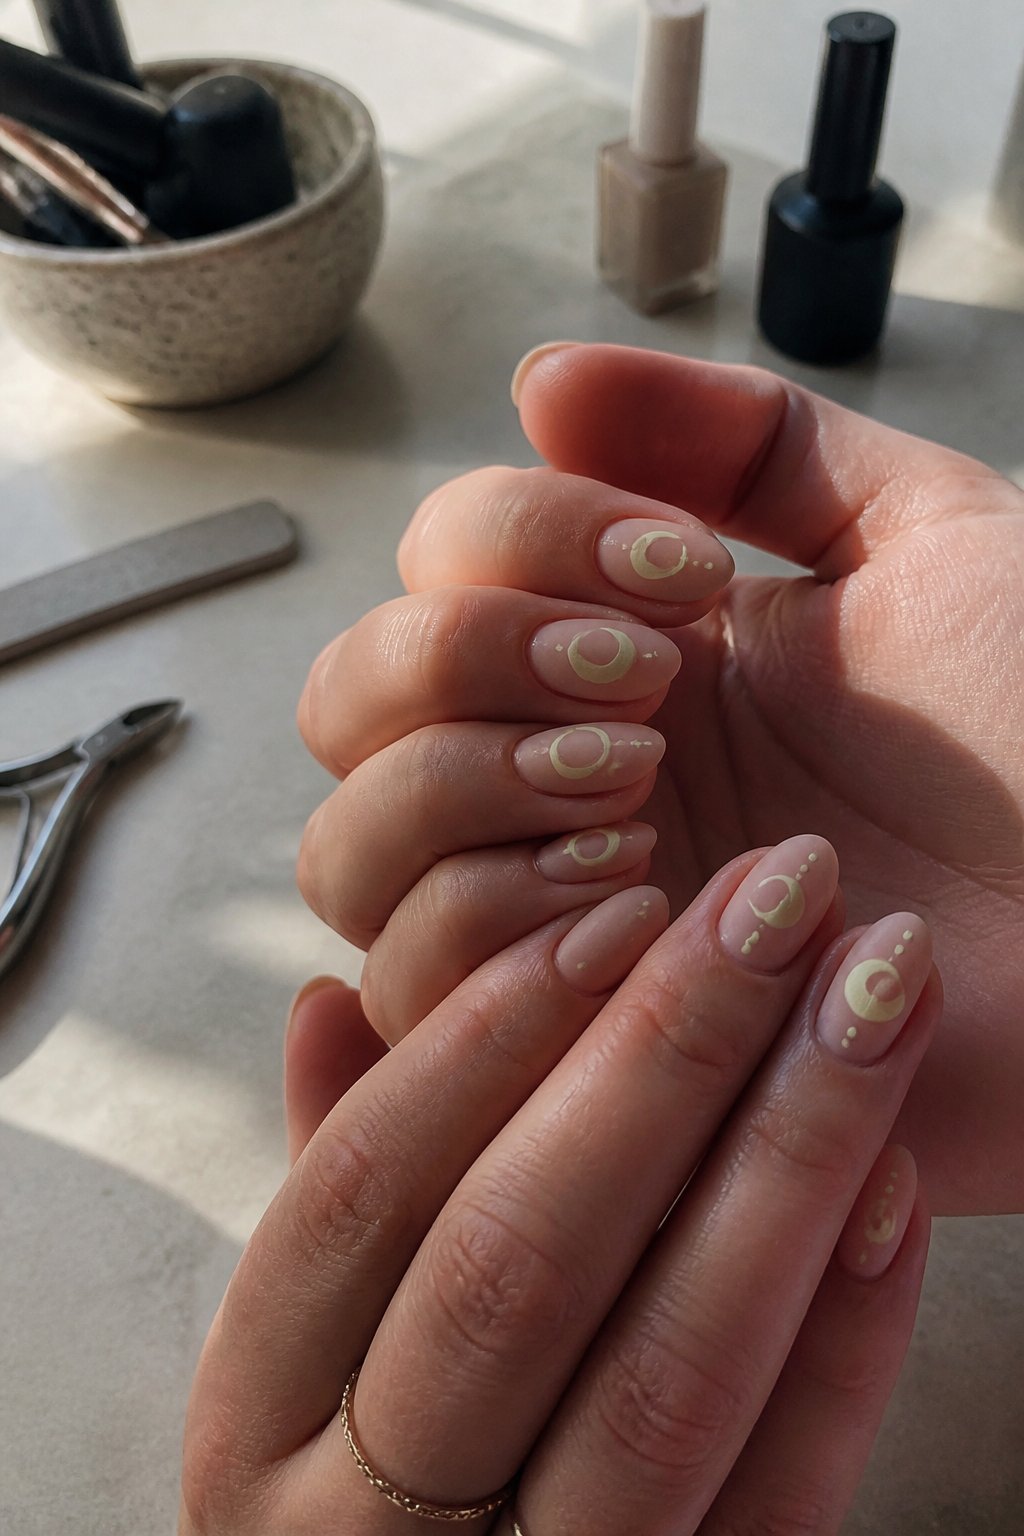
This is a tutorial to help you paint glow-in-the-dark moon phases over a nude base. Start with a smooth nude polish so the moons stand out by night and stay subtle by day.
Paint small crescents and circles in a row down the center or at the cuticle for a clean look. Use a thin brush or dotting tool; steady, short strokes avoid blobbed moons. A common mistake is overloading the brush—wipe excess polish first.
Choose a glow polish with good pigment or layer a white base under the glow for stronger nighttime effect. Cure each layer if you use gel to prevent smudges. Finish with a glossy topcoat to seal and protect the glow.
Try one accent nail with full phases and keep others matte nude for contrast. Ready to try it? Grab your tools and test the glow polish on a sample tip first.
12. Hailey Bieber–style Burnt Orange Cream Nails
Intent: tutorial and idea.
Choose a warm burnt orange cream for a modern, summerween twist that still feels wearable. Apply two even coats over a neutral base to get full opacity without streaks; thin layers dry smoother and last longer.
Leave one accent nail neutral or pale beige and add a tiny black bow or dot for contrast. That little detail makes the look coquette without overdoing it. If you press decals, seal edges with a top coat so they don’t lift.
Common mistakes to avoid: thick polish puddles at the cuticle and skipping base coat. Both cause chipping and uneven color. Finish with a glossy top coat and cure fully if you use gel to lock in shine.
Try this with short, rounded nails for an effortless vibe, or elongate tips for a bolder statement. Paint once, then wear it all week—play with one tiny accent to keep it chic.
Inspiration Behind Spooky Summer Nail Trends
You’ll find Summerween blends sunny palettes with Halloween motifs, mixing playful contrasts and DIY freedom. The next parts explain where the idea came from and which visual elements make the trend work.
Cultural Origins
Intent: guide you through how Summerween began and why it stuck.
Summerween grew from social media culture and seasonal mashups. Creators wanted Halloween imagery outside October, so they paired pumpkins, ghosts, and bats with bright summer colors to surprise viewers. Influencers and musicians who wore spooky looks at summer events helped the idea spread fast.
Street style and festival fashion also pushed Summerween. Think palm trees next to jack-o’-lanterns on a concert-goer’s manicure. That crossover made the trend feel natural rather than forced. A common mistake is copying motifs exactly as seen; instead, adapt symbols to your local vibe—use citrus tones if you’re near the beach, or sun-faded purples if you prefer nightlife looks.
Popular Aesthetic Elements
Intent: give you specific design ideas and rules to follow.
Summerween favors contrast. Use neon orange, hot pink, or teal bases with black silhouettes for bats, spiderwebs, and tiny pumpkins. Pastel pumpkins, sunglasses on jack-o’-lanterns, and ghosts wearing bikinis are playful motifs to try. Nail shapes that work best are short squares or rounded tips for clear mini-illustrations.
Techniques: gradient backgrounds, negative space, and thin-line details keep designs readable on small nail canvases. Materials to try: glossy topcoat for beachy shine, matte for moody scenes, and tiny rhinestones as “beachy” eyes or dew drops. Watch for overcrowding—limit each nail to one focal icon so your manicure stays crisp and wearable.
How to Maintain Vibrant Nail Art in Warm Weather
Intent: practical guide. You’ll learn how to keep colors bright and nails healthy when heat, salt, and sun threaten your manicure. Follow simple steps, avoid common mistakes, and use specific products and habits that work.
Preventing Color Fading
Keep polish from dulling by blocking the main causes: UV, friction, and water exposure. Apply a UV-blocking topcoat every 5–7 days to slow yellowing and color shift. Look for “UV inhibitor” on the label and re-seal the free edge to stop chipping.
Limit hot showers and long soaks. Heat lifts polish layers, so wash with lukewarm water and pat dry. Wear gloves for chores like dishwashing and gardening; abrasive cleaners and dirt quickly dull finishes.
Fix chips fast. Even a small nick lets water under the polish and speeds fading. Dab a thin layer of the original color, then add topcoat. If using gel, book a salon fill instead of DIY tweaks to keep the color uniform.
Common mistake: skipping base coat. A sticky base coat improves adhesion and reduces staining from bright pigments like neons and corals.
Moisture and Nail Health
Healthy nails hold polish better. Keep cuticles soft by applying cuticle oil once daily—rosehip, jojoba, or vitamin E oils work well. Massage the oil in for 30–60 seconds to boost circulation and hydration.
Use a hand cream after oil to lock moisture in. Pick products with glycerin or hyaluronic acid; they hydrate without leaving slippery residue that ruins polish. Carry a travel tube to reapply after handwashing.
Trim and file every 1–2 weeks to prevent snags that catch polish. File in one direction with a fine-grit board to avoid splitting. If your nails peel, add a biotin supplement or a protein-rich nail treatment for 6–8 weeks and track improvement.
Watch for overuse of alcohol-based sanitizers. They dry nails and cause flaking. When you must sanitize, follow with a moisturizing lotion within a few minutes.
About the Author — Lena Harper
Lena Harper is a fashion writer and content strategist at Fashion Pops, known for creating thoughtful, trend-aware articles that feel both stylish and relatable. With a strong background in fashion journalism, she specializes in turning seasonal trends, outfit ideas, and styling concepts into easy-to-follow inspiration for modern women.
Her writing focuses on practicality without losing creativity — helping readers build outfits that feel current, wearable, and confident. When she’s not working on new articles, Lena enjoys exploring street style trends, discovering unique fashion finds, and curating inspiration boards that shape upcoming content at Fashion Pops.