Nautical Nails: 10 Stunning Sea-Inspired Manicures to Try Now
You want a manicure that feels like a seaside escape and shows your style without trying too hard. Whether you crave classic navy stripes, a tiny anchor accent, or a subtle pearl sheen, this article will guide you through looks and tips that make nautical nails easy to pull off at home or at the salon. You’ll learn clear design ideas, common mistakes to avoid, and simple care steps so your manicure lasts longer and looks polished.
Expect step-by-step ideas for striped manicures, anchor and compass accents, sailboat silhouettes, and textured shell details, plus expert tips on tools, finishes, and nail care. You’ll see examples that suit short or long nails, bold or minimalist tastes, and learn which designs work best with different nail shapes and finishes. Keep scrolling to get inspired, pick a style, and master the techniques that make nautical nails stand out.
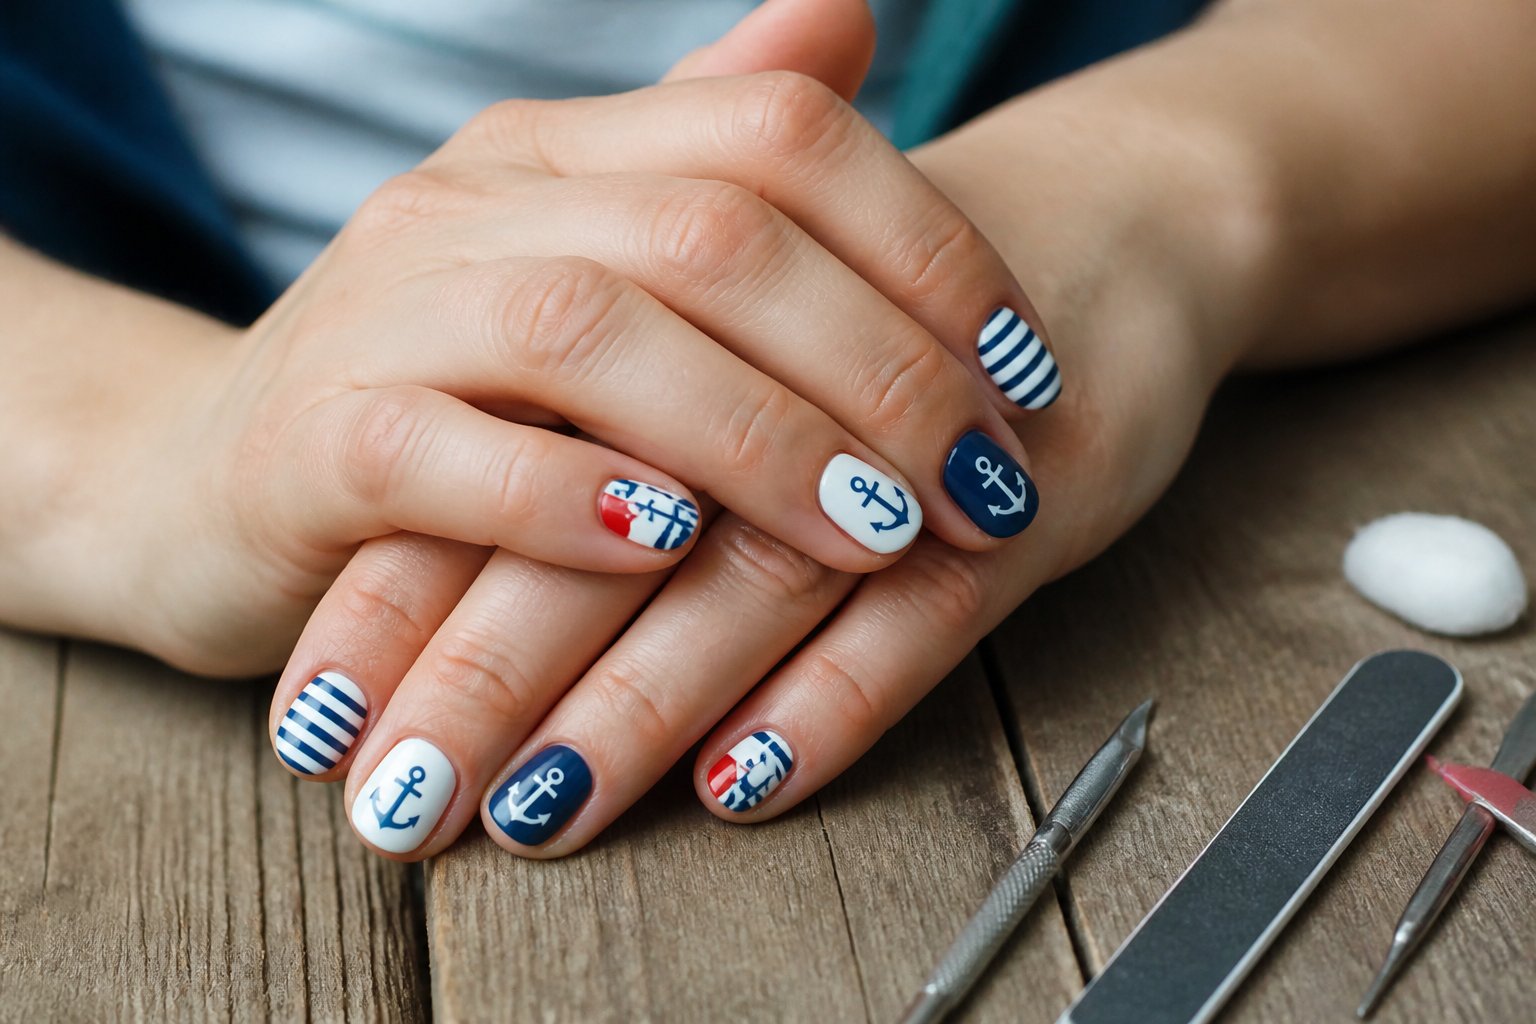
1. Classic Navy and White Striped Manicure
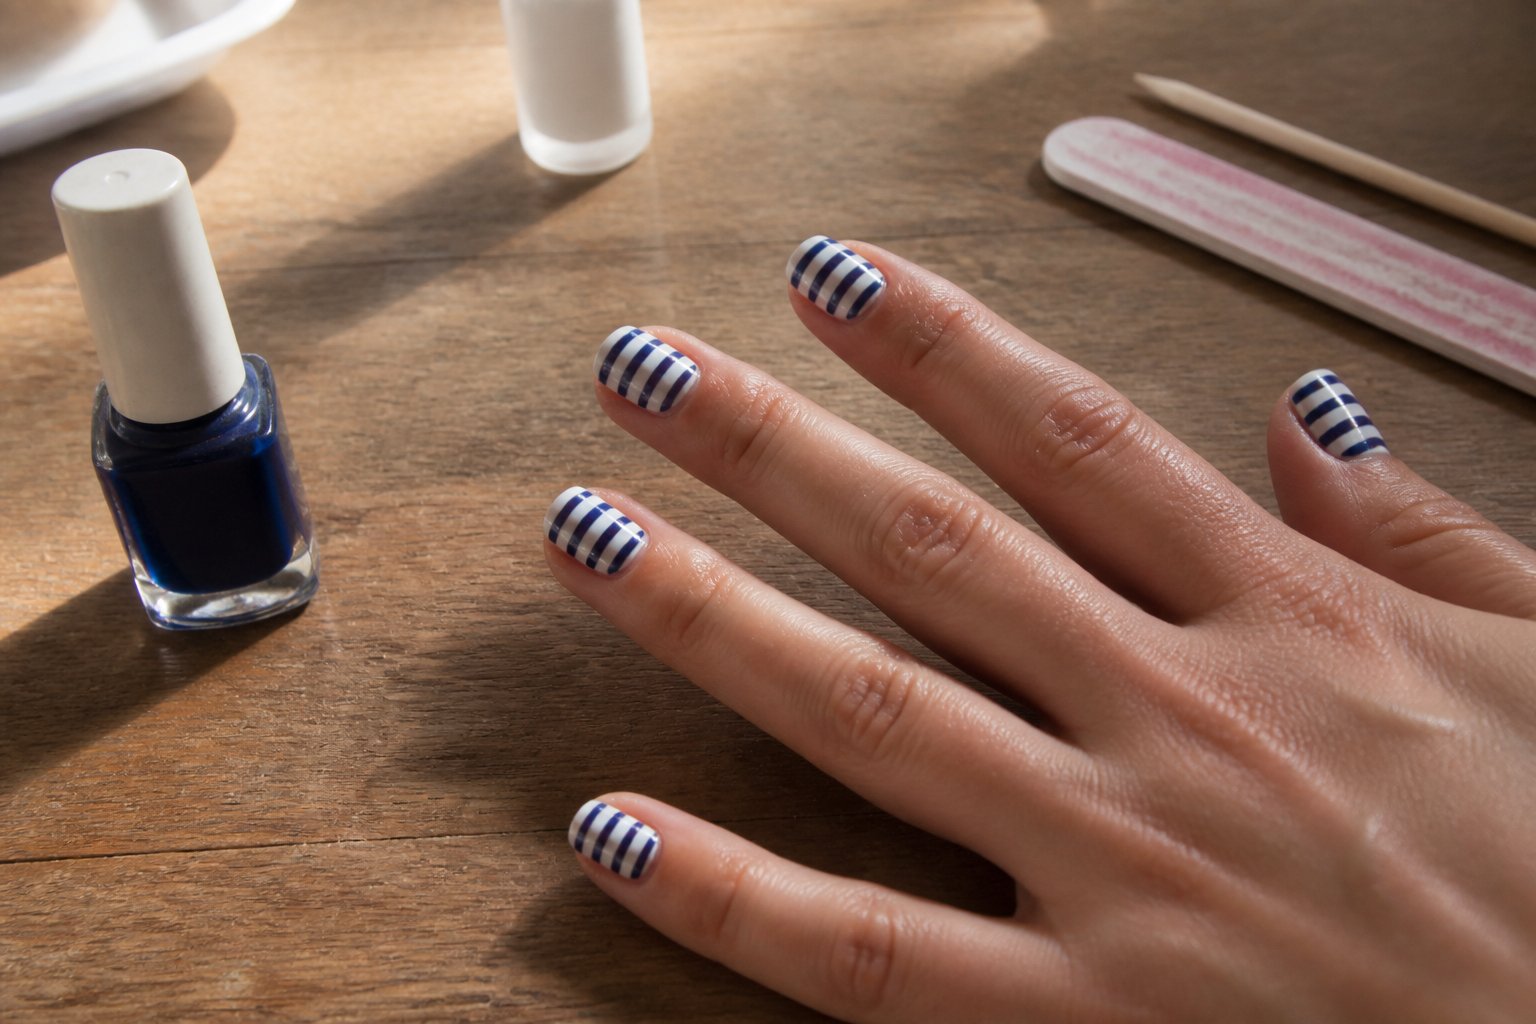
This is a tutorial to help you nail a timeless navy-and-white striped look. Start with a navy base on clean nails; let it fully dry before adding crisp white stripes.
Use a thin striping brush or tape for even lines. Try horizontal sailor stripes on short nails or vertical pinstripes on elongated shapes for different effects.
Avoid thick paint layers that smudge. One pro tip: seal each layer with a quick-dry top coat to prevent dragging when you add stripes.
Common mistake: placing stripes too close to the cuticle. Leave a small gap for a cleaner finish. If you want variety, add a tiny gold anchor on one nail for a subtle accent.
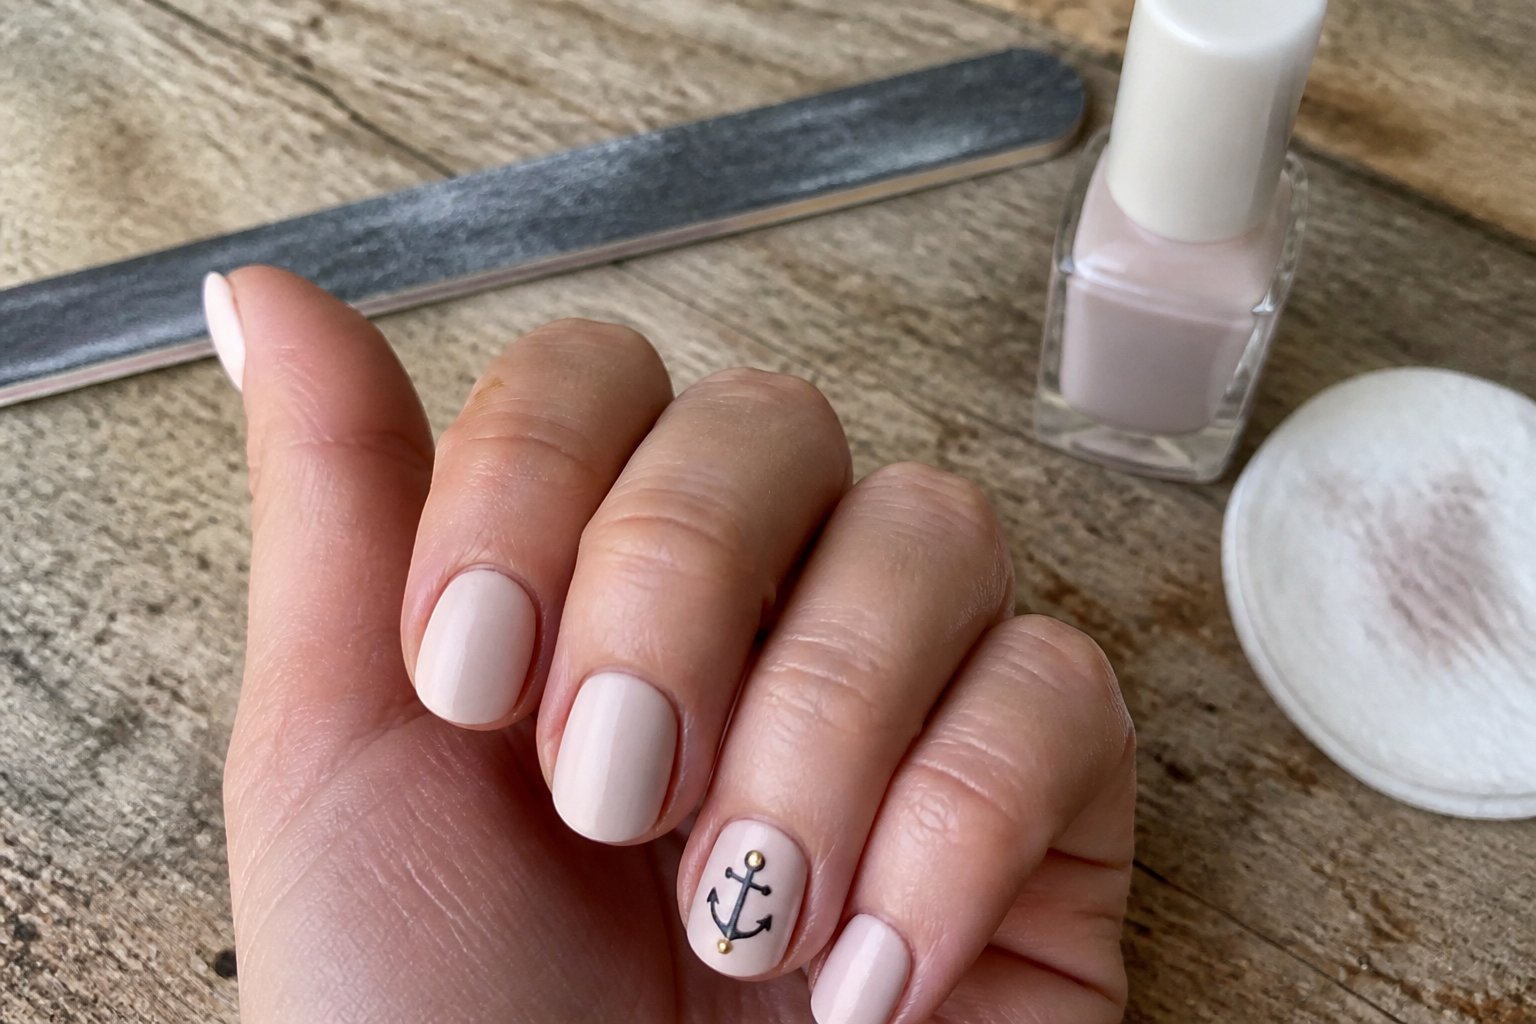
2. Anchor Accent Nail with Gold Studs
Intent: tutorial and style idea.
Use a single accent nail to make an anchor design pop without overwhelming your manicure. Paint a neutral base, then add a small navy anchor with a fine brush or sticker. Place tiny gold studs along the anchor’s curve for a luxe touch.
A common mistake is overloading the nail with too many studs. Keep spacing even and use three to five tiny studs so the anchor stays the focal point. If your brush slips, try a toothpick for finer dots and cleaner lines.
For a salon look at home, seal the studs with two thin top coats and press gently until tacky polish holds them. Try this on short or almond nails; it reads elegant on any length.
3. Sailor Hat Negative-Space Design
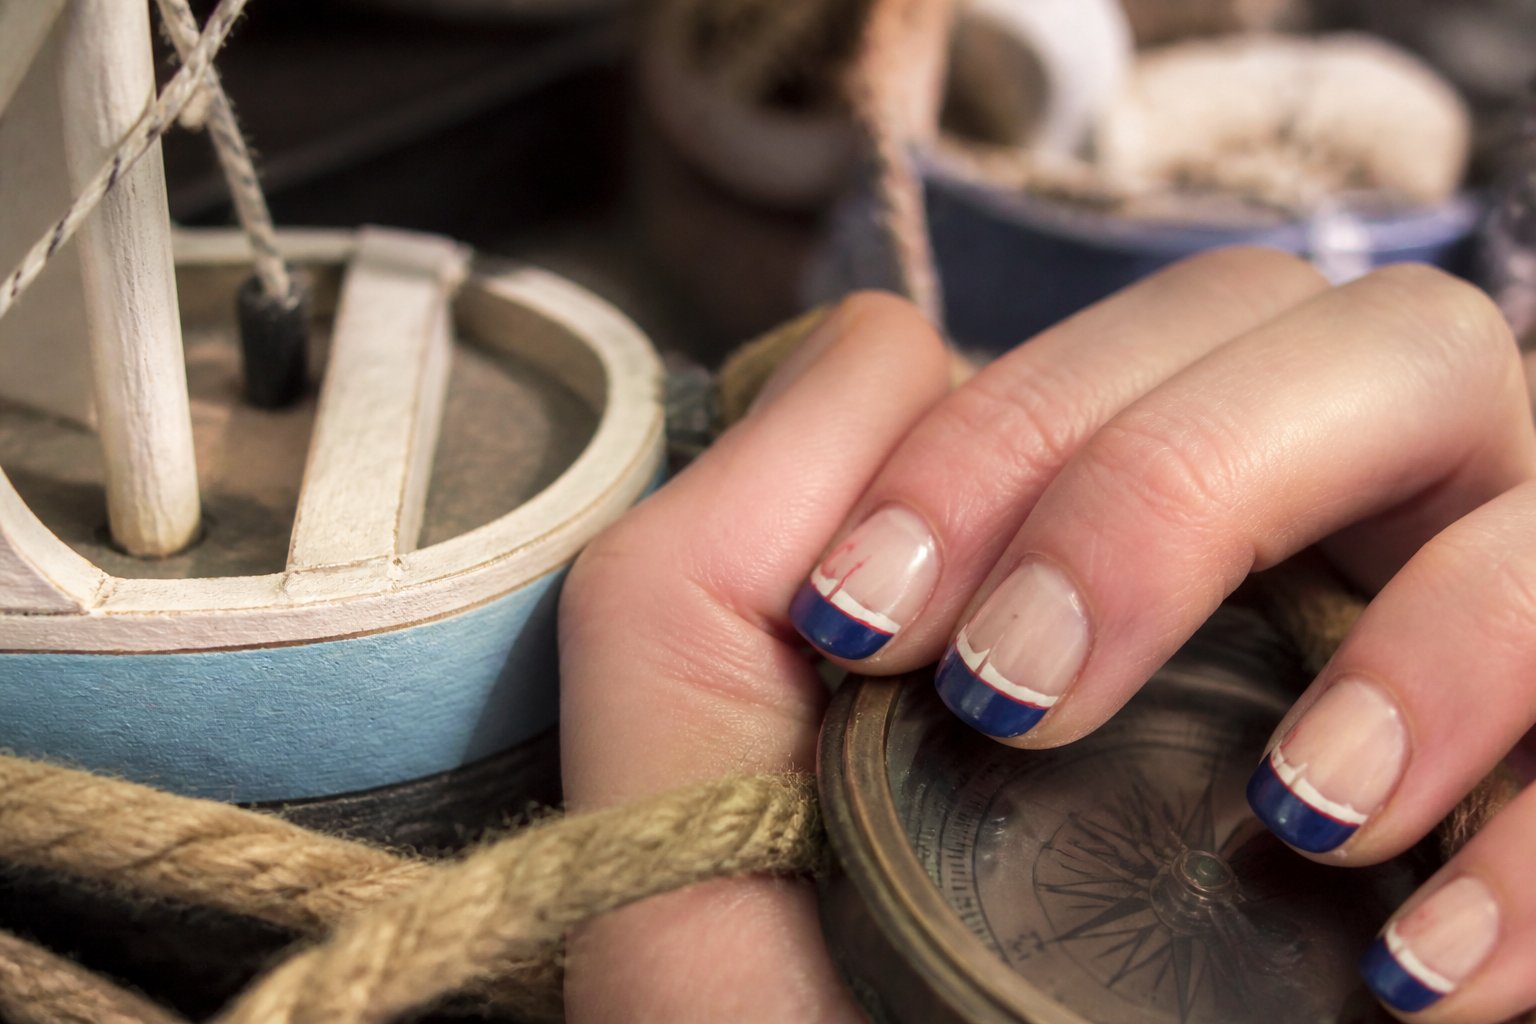
Intent: tutorial. Use negative space to shape a tiny sailor hat across one or two accent nails for a clean, modern twist on nautical nails.
Start by painting a sheer nude or pale blue base. Then use a steady hand or thin brush to block a crescent of bare nail near the cuticle — that crescent becomes the hat’s brim. Add a small navy triangle or curved top above the brim and finish with a tiny red dot or stripe for the hat band.
Common mistakes: don’t overfill the negative space or the hat will lose its silhouette. Let each layer dry to keep edges sharp. Try this on short square nails for a bold look, or on almond nails for a softer effect.
If you want an easy shortcut, swap freehand for a tiny French-tip sticker to mask the brim area. Try one or two accent nails before committing to a full set.
4. Navy Ombre with Pearl Topcoat
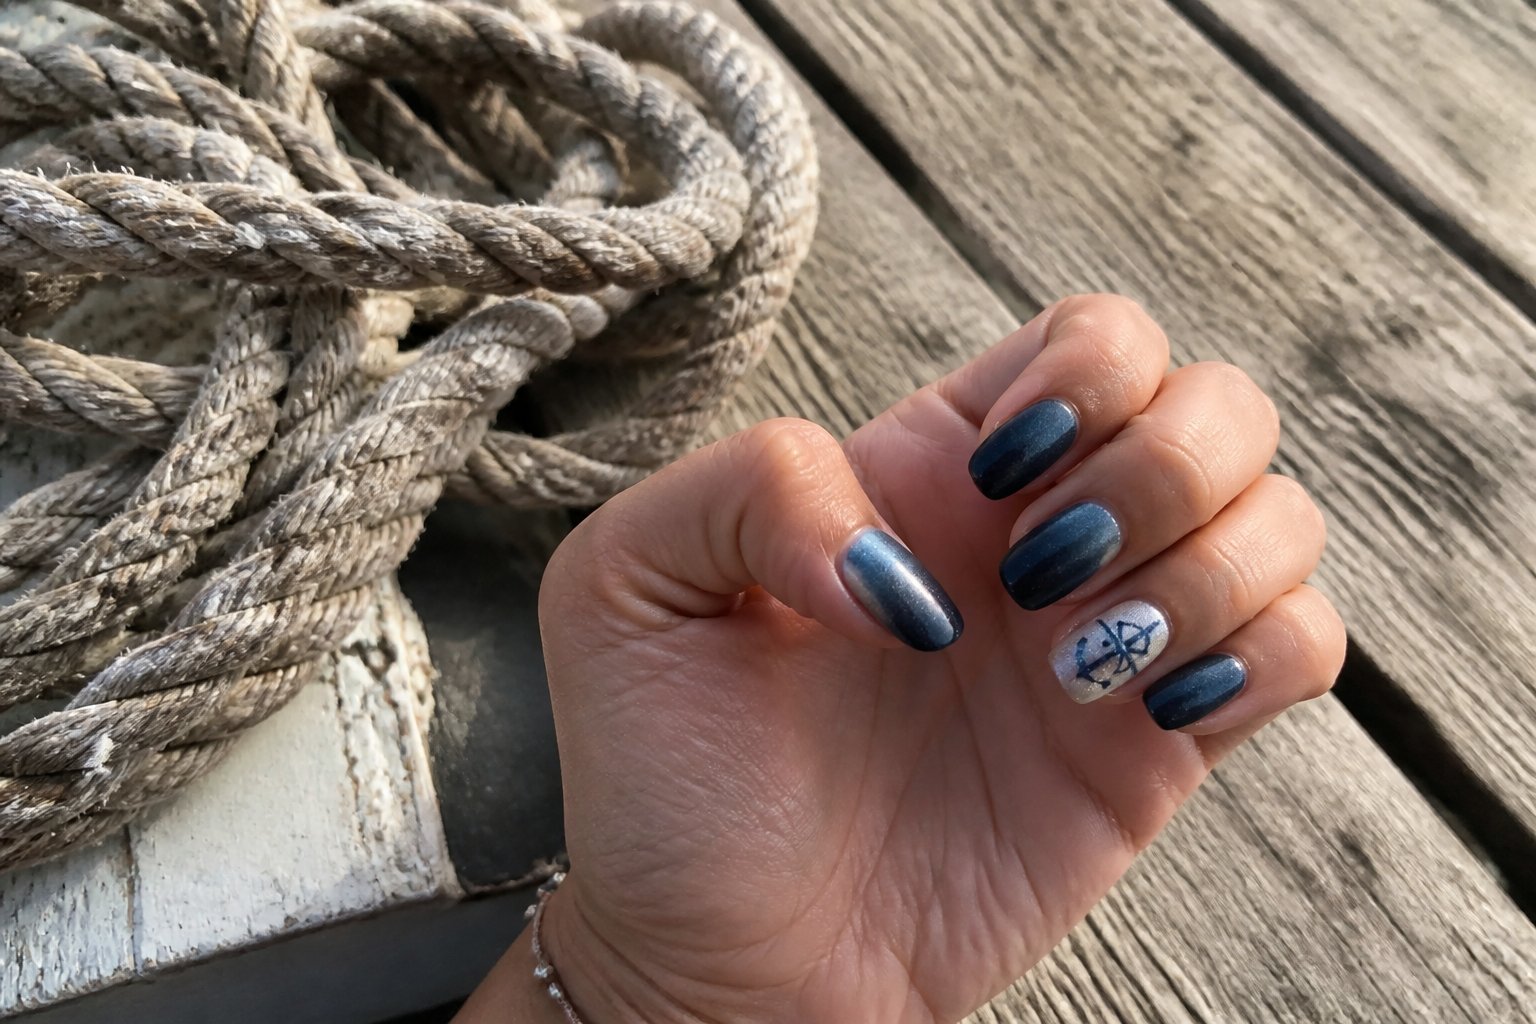
Intent: tutorial. Try a navy ombre base that fades from deep midnight at the cuticle to a lighter navy at the tip. Work in thin layers so the gradient blends smoothly; a sponge helps, and wipe excess polish from the skin to avoid a messy edge.
After the ombre dries, apply a sheer pearl topcoat for pearlescent shimmer that lifts the look without hiding the gradient. Test the pearl coat on one nail first—too many coats can mute the ombre or add thickness.
Common mistakes include using thick polish or rushing between layers, which creates streaks and bubbles. If you want detail, add a tiny gold stripe near the cuticle for a nautical nod.
Try this on short or almond nails; it reads elegant on both. If you like, see navy ombre ideas for more looks and inspiration.
5. Red Rope-Twist Accent on Matte White
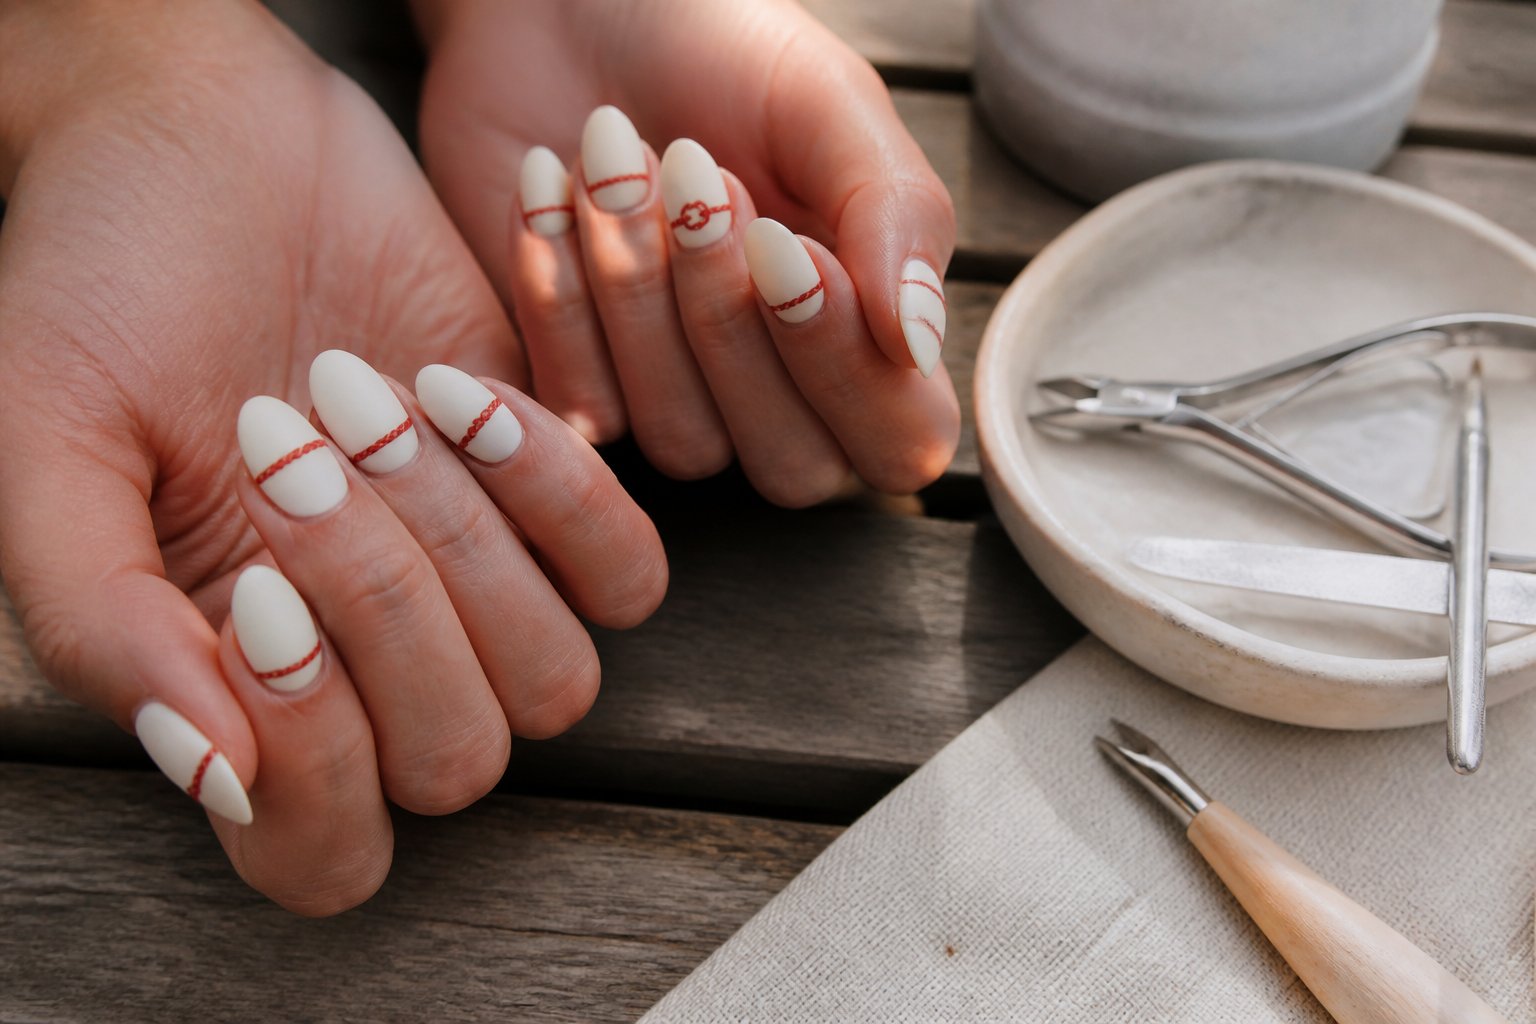
Idea: a tutorial for a bold, clean nautical accent you can wear anywhere.
Start with two coats of matte white polish for an even, opaque base. Let each coat dry fully; rushing causes smudges and uneven texture. Use a thin brush or a nail art pen to draw a twisted red rope line down the center or along the cuticle edge.
Keep the twist tight and consistent; practice the motion on a plastic tip first if you worry about spacing. Add tiny gold studs where the rope crosses a stripe for a sailor feel without overdoing it. Seal only the red line with a glossy topcoat to make it pop while leaving the rest matte if you like mixed textures.
Common mistake: pressing too hard and flattening the rope look. Try light, deliberate strokes. Ready to try it? Grab a fine brush and a steady hand.
6. Tiny Compass Detail on Ring Finger
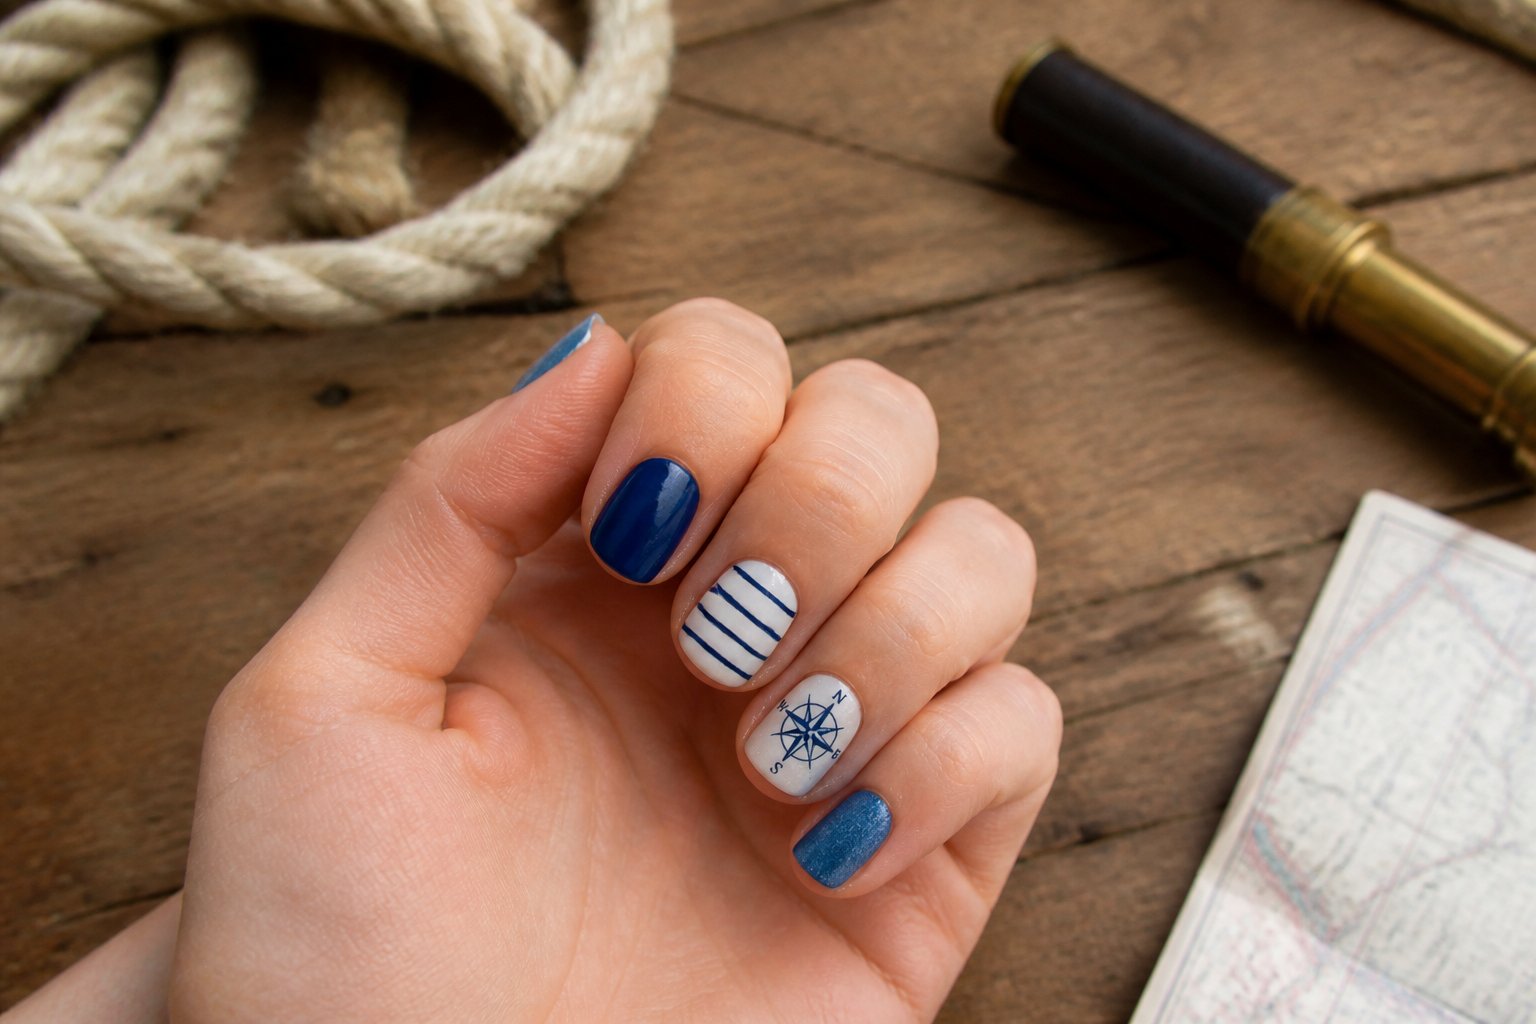
Intent: tutorial and idea.
Place a tiny compass on your ring finger to add a smart nautical touch without overpowering the look. Use a fine liner brush or a compass decal for precision; hand-paint the outer circle in navy and the north arrow in white for crisp contrast.
Start on a clean, glossy base so the detail reads small but clear. A common mistake is crowding the design—leave negative space around the compass to keep it legible on short nails. Try pairing it with solid navy or thin white stripes on adjacent nails for balance.
If you hand-paint, work in thin layers and let each dry to avoid smudging. Prefer decals? Seal them with a gel topcoat to prevent lifting. Try one nail first to see how it suits your style, then repeat when you’re confident.
7. Chevron Wave Tips in Aqua and Coral
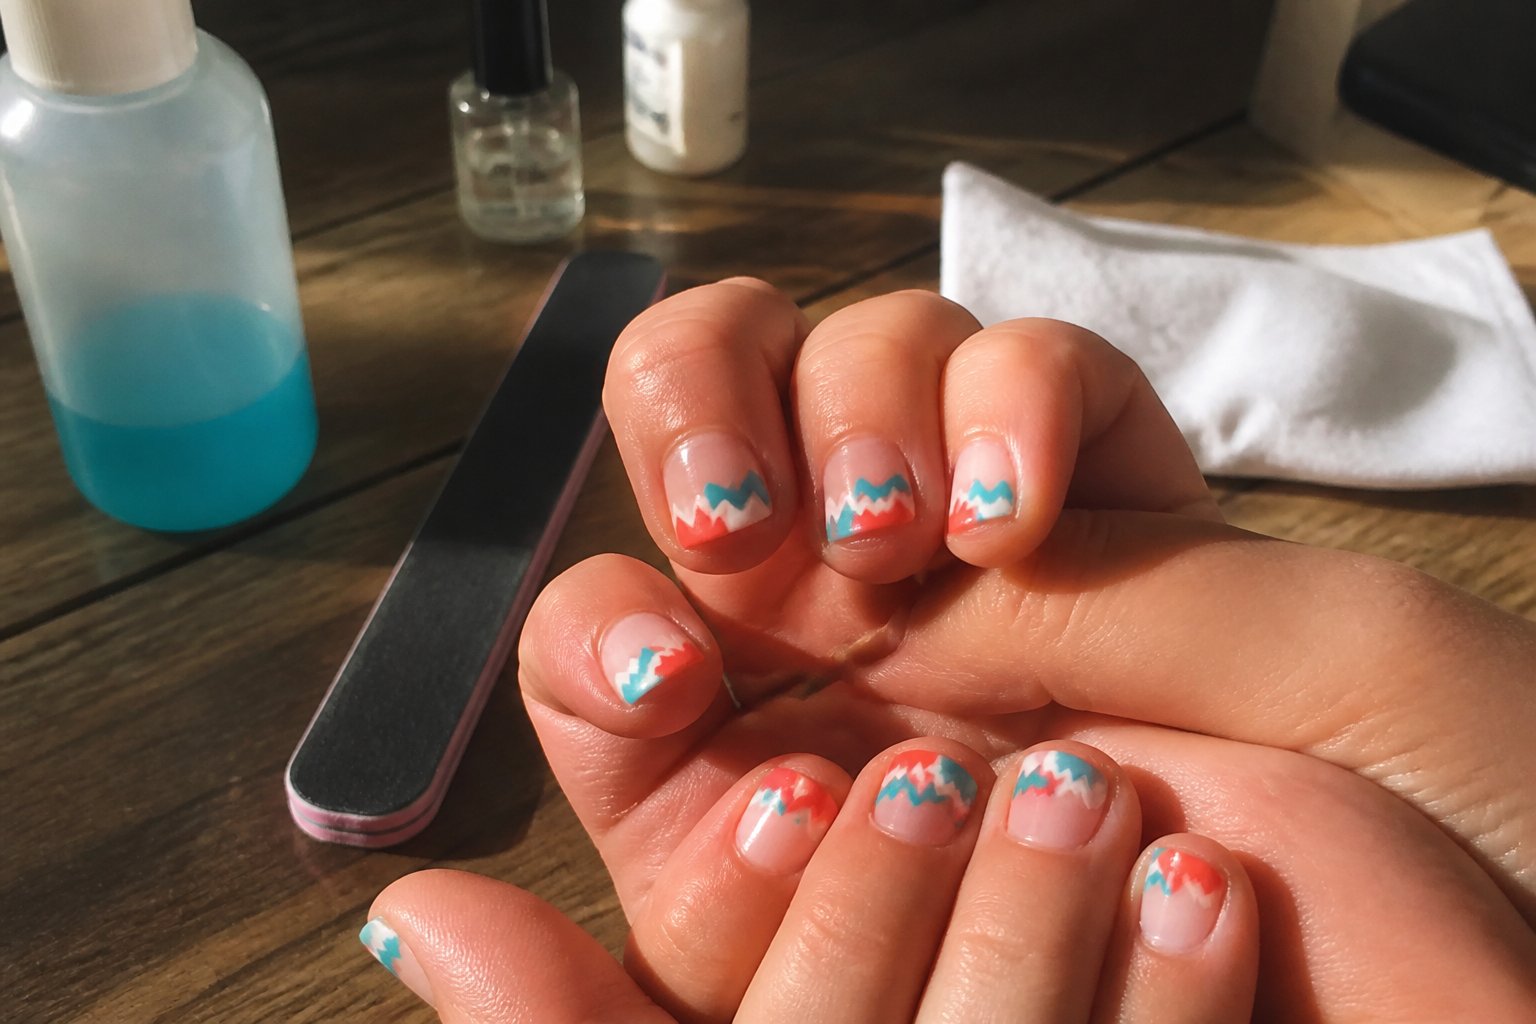
Idea: a bold, beachy tip that mixes chevrons with gentle wave accents.
You paint a clean aqua base and layer coral chevrons across the tip for crisp contrast. Use striping tape or a thin brush to keep lines sharp; messy edges are the most common mistake.
Add tiny white wave strokes inside some chevrons to soften the look and add motion. Try one accent nail with a small shell charm or pearl for texture without overdoing it.
Keep nails short to medium so the pattern reads clearly. If you work in a salon, demo on a practice hand first to balance chevron size and color saturation.
Try coral at 70% opacity for a sun-kissed effect. Take a photo under daylight to check tones, then show the client for final approval.
8. Shell and Starfish 3D Embellishment Set
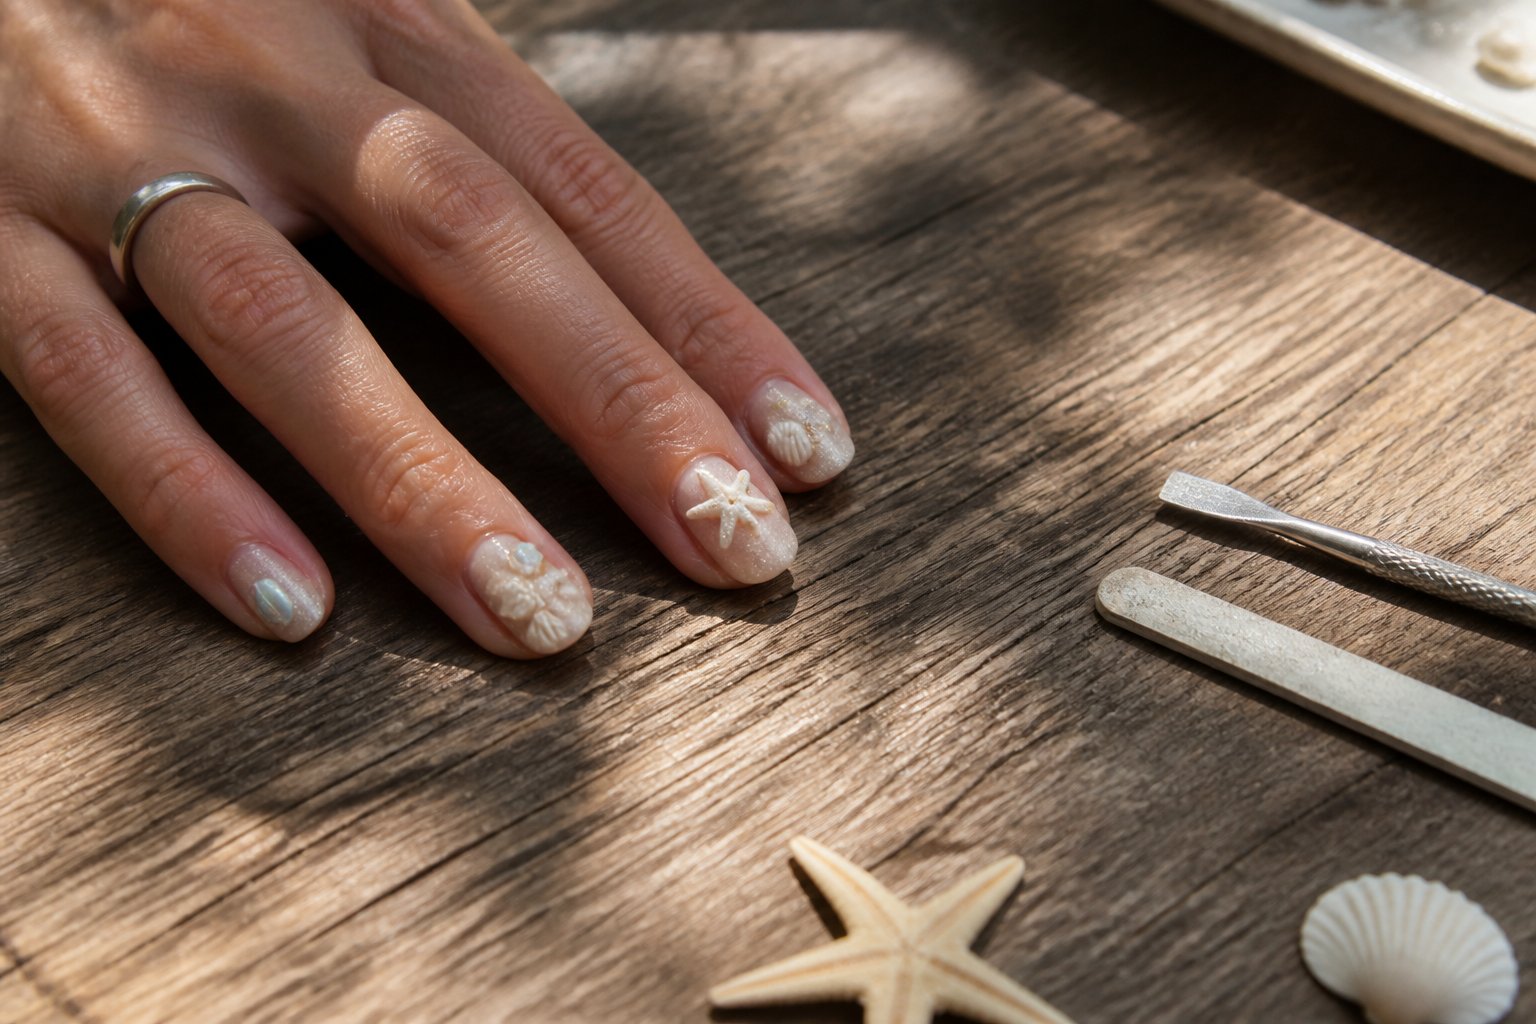
Guide: how to use a 3D shell and starfish set to create textured nautical nails.
Choose a mixed pack of shells, starfish, and tiny pearls for depth. Apply them on tacky gel or builder gel and cure each layer to avoid lifting.
Place the largest charm near the cuticle for balance; small pearls look best scattered toward the tip.
A common mistake is using too much glue — that causes bulk and early peeling. Press charms in firmly, wipe excess adhesive, and seal edges with a thin top coat.
If you plan to reuse the set, keep extras in a small organizer and remove gently with an oil soak.
Try a single statement nail per hand for everyday wear, or full 3D accents for vacation looks. Test placement on a practice nail to save time and avoid surprises.
9. Minimalist Single-Stripe Nautical French

Intent: tutorial.
Keep your manicure clean with a single navy stripe along a classic French tip. Use a thin striping brush or tape to lay down a sharp line; steady your hand by resting your elbow on a table. Try navy on white or navy on sheer nude for different vibes.
A common mistake is making the stripe too thick. Less looks more—aim for a line about 1–2 mm wide. If the stripe wobbles, remove it with a tiny brush dipped in remover and redo just that finger.
For extra polish, add a tiny gold dot near the cuticle on one nail. That small accent makes the design feel finished without clutter. Try this on short or almond nails; it reads chic either way.
Want a quick at-home try? Practice on a fake nail first, then copy the best result to your hand.
10. Sailboat Silhouette on Midnight Blue
Intent: tutorial. Use a deep navy base and paint a crisp white sailboat silhouette for a sleek, high-contrast look.
Start by applying two thin coats of midnight blue polish. Let each coat dry fully to avoid smudging when you add the silhouette.
Sketch the boat with a fine brush or transfer a tiny decal if freehand feels risky. Keep the hull low and the mast straight; common mistakes include uneven sails and blobbed paint.
Add a tiny silver dot for a star or a pale horizon line for depth. Seal with a glossy topcoat to protect the fine lines and boost shine.
Try this on an accent nail first to test scale. If you like precise tools, check small nail art brushes or premade sailboat decals from places like Etsy sailboat nail art to speed the process.
Design Principles for Nautical-Themed Nail Art
You’ll focus on color choices, motif selection, and how to arrange elements so your nails read like a cohesive seaside look. Each choice should support the theme and stay wearable for everyday life or a beach event.
Color Palettes Inspired by the Sea
Intent: guide — pick palettes that read nautical at a glance.
Start with three core colors: navy, crisp white, and a bright red or coral for contrast. Navy provides depth and formality; white keeps designs clean and sharp; red or coral adds a pop that ties to classic sailor themes. Add a soft sand beige or seafoam green as a neutral or accent to soften bold contrasts.
Try two palette examples:
- Classic: navy + white + red.
- Coastal soft: seafoam + sandy beige + pearly white.
Common mistakes: using too many saturated colors at once or mismatching metallics. Keep polish finishes consistent—gloss with gloss, or matte with matte—so the palette feels unified. Test small swatches on a nail wheel to see how the colors read under daylight.
Incorporating Marine Motifs
Intent: tutorial — choose motifs that read clearly at nail scale.
Pick 1–2 motifs per hand: anchors, stripes, waves, shells, or starfish work well. Use anchors as a focal point on ring fingers, waves across tips, and thin stripes on thumbs for variety. Keep motif size proportional to nail length; tiny anchors disappear on short nails.
Design tips: use decals or stamps for precise anchors, and freehand simple wave lines with a thin brush. Avoid overcrowding—pair a detailed motif with a plain or striped nail. Example layout: anchor on ring finger, stripes on middle, solid accent on pinky. Watch for contrast: a pale motif on a pale base won’t show.
Balance and Composition
Intent: guide — arrange elements so the whole manicure feels balanced and intentional.
Decide on a visual weight plan before you paint. Place heavier, detailed designs on one or two nails and balance them with negative space or simple stripes on the others. Think in thirds: one bold nail, two patterned nails, two solids creates harmony on five nails.
Use repetition to tie the set together: repeat a color, a thin stripe, or a tiny dot across nails. Vary scale to keep interest—large anchor, medium waves, small dots. Common error: mirroring every nail exactly; instead, aim for variety with a repeat element. Try sketches or a quick sticker mock-up to ensure composition before committing.
Nail Care Tips for Long-Lasting Results
This section shows how to prep your nails so polish and nail art stick, and how to protect the finished look so it lasts through daily wear. Follow the steps and product tips to prevent lifting, chipping, and premature dulling.
Prepping Nails for Art
Intent: tutorial. Start by cleaning and shaping—this sets the foundation for any nautical design.
Wash hands with warm water and a mild soap, then push back cuticles gently with an orange stick. Trim or file straight across for strength, and finish with a single-direction file stroke to avoid splits. Buff lightly only if the surface is very ridged; over-buffing thins nails.
Use a 70%+ isopropyl wipe or nail cleanser to remove oils. Apply a thin, even base coat and let it dry fully—this prevents staining and gives polish something to grip. For gel or press-ons, make sure the natural nail is dehydrate-dry and free of lotion. A common mistake: skipping the base coat to save time. That choice often causes lifting within days.
Protective Top Coats
Intent: guide. Choose the right top coat and apply like a pro to lock in color and shine.
Use a fast-dry glossy top coat for regular polish and a long-wear gel top coat cured under an LED lamp for gel manicures. Always cap the free edge by brushing the tip horizontally; this step seals the edge and cuts down on chips. Apply thin coats—thick layers can peel or take too long to cure.
Reapply a quick-dry top coat every 3–5 days to refresh shine and add a new protective layer. For extra protection on vacation or water-heavy days, wear clear nail-friendly gloves when doing dishes. Avoid using your nails as tools; even the best top coat won’t save them from prying or opening cans.
About the Author — Lena Harper
Lena Harper is a fashion writer and content strategist at Fashion Pops, known for creating thoughtful, trend-aware articles that feel both stylish and relatable. With a strong background in fashion journalism, she specializes in turning seasonal trends, outfit ideas, and styling concepts into easy-to-follow inspiration for modern women.
Her writing focuses on practicality without losing creativity — helping readers build outfits that feel current, wearable, and confident. When she’s not working on new articles, Lena enjoys exploring street style trends, discovering unique fashion finds, and curating inspiration boards that shape upcoming content at Fashion Pops.