10 Independence Day Nails That Wow: Stunning, Easy Patriotic Designs
You want nails that match the spirit of backyard barbecues, parades, and fireworks—but without the stress of time-consuming designs that disappoint.
Here’s your pro guide to ten easy, stylish Independence Day nails ideas and practical care tips so your look lasts all through the party and in every photo.
You’ll find clear tutorials, color combos that pop, and fast fixes for common mistakes like chipping or muddy colors.
From classic stars-and-stripes to subtle negative-space stars, these step-by-step ideas and quick nail-care strategies will help your mani stay flawless all weekend.
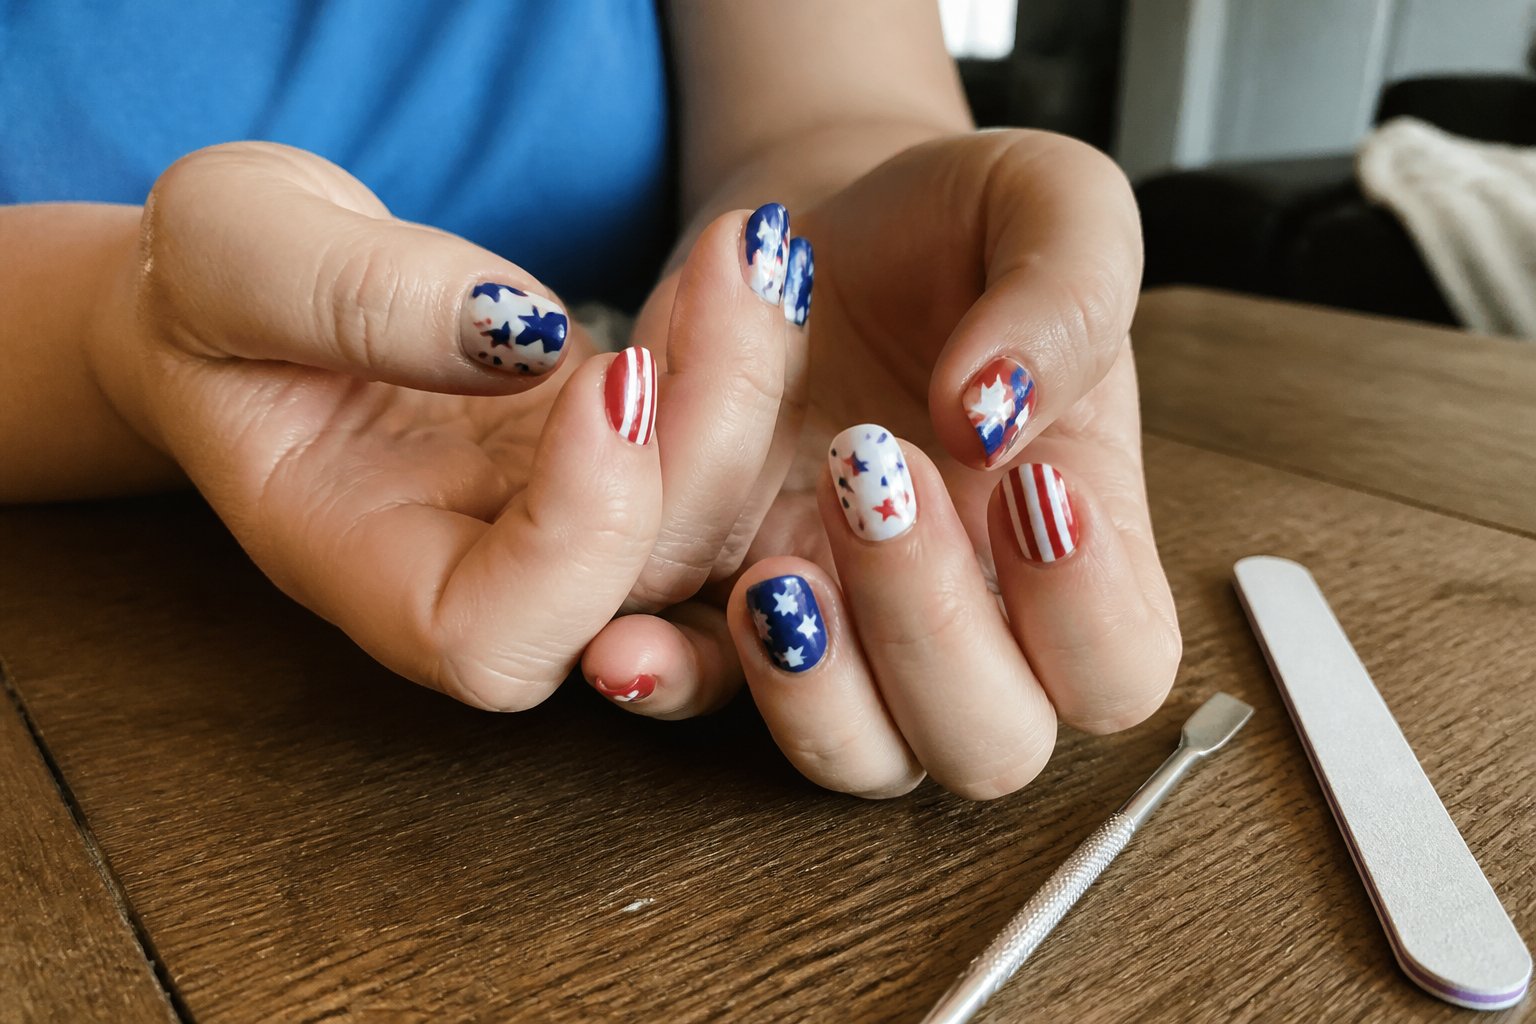
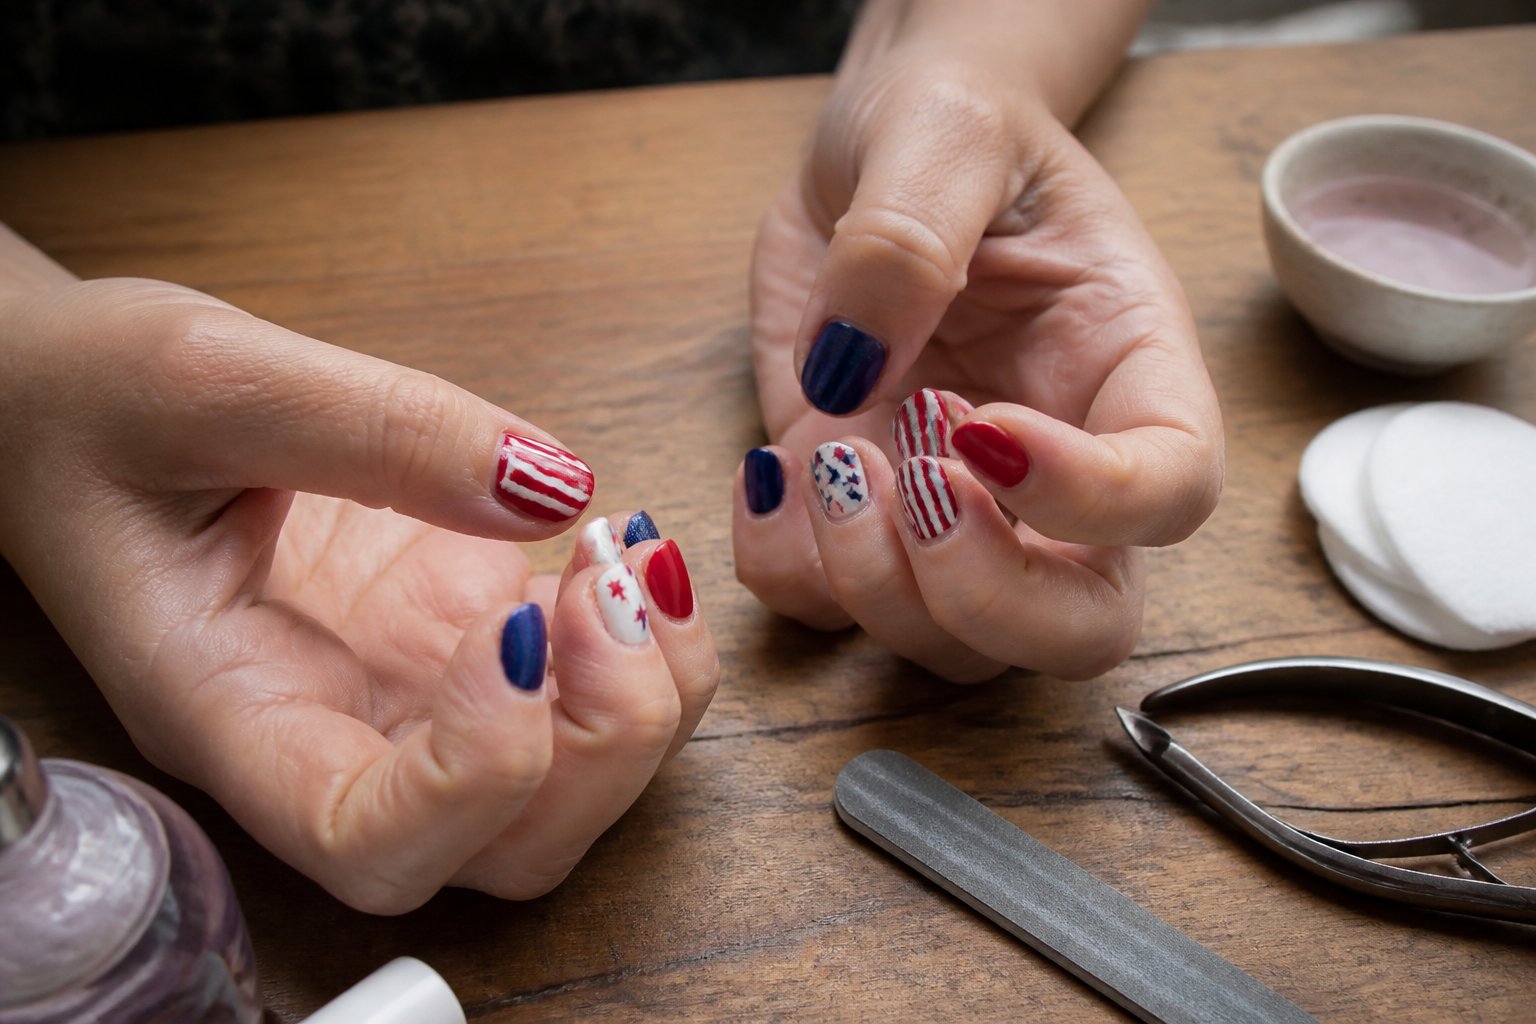
1. Classic Stars-and-Stripes Accent Nail: Step-by-Step Tutorial
This tutorial shows you how to paint one accent nail with a crisp flag motif—a perfect way to show patriotic style without going overboard.
Start with a smooth base coat, keeping the other nails neutral for a balanced look. Use thin striping tape or a steady hand for sharp, clean stripes; this is where patience pays off.
For the stars, reach for a tiny dotting tool and dab white polish over a navy square. Always use thin coats and let each dry—thick polish leads to smudges that ruin the effect.
A favorite combo: one glossy blue accent with tiny white stars, flanked by two red-and-white striped nails. If you love a touch of sparkle, add a sheer glitter topcoat only to the accent nail for just the right amount of shine.
Try this look for a festive finish that feels classic and bold—then snap a photo before the party starts!
2. Reverse French with Red, White & Blue Tips: Modern Patriotic Tutorial
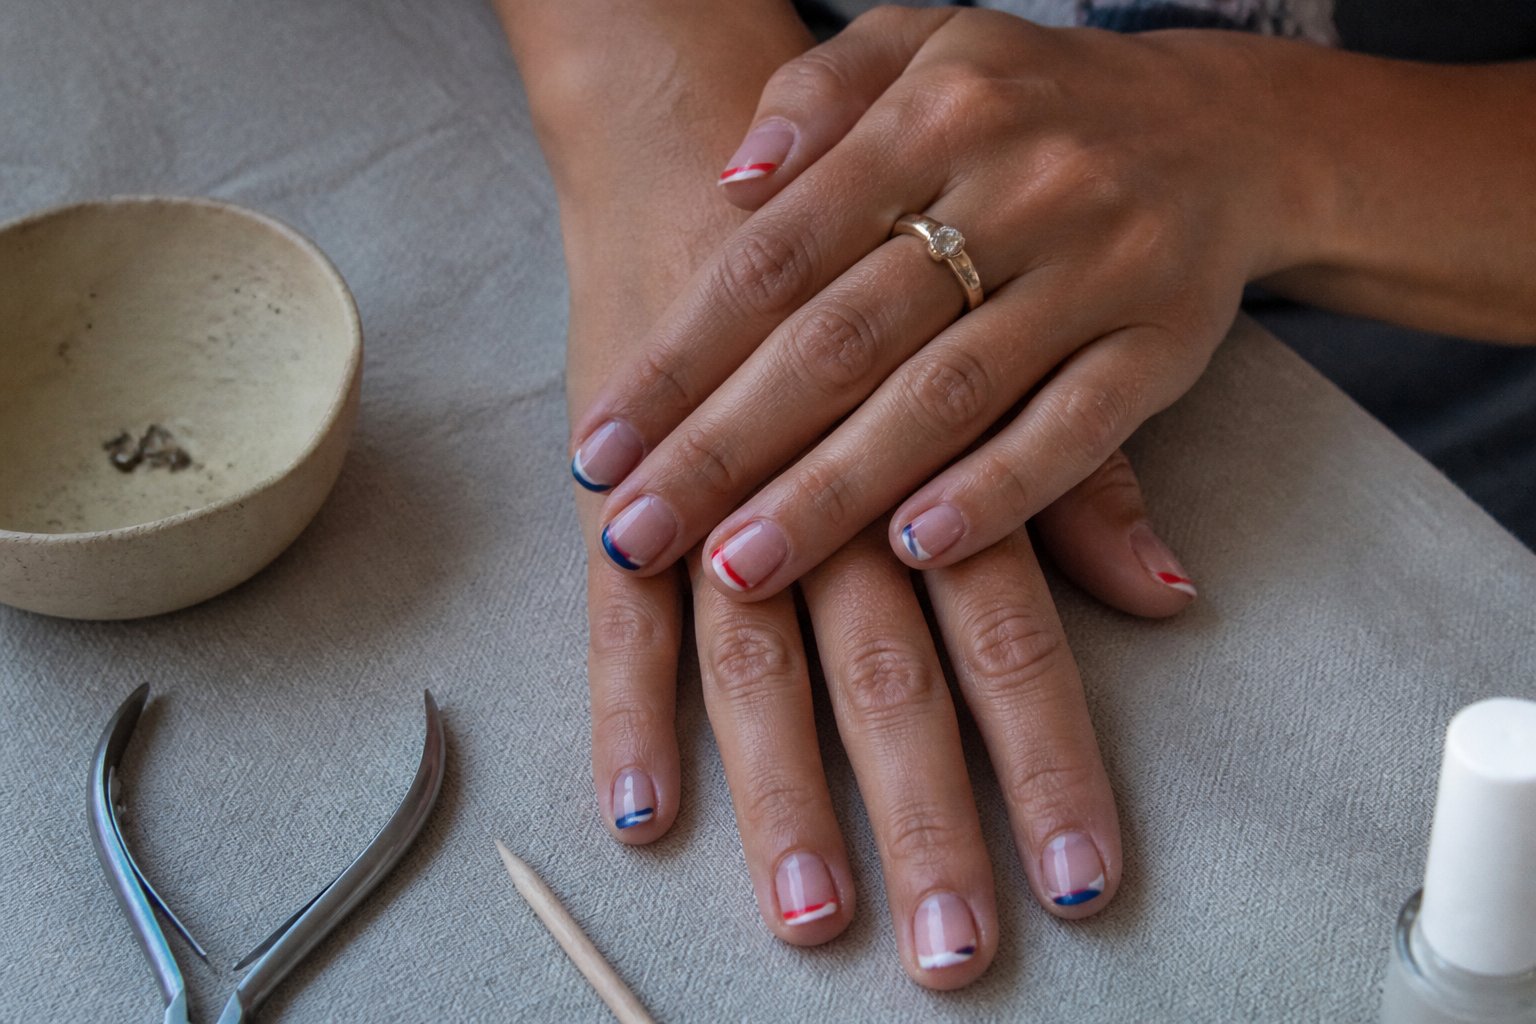
Give your Independence Day mani a modern twist with a reverse French tip—crescent moons in red, white, and blue at the cuticle.
Start with a clean, neutral base and use a fine brush or dotting tool for the color-blocked crescents. Always apply the lightest shade first to avoid staining and wipe your brush between colors for crisp separation.
If you slip, don’t panic—just remove the tip and redo it, keeping the base intact. Many at-home artists overload the brush; stick to thin layers and let each coat dry before adding the next.
Pair with a single glitter accent nail for extra flair. Bring this idea to your favorite nail tech, or try it at home for a salon-level finish that feels fresh and festive.
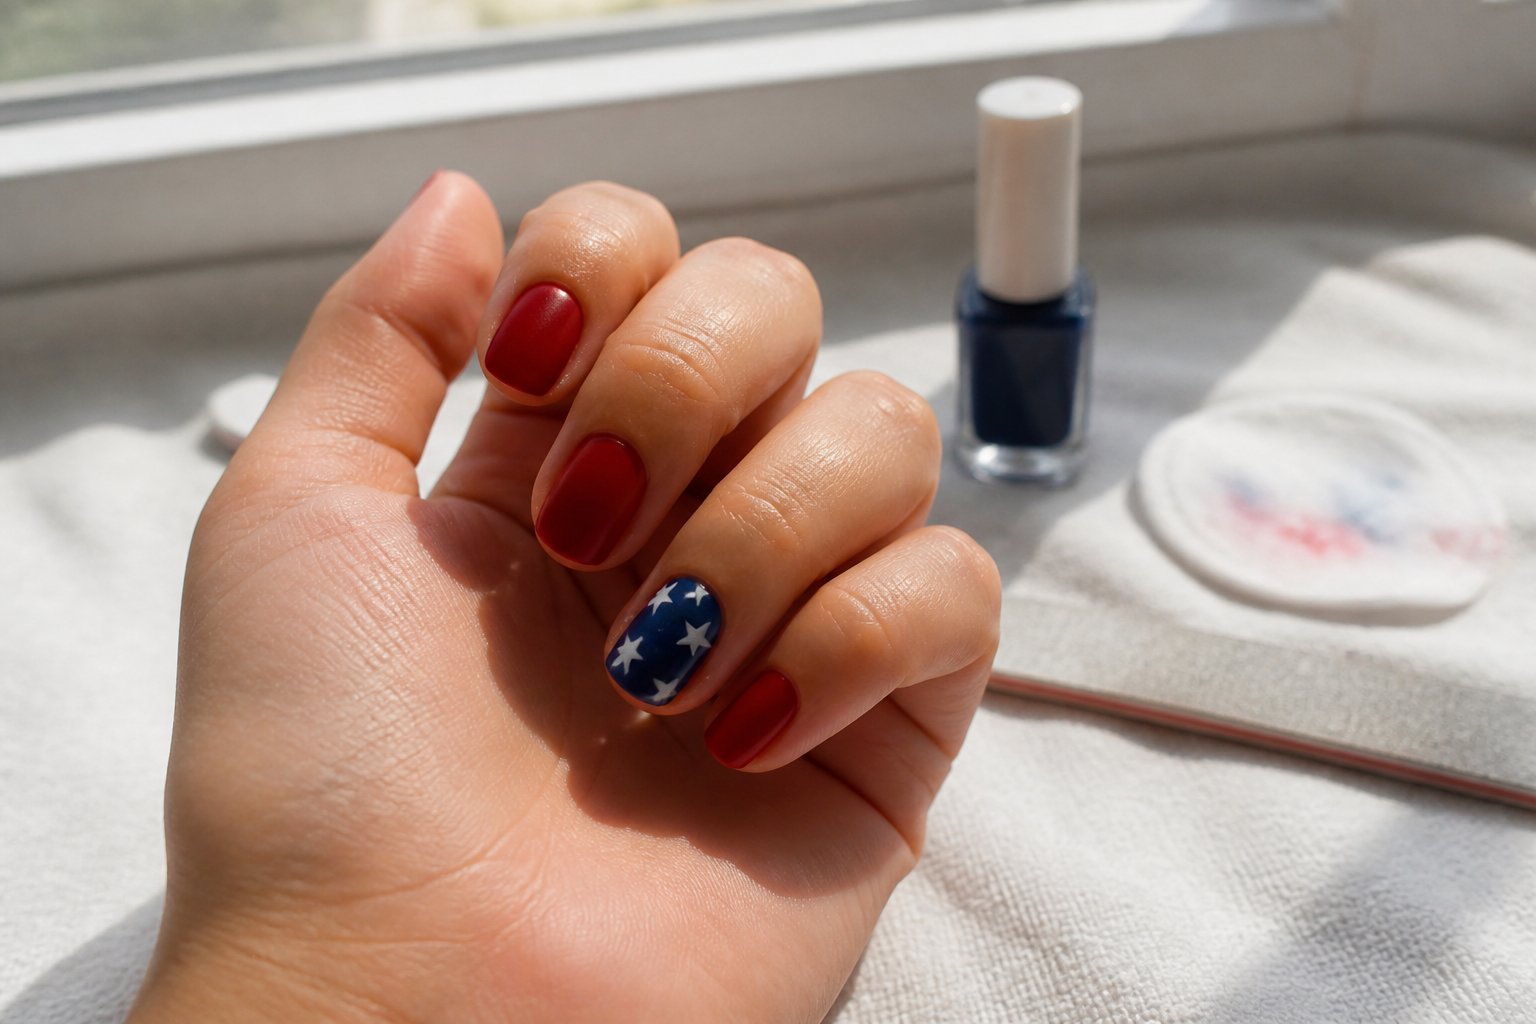
3. Nautical Navy Base with Gold Star Studs: Luxe DIY Guide
For a touch of luxury, start with a deep navy base—apply two thin coats, letting each dry to avoid streaks and bubbles.
Next, place small gold star studs near the cuticle or at the tips. Use tweezers and a tiny dot of clear top coat to secure each star, pressing gently so they sit flush and don’t lift.
This look works beautifully on both short squoval nails and long stiletto shapes. Avoid using too much glue; it makes studs uneven and more likely to peel off during the festivities.
Finish with a glossy top coat and cure if you’re using gel polish. Keep a small kit handy for quick repairs—if a stud pops off, you’ll be ready for a fast fix and back to celebrating in minutes.
4. Sparkling Firework Burst Nail Art: Eye-Catching Tutorial & Idea
This tutorial shows how to paint fireworks that pop on any base color—perfect for those who want their nails to be the main event.
Start with a dark navy or black base so your colors shine. Use thin brushes and dotting tools to layer tiny dots outward from a center point, creating the firework burst.
Mix metallics, neons, and glitter for extra impact—silver for sparks, red or blue for trails. Apply glitter in thin layers to avoid clumping, sealing with a glossy topcoat to lock in shine.
Don’t overwork the design; fireworks look best when bursts are clear and lines are crisp. For balance, try one accent nail with multiple bursts and keep the rest simple—your nails will light up the night.
5. Gradient Ombre from Red to Blue: Pro Blending Tutorial
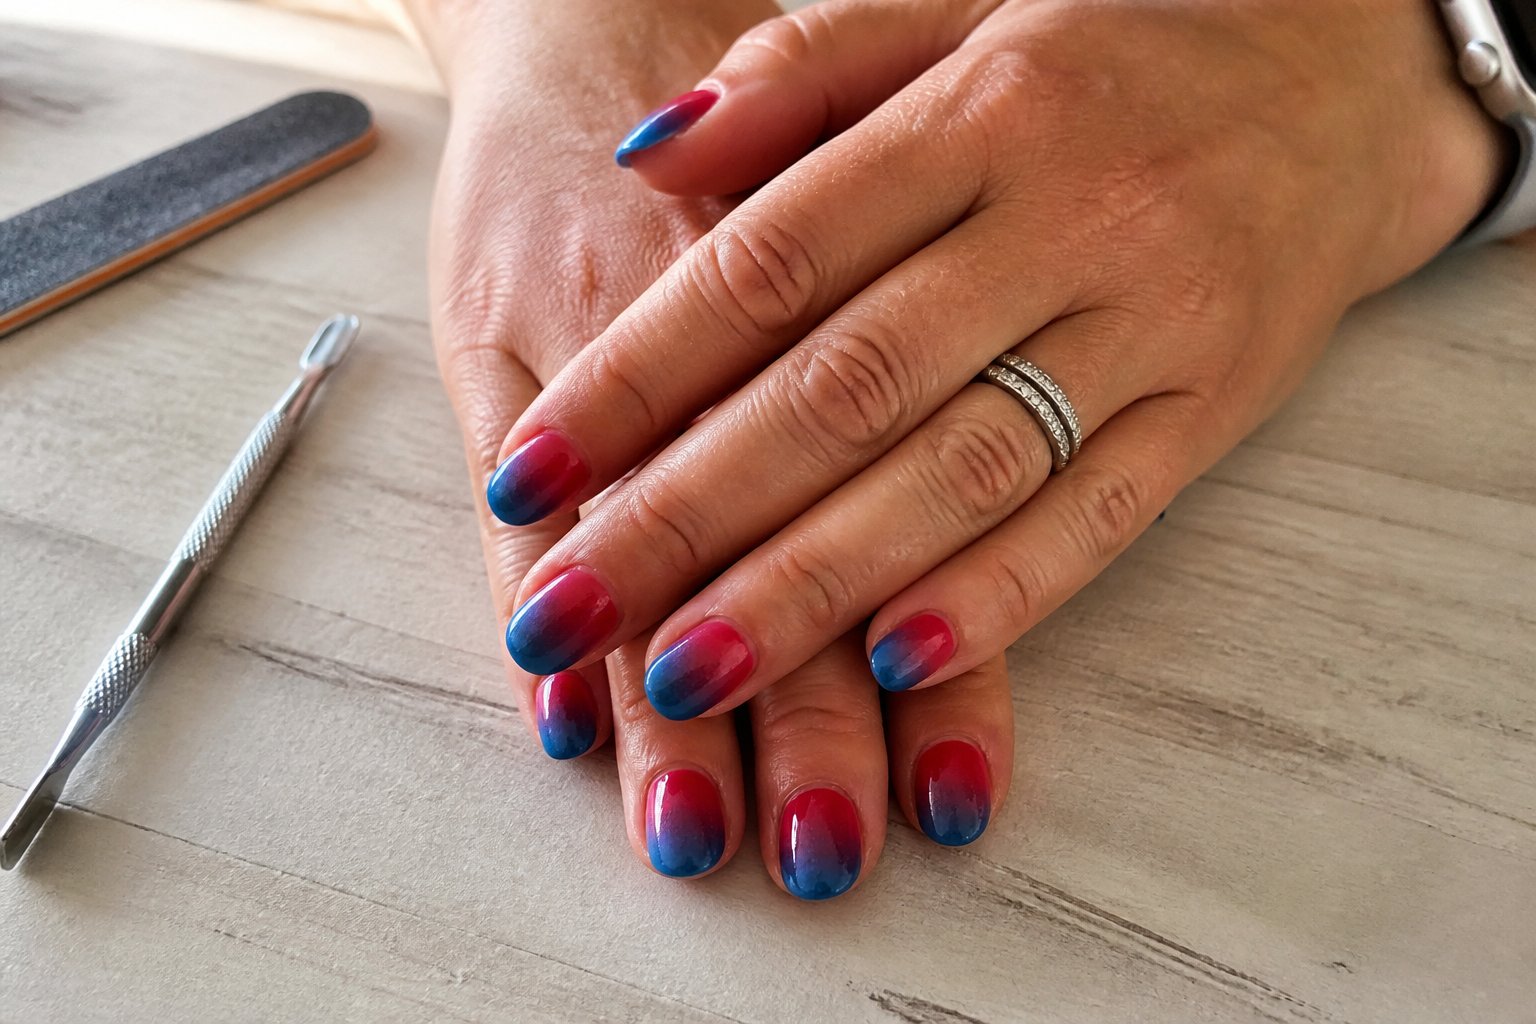
Create a seamless red-to-blue ombre using a makeup sponge and a little patience—this look is all about smooth transitions.
Start with a thin coat of white polish to make the colors pop, then dab red, white, and blue stripes onto a sponge and gently press onto your nail. Use short, light taps to blend, repeating as needed for even color.
Finish with a quick-dry topcoat to fuse the layers and smooth any ridges. Clean up the cuticle line with a small brush dipped in acetone for a pro finish—don’t overload the sponge or you’ll end up with blobs.
For a patriotic twist, add a single white star accent. Practice on a nail wheel if you’re new to ombre, then show off your gradient at the next cookout.
6. Matte White Base with Tiny Flag Decals: Crisp Nail Guide
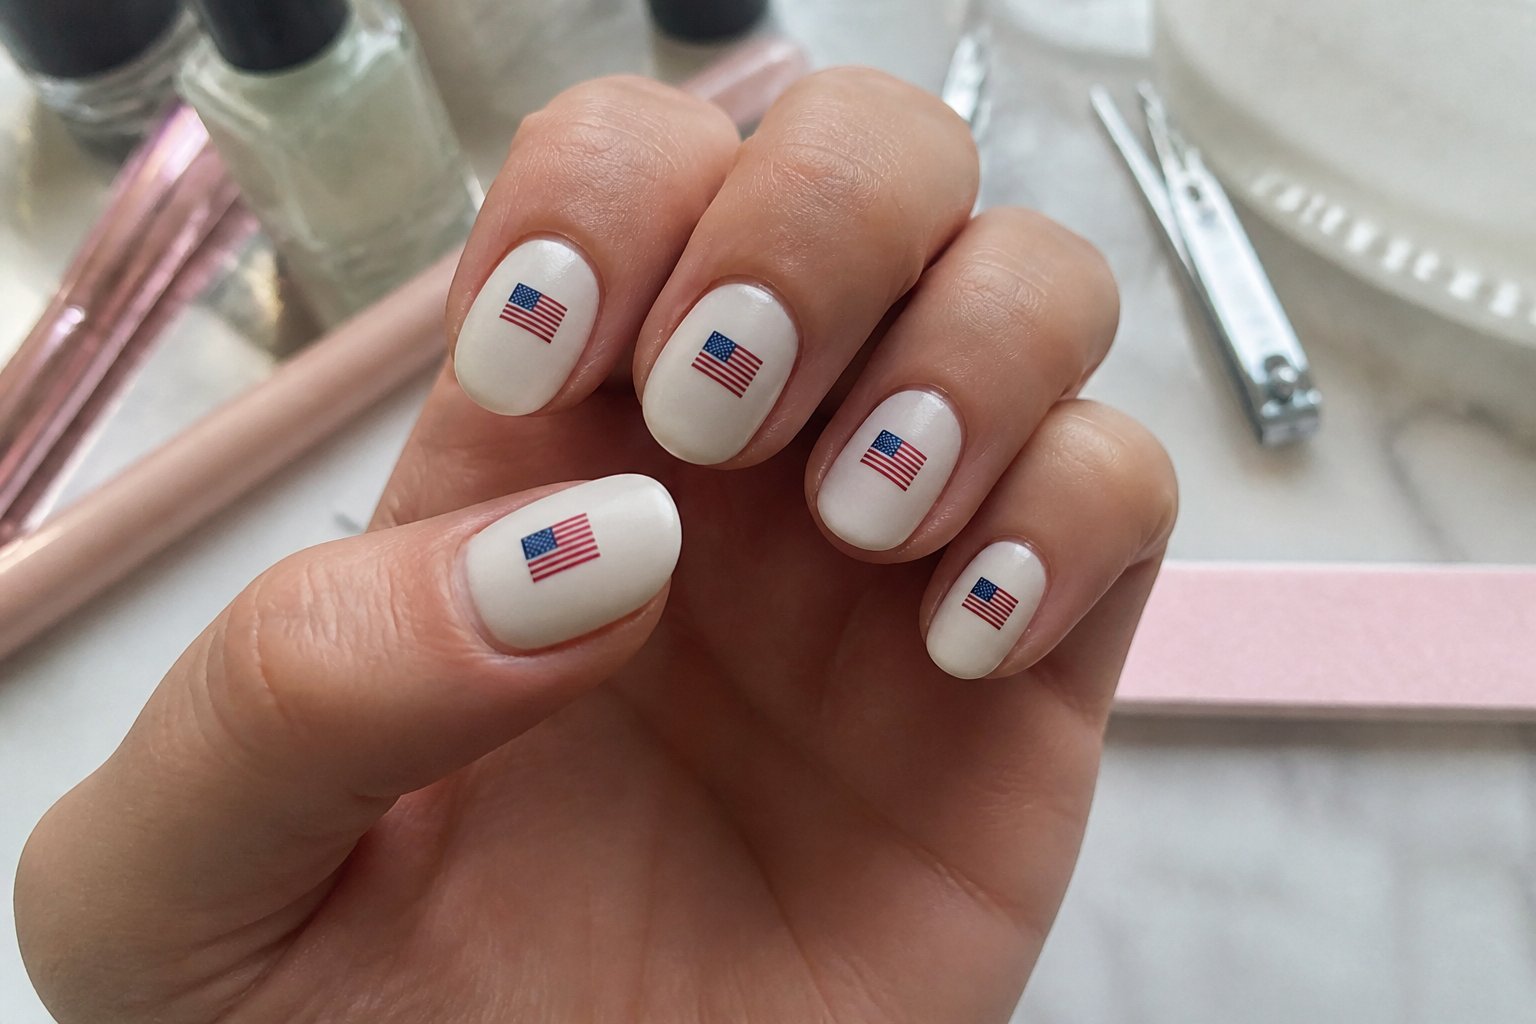
This guide shows you how to get crisp, patriotic nails with minimal effort—perfect for busy party planners or nail art beginners.
Apply two thin coats of matte white polish to a clean, buffed nail, letting each layer dry fully so decals don’t slide or wrinkle.
Use tweezers to place tiny flag decals at the cuticle or tip, then seal with a matte top coat for a modern, soft finish. Stick to small decals—large ones can overwhelm short nails and look messy.
If a decal lifts, press it down and add a drop of top coat to hold it. For a subtle twist, mix in one glitter accent nail or shop Etsy for a range of neat, tiny flag decals to personalize your look.
7. Glittery Red Base with Blue Rhinestone Crescent: Festive Nail Tutorial
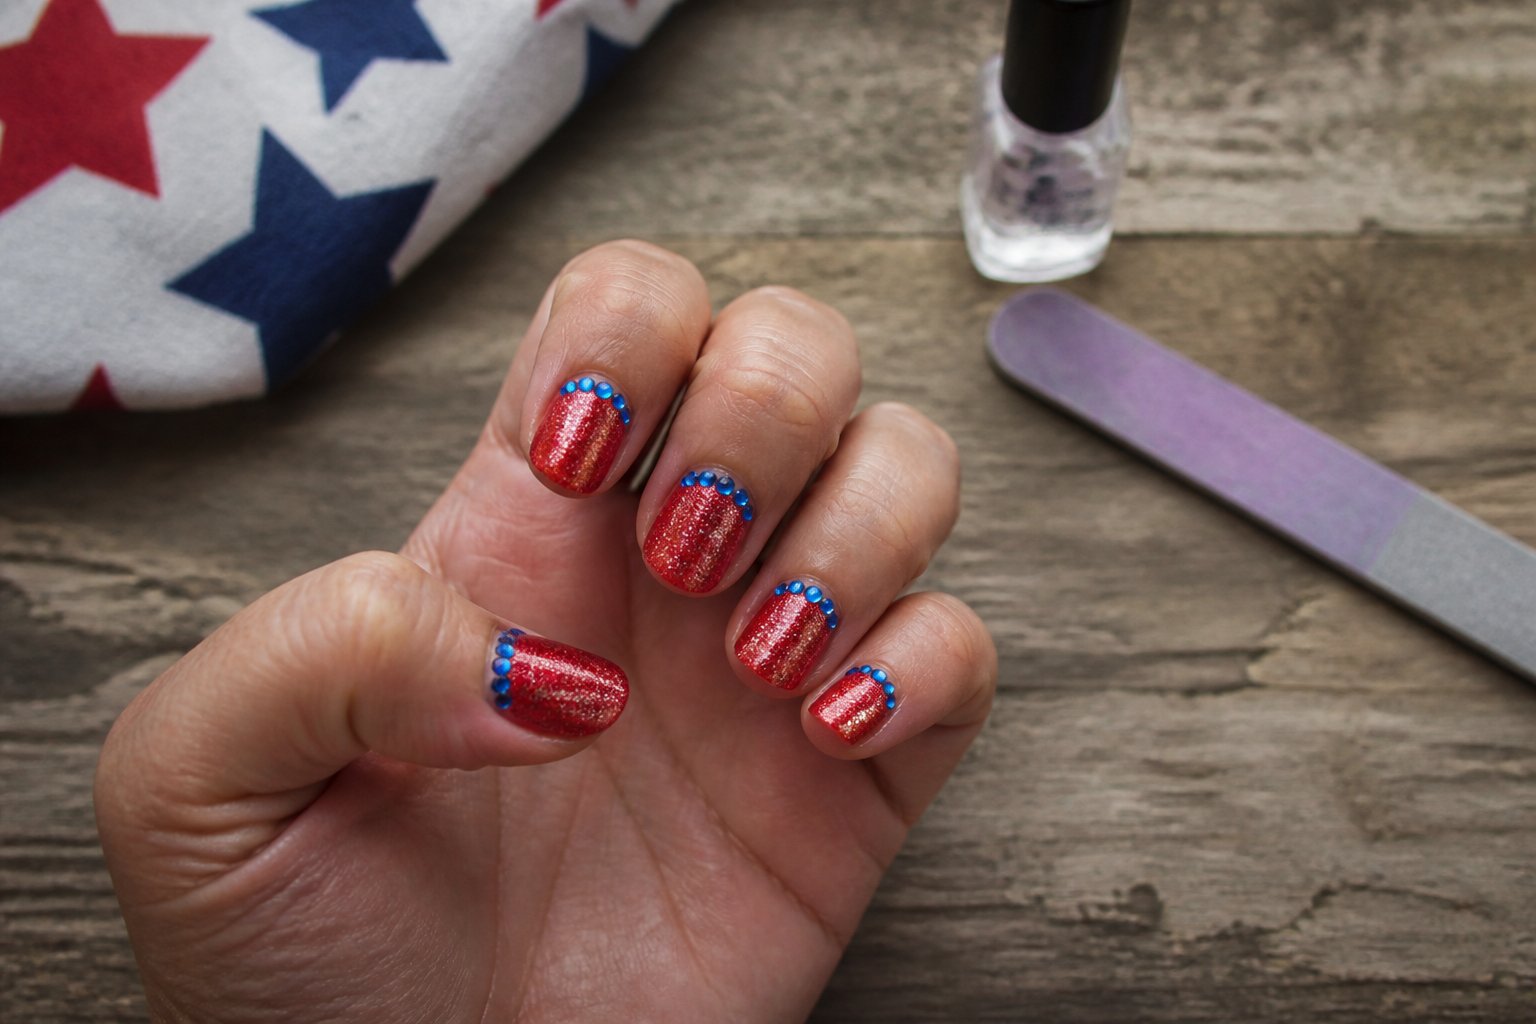
Go bold with a glittery red base and a crescent of blue rhinestones at the cuticle for maximum festive impact.
Apply two thin coats of red glitter polish, then use a dotting tool or tweezers to place small blue rhinestones in a crescent shape, starting from the center and working outward for symmetry.
Don’t crowd the stones—leave small gaps so each one sparkles. Seal with a thick gel or fast-dry top coat to keep rhinestones secure and prevent lifting during celebrations.
Try matte red with glossy rhinestones for extra contrast, or add a tiny white star for an accent. If you’re new to stone placement, practice on one hand before finishing your full set for a flawless result.
8. Polka Dot Patriotic Mix (Red, White, Navy): Playful Nail Tutorial
Add playful charm to your Independence Day look with a polka dot mix—this tutorial is perfect for those who want fun, easy art that stands out.
Paint a navy base on a few nails, others white, and add red dots for contrast. Vary dot sizes and spacing for visual interest—small clusters on one nail, larger, spaced dots on another.
Use a toothpick or dotting tool for perfect circles and always leave breathing space so the design doesn’t look crowded. Overloading dots is a common mistake—less is more for a crisp, modern finish.
Try a glitter accent or a tiny star over a dot for subtle flair. Practice on a nail wheel, then apply slowly and steadily for a look that’s both playful and polished.
9. Negative Space Star Cutout Manicure: Clean-Edge Tutorial
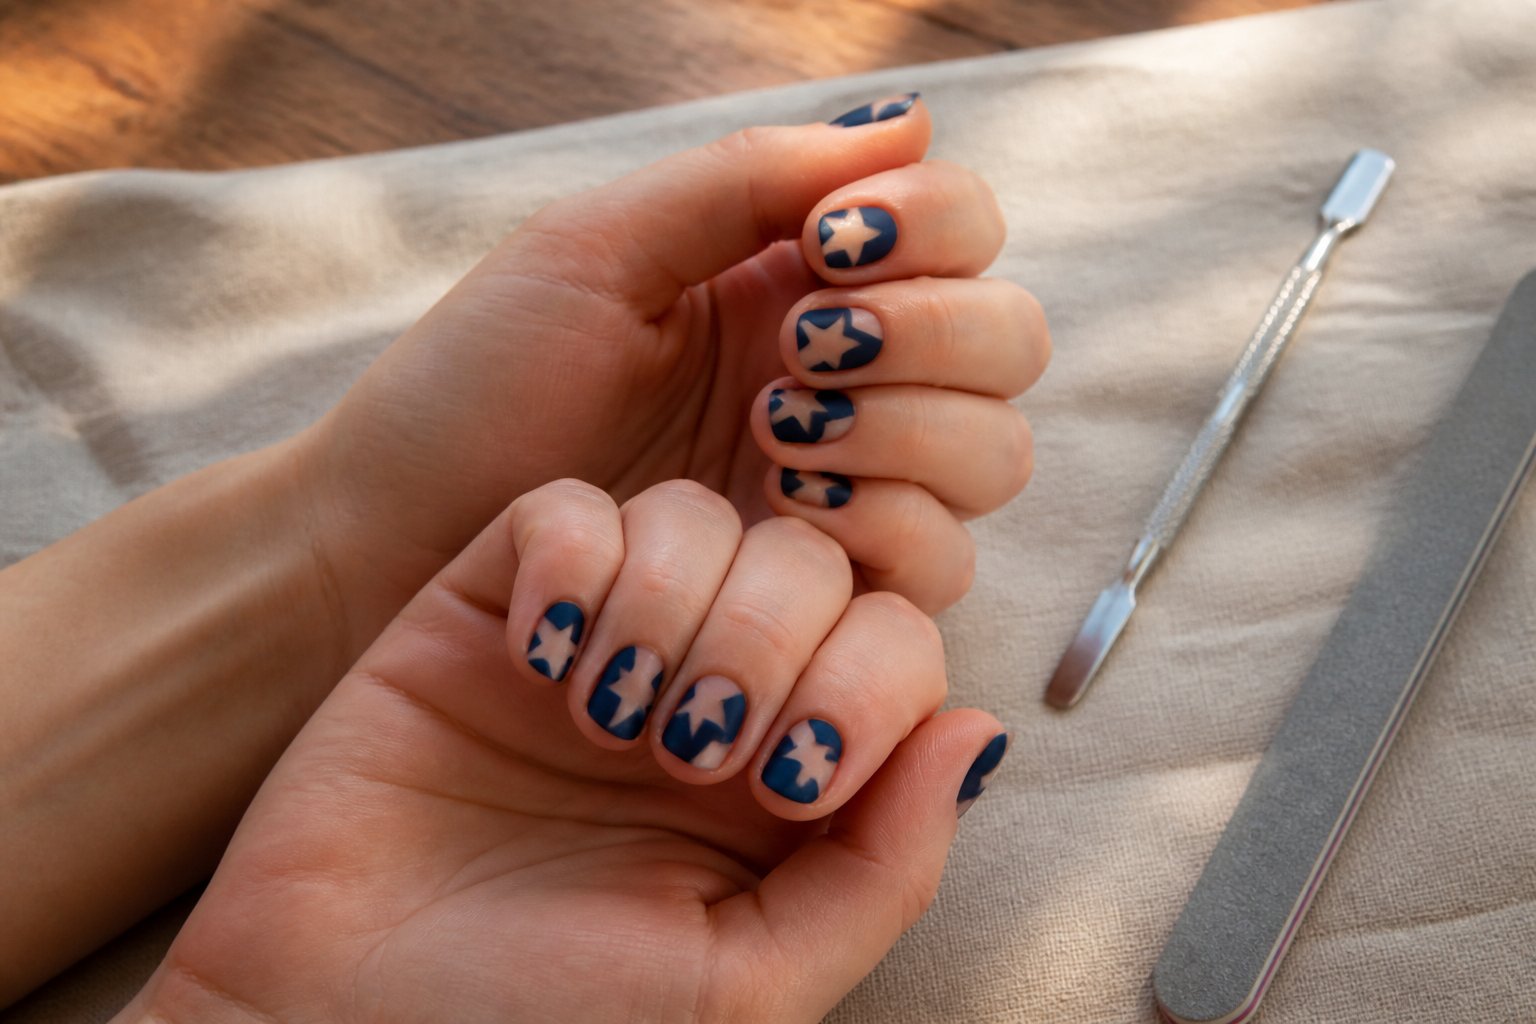
This tutorial shows you how to make a star-shaped window on a neutral or red base—letting your natural nail peek through for a sophisticated twist.
Start with a sheer or clear base, then place a small star stencil where you want the cutout. Paint a bold color—navy, crimson, or glitter—around the stencil, and peel it off while the polish is tacky for sharp edges.
Use thin brush strokes and remove excess polish from the stencil edge for best results. Avoid thick coats that can flood the cutout or waiting too long to remove the stencil, which can cause ragged edges.
Mix up the look with tiny stars on accent nails and a larger star on the ring finger. Protect your design with a glossy top coat and keep your Independence Day manicure looking fresh all weekend.
10. Silver Foil Firecracker Accent Nail: Step-by-Step Tutorial
If you want your Fourth of July nails to shimmer without going overboard, try a silver foil firecracker accent. This design brings a spark of celebration to your manicure while keeping it chic and wearable.
Begin with a matte navy or deep red base on your accent nail. This contrast ensures the foil will stand out and catch the light beautifully.
Cut silver foil into uneven pieces and lay them over a tacky gel topcoat. Press each piece gently with a silicone tool—this avoids wrinkles and makes the foil look like scattered sparks.
Add a tiny gold or white dot near the cuticle to mimic a firecracker fuse. This subtle detail ties the look together and gives your nails a festive story.
Avoid the common mistake of covering the entire nail; leave negative space for a modern, wearable effect. Seal with two thin layers of gel topcoat, curing fully between coats, so your foil art lasts through the festivities.
Test this accent on one hand first. If it feels too bold, reduce the foil pieces or swap for a chrome strip for a more understated shine.
Let your creativity pop and show off your handiwork at your next summer gathering.
Nail Prep Guide: Perfect Base for Patriotic Designs
Setting up your nails properly is the secret to a long-lasting, flawless manicure. A pro-worthy base ensures your colors look vibrant and your art stays put.
Remove any old polish with a gentle, non-acetone remover to protect your nail plate. Trim and file your nails to your preferred length, then lightly buff to smooth away ridges—over-buffing can actually cause polish to peel, so keep it minimal.
After a warm soak, gently push back your cuticles with a wooden stick. Never cut your cuticles unless you’re experienced; instead, nourish them with cuticle oil nightly for three days leading up to your manicure.
Before you paint, swipe each nail with alcohol or a nail cleanser to remove any oils. Apply a thin, even base coat and let it dry completely—this is your polish’s anchor.
For extra staying power, use a gel or ridge-filling base and cure as needed. Remember, thin coats dry faster and resist chipping better than thick ones.
Take your time with prep, and you’ll notice your nail art lasts well beyond the holiday weekend. Your future self will thank you when your manicure still looks fresh after days of fun.
Choosing the Right Nail Shape for Festive Art: Pro Tips
Your nail shape sets the stage for every design, so choose wisely based on your lifestyle and the look you want. Short, square, or rounded shapes are durable and keep patriotic details crisp—ideal if you’re hands-on or new to nail art.
Long almond or stiletto shapes make flag and firework accents dramatic, but they can be fragile. If you’re going for intricate fireworks or silhouette designs, longer tips give you more space to play.
Pair short squoval nails with stripes and dots for a classic vibe. For more elaborate art, opt for longer shapes and use gel polish to prevent chipping.
Not sure what works? Try a test length for a day—can you type, cook, and run errands comfortably? A good shape should fit your real life, not just your Instagram feed.
Ask your nail tech to refine edges so your polish hugs the nail perfectly. The right shape makes your art pop and keeps your manicure looking sharp all week.
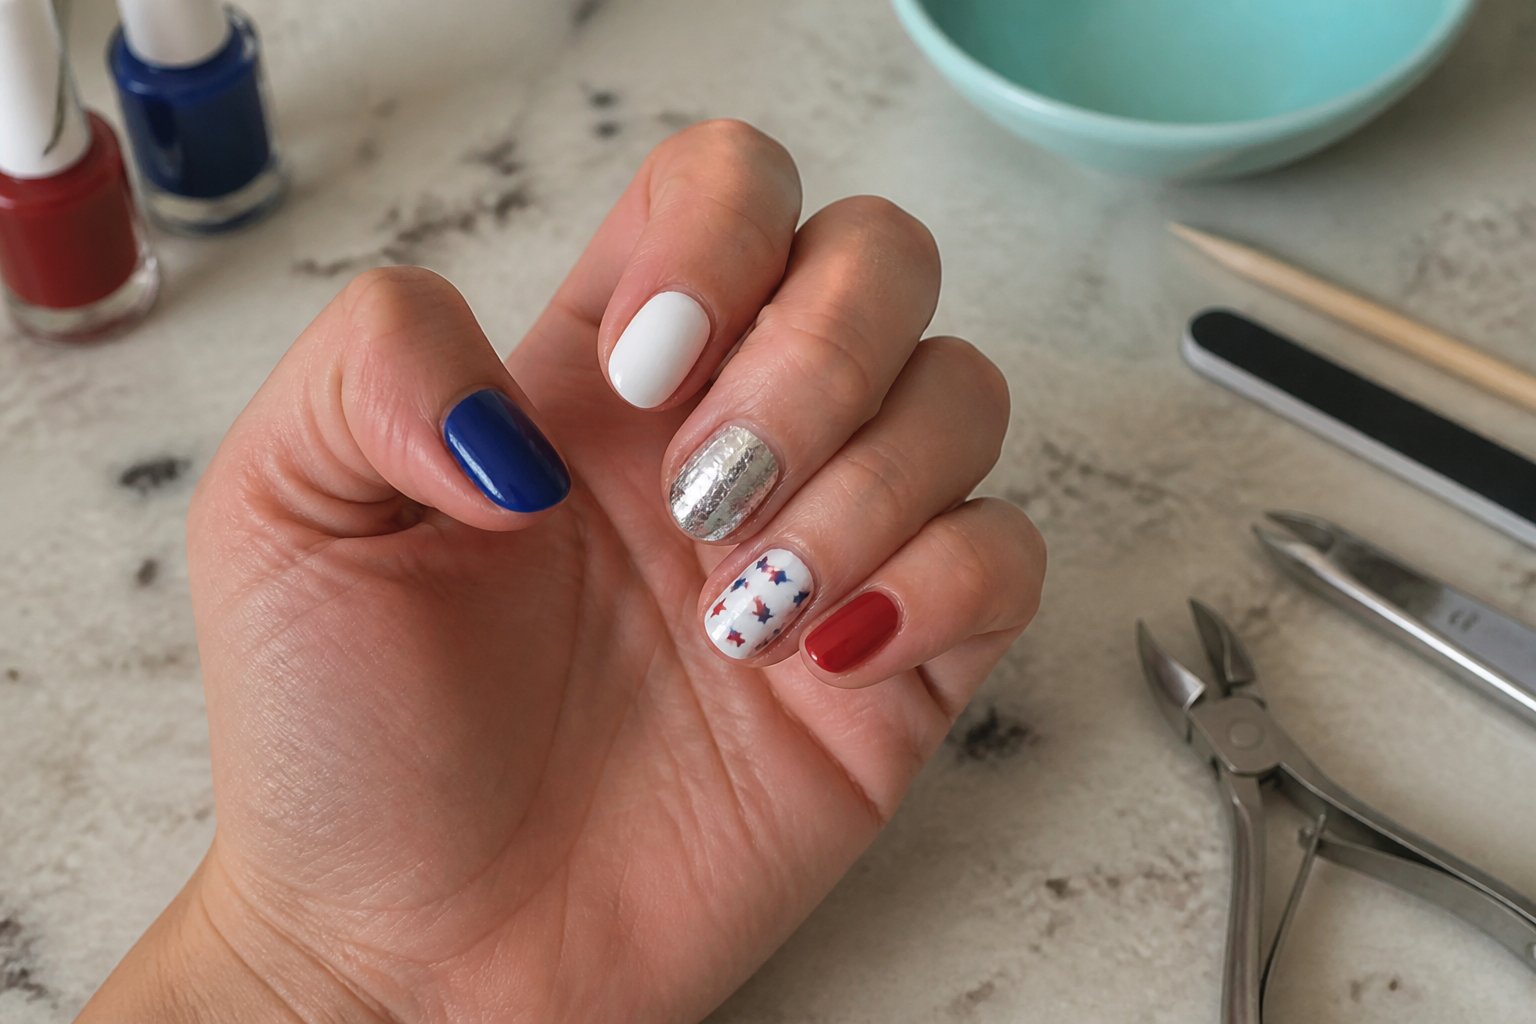
Patriotic Color Pairings That Stand Out: Guide for Eye-Catching Combos
Choosing the right red, white, and blue combo is all about clarity and impact. Your goal: bold color contrast that looks great in person and in photos—especially at summer barbecues and parties.
Start with a single focal nail to anchor your design. For example, paint your thumb glossy red, then use solid blue and white accents on other nails to keep things balanced.
Try this layout for a polished look:
- Thumb: glossy red for instant impact
- Index: white base with a clean blue stripe
- Middle: blue with tiny white stars for a nod to the flag
- Ring: white with a crisp red French tip
- Pinky: matte red for a subtle finish
Mixing finishes—like pairing a glossy red with a satin blue—adds depth and keeps your look fresh. Use a thin brush or striping tape for sharp lines, and don’t crowd every nail with stars and stripes.
Let one or two nails carry the detailed art while the rest stay simple. This editorial approach keeps your manicure looking professional and photo-ready, no matter where you celebrate.
Ready to try your own twist? Share your patriotic nail art and inspire others to show their colors with pride.
Adding Metallic Accents for Extra Flair
Intent: idea for elevating patriotic nails with metallics.
If you want your patriotic nails to truly stand out, metallic accents are your secret weapon. Think gold or silver outlines, a single gleaming star, or a metallic French tip—each brings a festive edge to the classic red, white, and blue.
Metallics catch the light beautifully, especially during summer celebrations and fireworks displays. But restraint is key to keeping your design chic, not flashy.
- Tiny silver star near the cuticle
- Gold stripe between color blocks
- Metallic chrome on one nail as an accent
Reach for foil flakes or a fine metallic polish and always finish with a glossy top coat to lock in shine and prevent chipping. Avoid thick or uneven metallic lines, which can look messy; steady your hand by practicing on a spare nail or wheel first.
Start with just one metallic accent nail to test the look before adding more. Experiment, have fun, and let your nails shine as boldly as your celebration plans.
About the Author — Lena Harper
Lena Harper is a fashion writer and content strategist at Fashion Pops, known for creating thoughtful, trend-aware articles that feel both stylish and relatable. With a strong background in fashion journalism, she specializes in turning seasonal trends, outfit ideas, and styling concepts into easy-to-follow inspiration for modern women.
Her writing focuses on practicality without losing creativity — helping readers build outfits that feel current, wearable, and confident. When she’s not working on new articles, Lena enjoys exploring street style trends, discovering unique fashion finds, and curating inspiration boards that shape upcoming content at Fashion Pops.