4th of July Pedicure: 10 Stunning Nail Ideas to Wow the Crowd
You want toes that match the holiday mood without fuss or regret. Whether you plan a pool party, backyard barbecue, or fireworks show, this guide helps you pick a 4th of July pedicure that looks great and lasts through sand, sun, and celebration. You’ll learn easy designs, color tips, and maintenance tricks so your pedicure stays bold and photo-ready all weekend.
You’ll find classic red, white, and blue looks, playful glitter and floral options, and low-effort styles that still feel polished. Expect clear steps, common mistakes to avoid (like thick topcoat buildup or skipping base protection), and quick care advice to keep your polish chip-free. Get ready to pick a pedicure that fits your style and the kind of holiday you want to have.
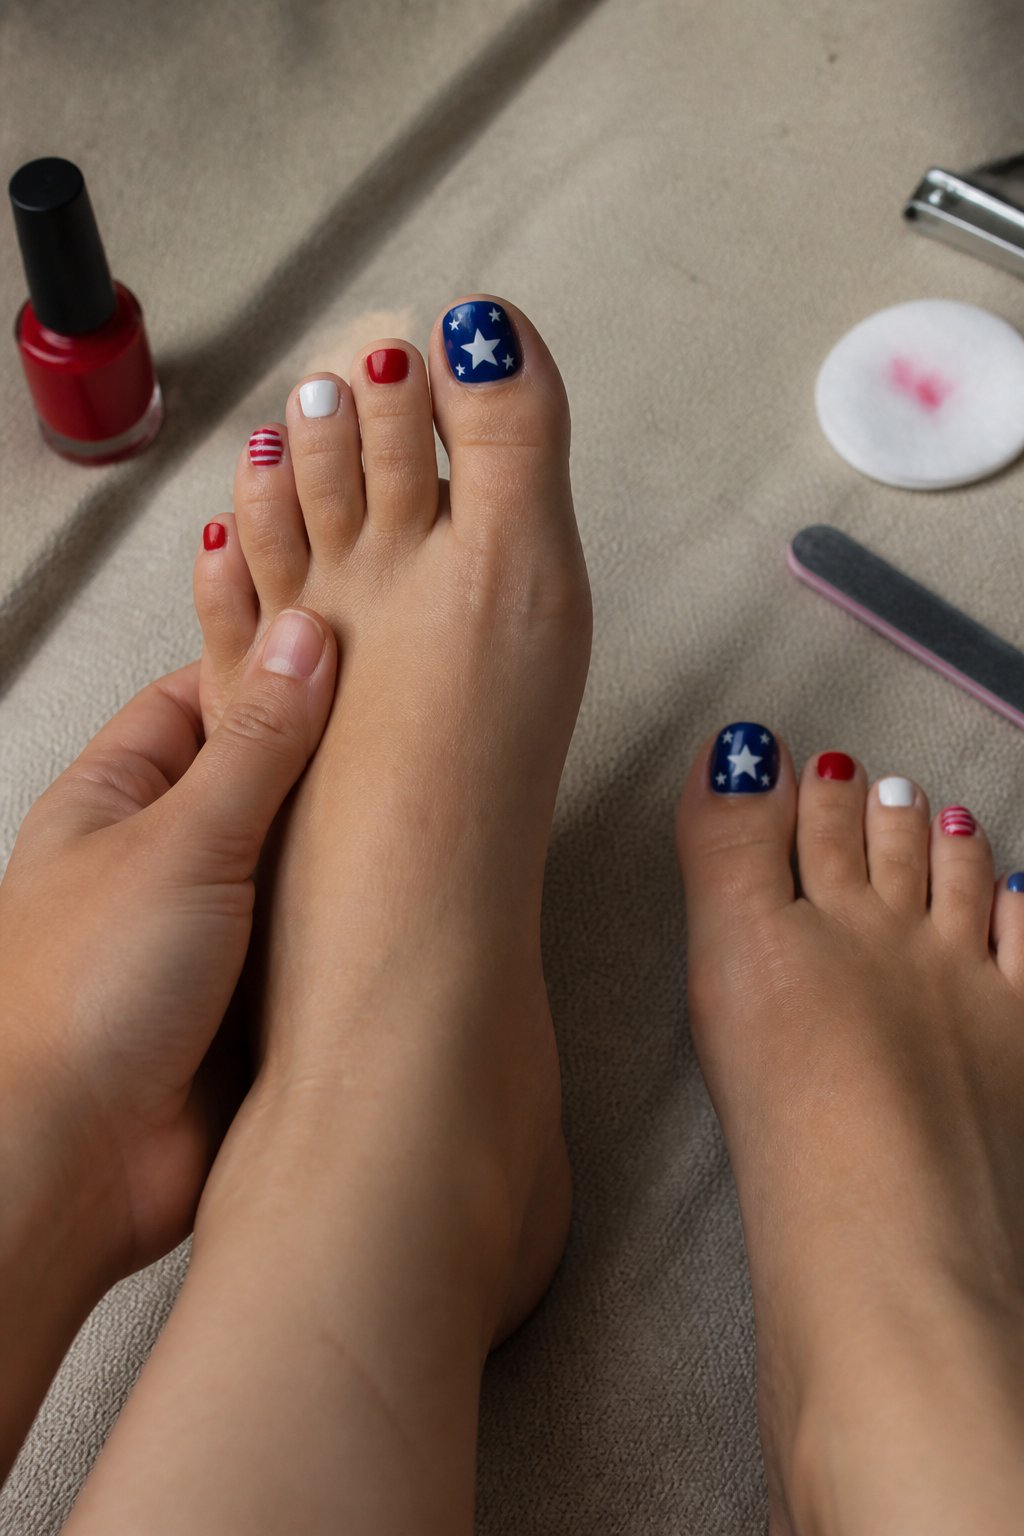
1. Classic Red, White & Blue French Pedicure

Intent: tutorial. You’ll get a clean, timeless look that fits any July event.
Start with a neutral base and let your big toe wear the star or stripe detail. Use thin brushes for crisp French tips in red and blue; stickers help if your hand isn’t steady.
Keep polish layers thin to avoid chipping. A common mistake is thick topcoats that smudge the lines—wait full minutes between coats. Try a matte topcoat on white for contrast or add tiny glitter on the blue for subtle sparkle.
Practice the tip shape on a spare toenail first. If you want inspiration, see patriotic pedis with stars and stripes for more ideas.
2. Star-Spangled Glitter Ombre Toenails
Tutorial: this look blends a soft nude base into red and blue glitter ombre with tiny star accents. Start with a clean, buffed nail and apply a sheer nude base to even out color.
Use a sponge to dab red glitter toward the tip, then blue near one corner for a flag-inspired fade. Add small star decals or paint tiny stars with a dotting tool; avoid overcrowding the nail.
Common mistake: overloading glitter at once causes clumps. Build thin layers and cure between coats if using gel. Finish with a glossy topcoat to seal glitter and smooth texture.
Try one toe with full stars and keep the rest subtle for a chic, wearable result. Paint one set and go enjoy the fireworks—show off your toes.
3. Navy Base with White Star Accent Nail
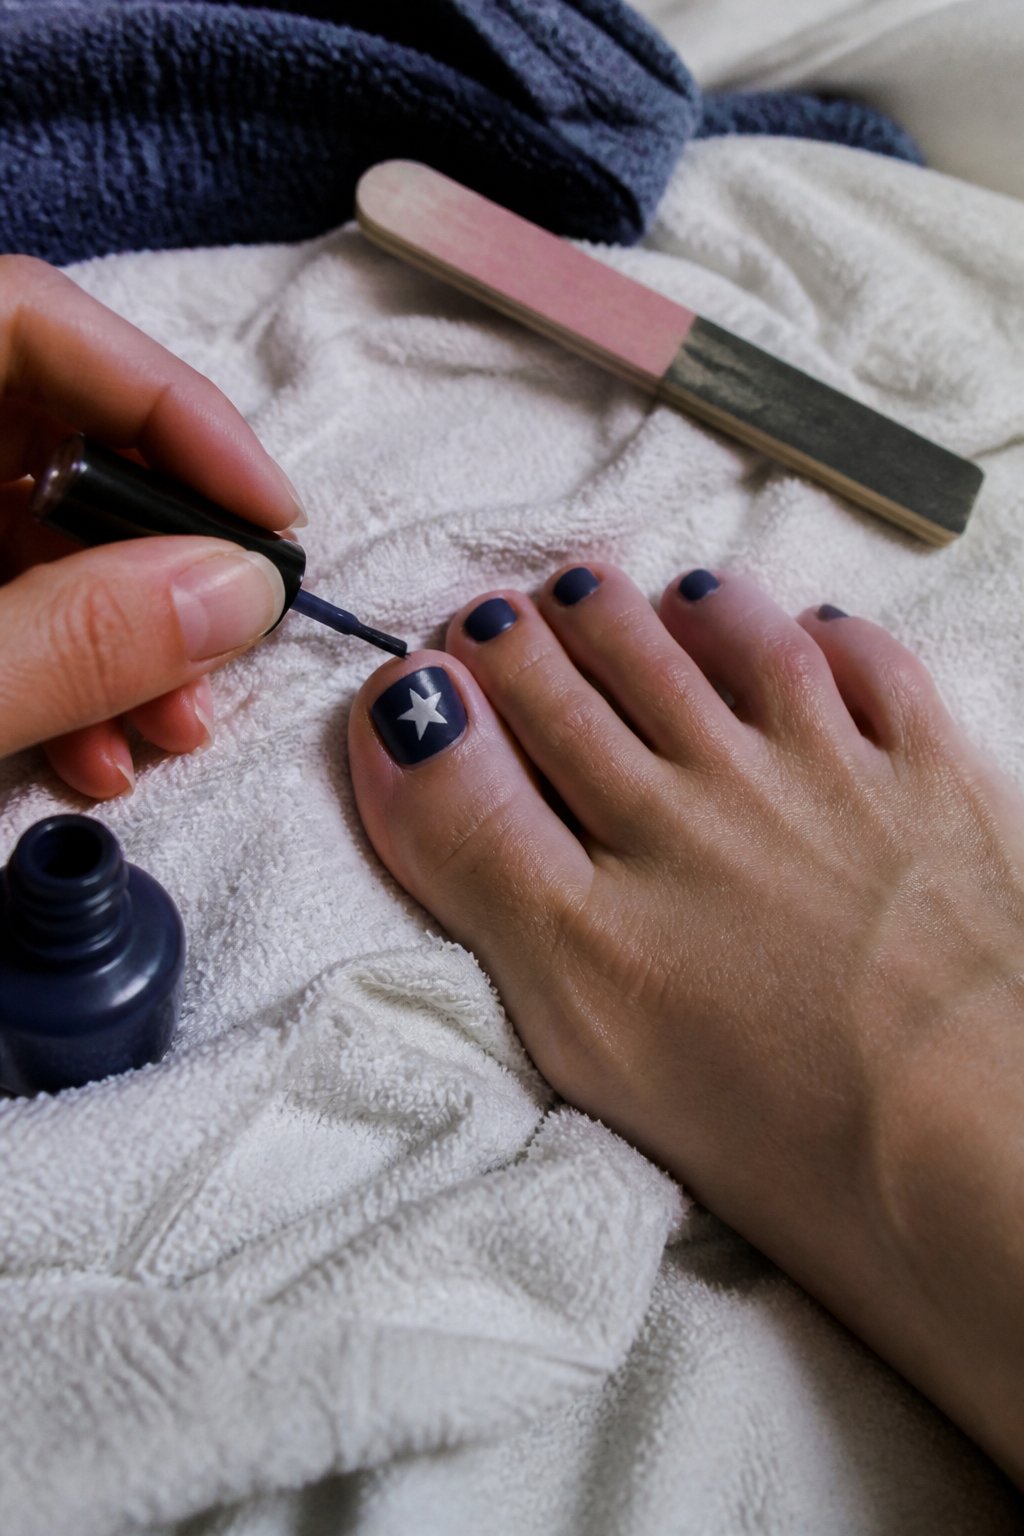
Tutorial: paint a deep navy base across all toes for a clean, classic look. Start with a ridge-filling base coat so polish lays smooth; this prevents streaks and helps the stars sit flat.
Use a thin brush or dotting tool to add one white star on your big toe. Place the star off-center for a modern feel and seal with a matte or glossy top coat depending on your style.
Common mistake: crowding stars. One accent star reads more polished than a busy pattern. If you mess up, soak a brush in remover and gently correct the point.
Try a tiny silver glitter halo around the star for subtle shine. Test placement on a nail wheel first, then enjoy your low-key, patriotic pedicure.
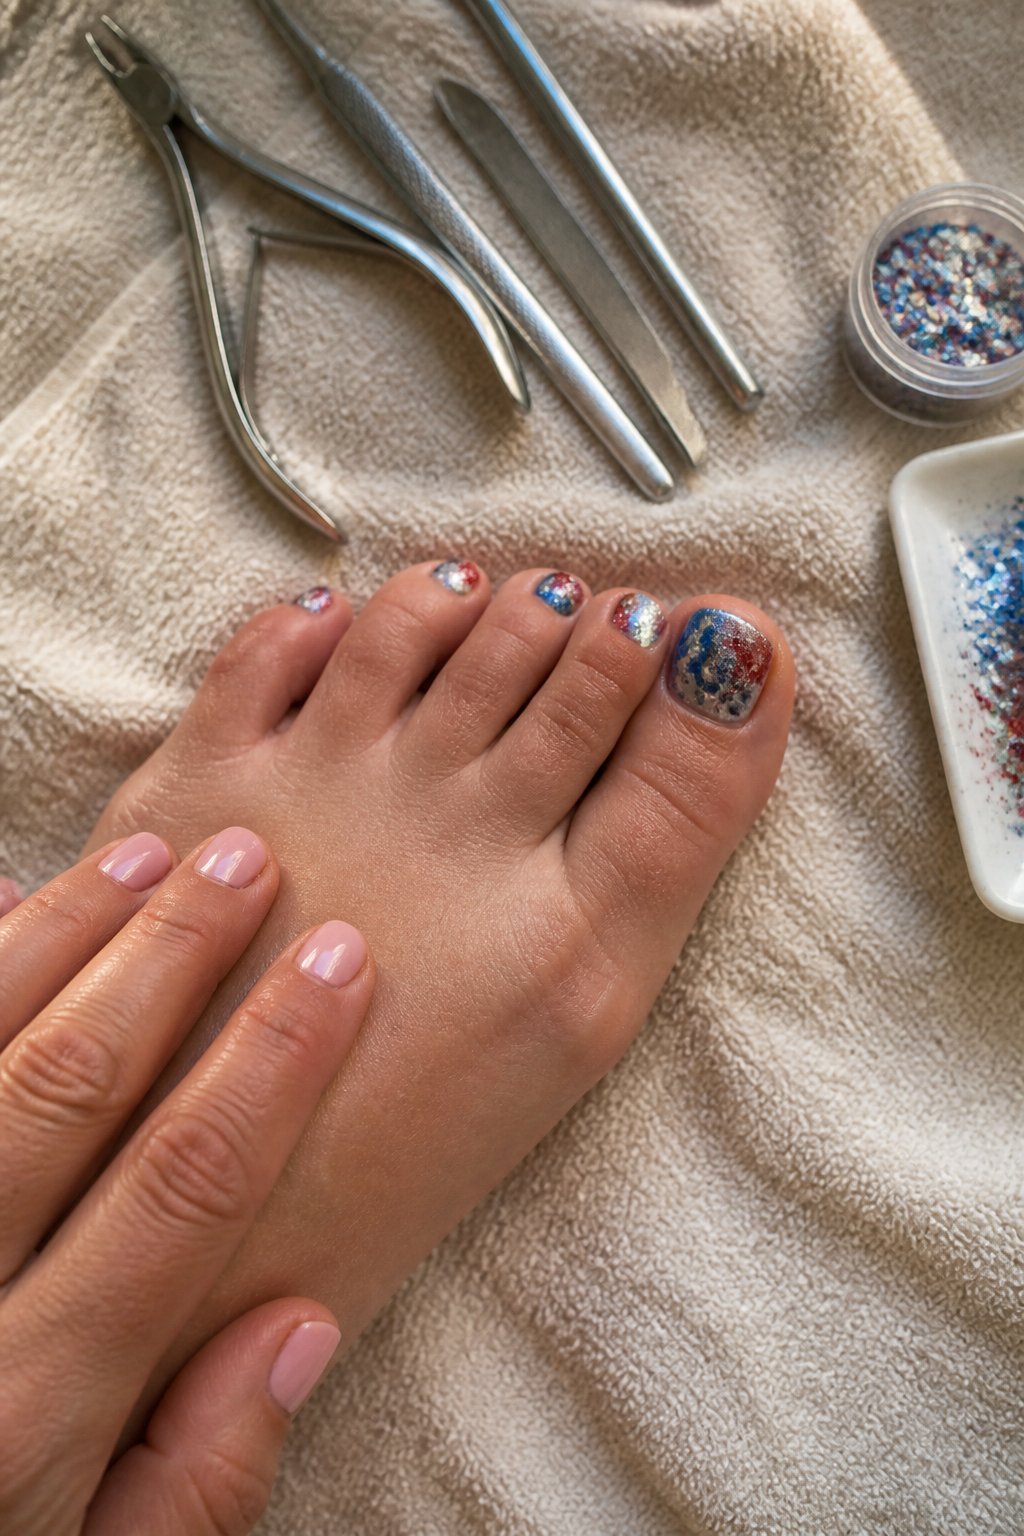
4. Fireworks Accent Toes with Multicolor Microglitter
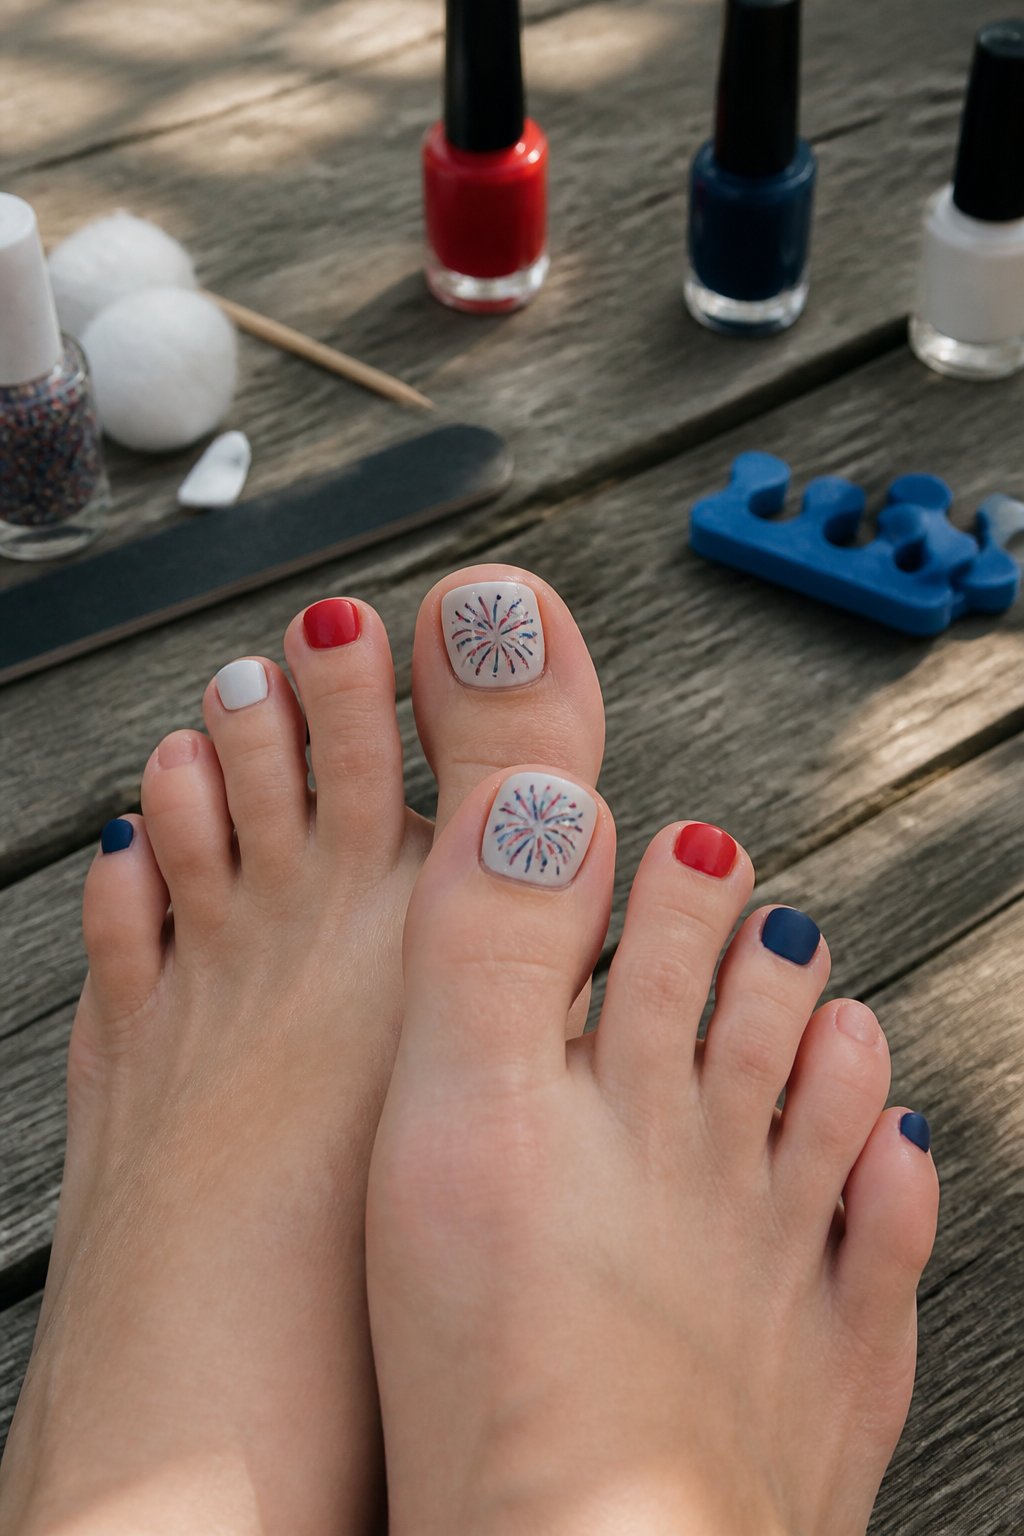
Tutorial: create small, sparkly fireworks on one or two accent toes using multicolor microglitter and a thin brush.
Start by painting a solid base—navy or deep red works well. Let it dry fully; smudging is the most common mistake.
Load a fine brush with clear topcoat, dot the center, then drag short lines outward to form burst shapes. While tacky, press tiny multicolor microglitter into each burst so the glitter catches light without falling off.
Seal with two layers of topcoat for smoothness and longevity. If glitter sits unevenly, gently press it down with a fingertip before curing or drying. Try different color mixes on each toe for a playful, festive look.
5. Matte Navy with Metallic Silver Stripe
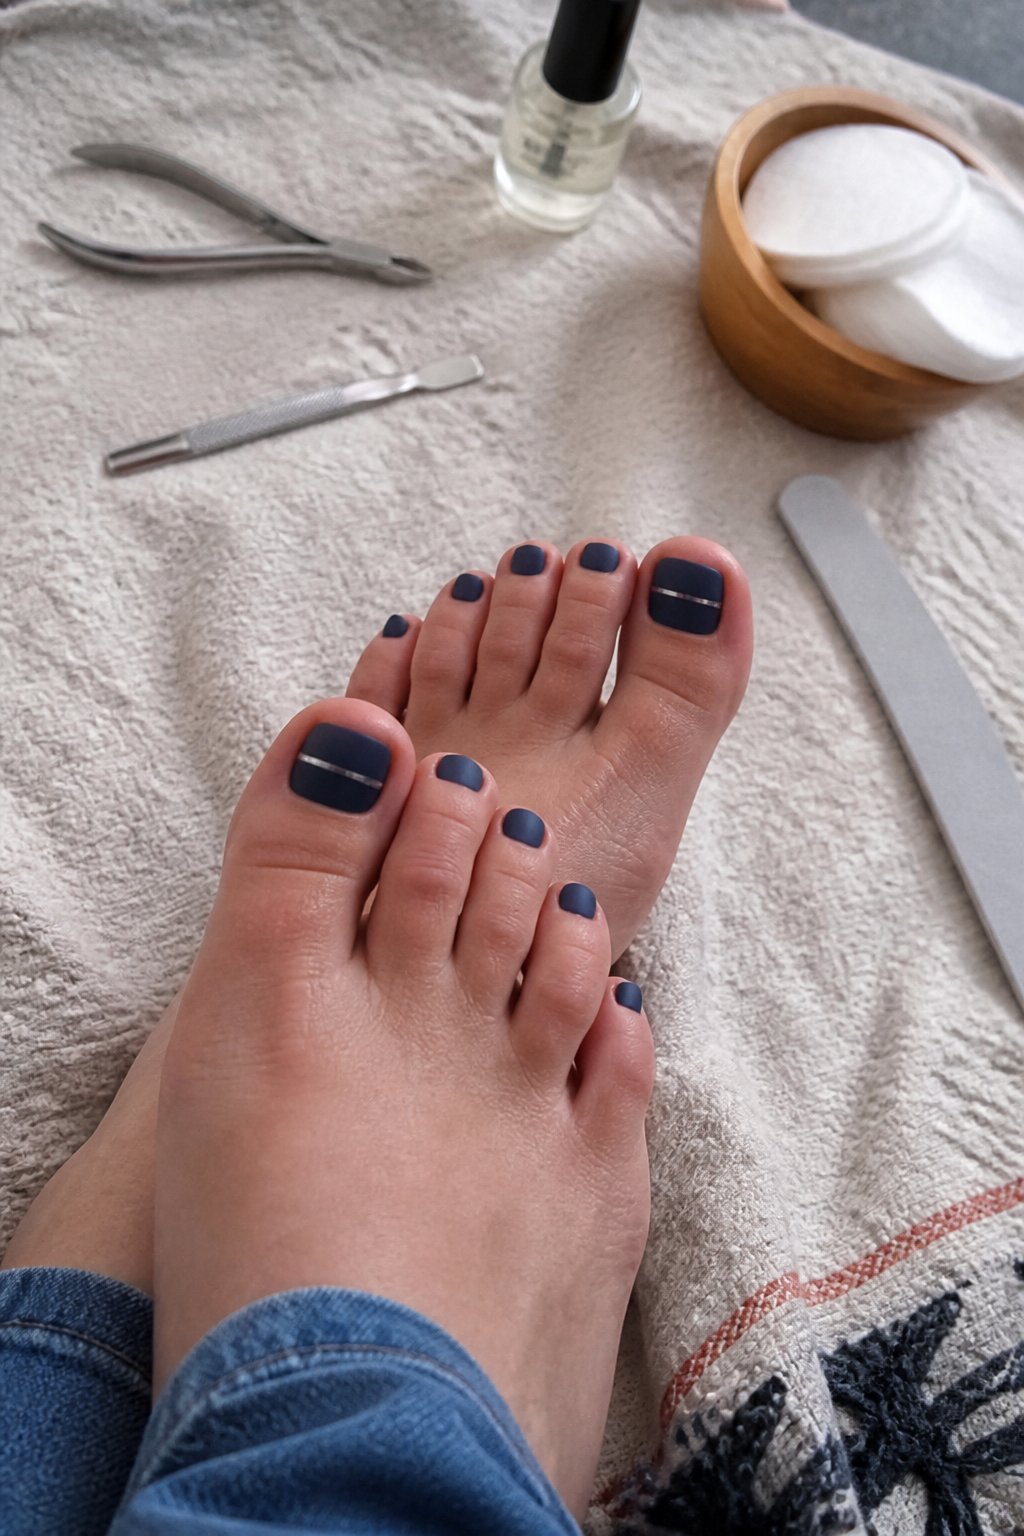
Guide: a clean, modern pedicure you can do at home or with a tech.
Start with two coats of matte navy polish for full opacity. Let each coat dry fully; smudges ruin the crisp look.
Use a thin striping brush or metallic silver tape to add a single horizontal or diagonal stripe. Keep the line steady and don’t overload the brush—too much metal polish blobs easily.
Common mistake: placing the stripe too close to the cuticle. Aim for the middle third of the nail for best balance. Finish with a matte top coat over the navy and a glossy clear coat just on the silver to amplify contrast.
Try a mix of toe shapes: rounded toes soften the look, square toes make it sharper. If you’re wearing sandals, match a silver accessory for a pulled-together finish.
6. Red Satin Base with Tiny White Stars
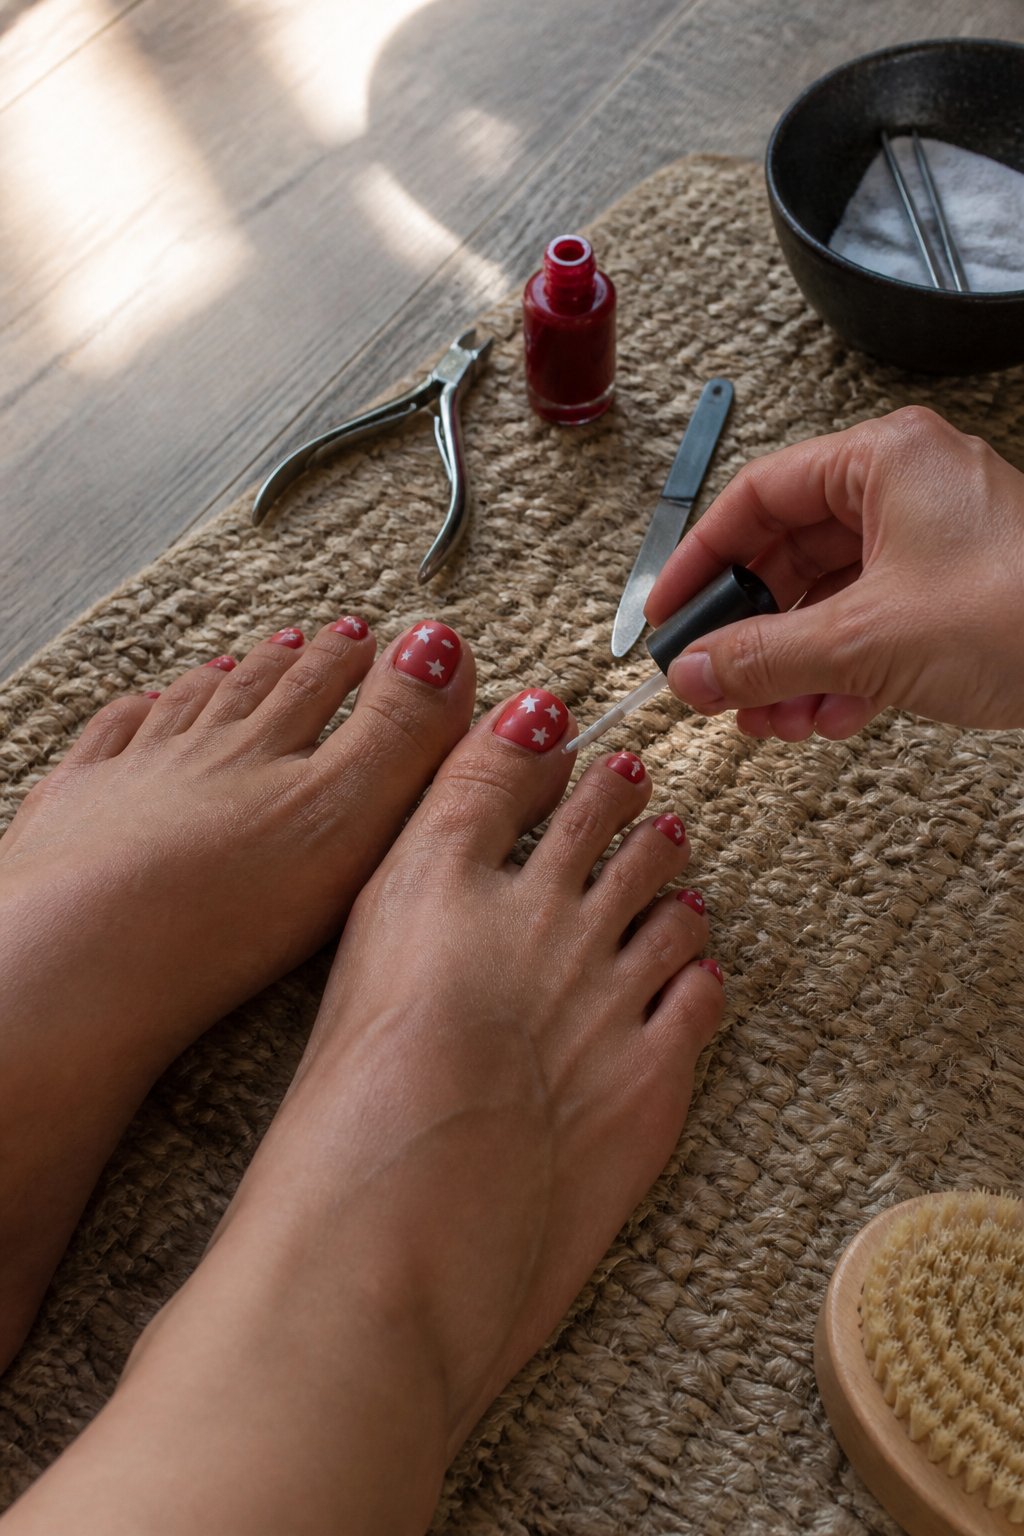
This is a tutorial for a classic, polished 4th of July pedicure. Start with a smooth red satin polish and work on clean, buffed nails so the finish looks silky and even.
Use a thin dotting tool or toothpick to place tiny white stars on one or two accent toes. Keep stars small and spaced; crowded stars look messy and cheap. A star sticker makes this easier if your freehand feels shaky.
Avoid thick top coats that drown the satin effect; a thin, glossy layer seals the design without losing texture. Common mistake: skipping base coat—red can stain, so protect your skin and polish longevity.
Try one navy stripe on the big toe for a subtle twist. If you want, bring a photo to your salon so the tech copies your exact spacing and size.
7. Checkerboard Red-and-White Big Toe Design
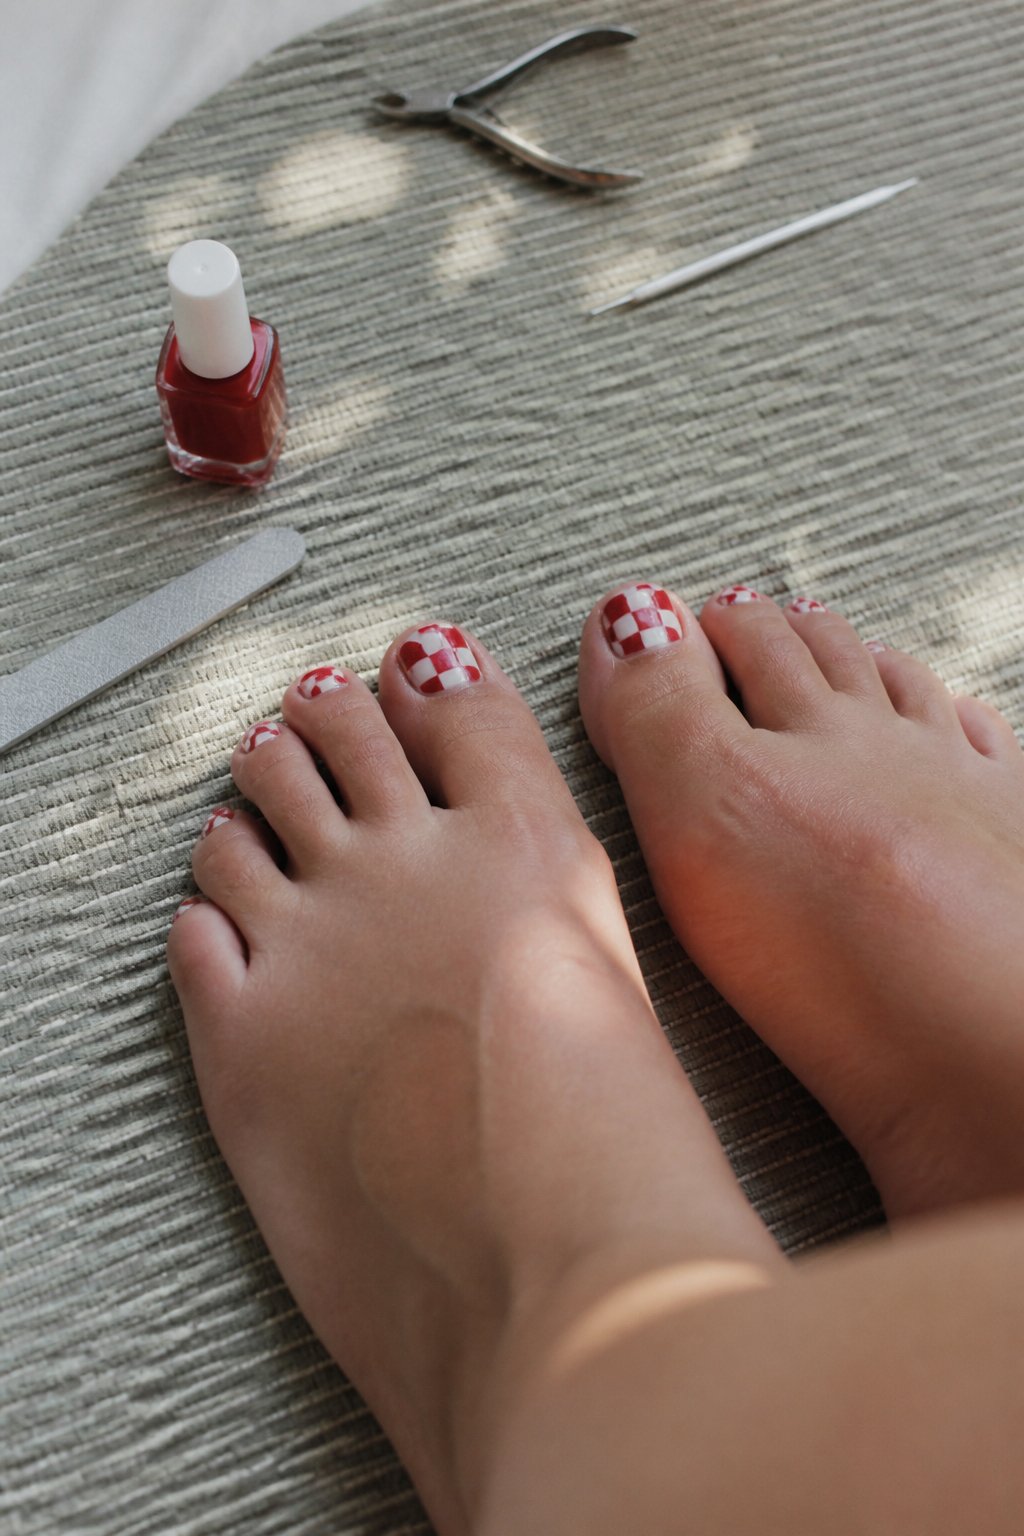
Tutorial: paint a bold checkerboard on your big toe for a retro, patriotic look. Start with a white base so colors pop and your squares stay crisp.
Use thin striping tape or a small brush to mark even squares. Paint alternate squares red; let each layer dry to avoid smudges. A tiny dotting tool helps fix wonky corners.
Common mistake: rushing the drying time. Smudges ruin the pattern fast, so work one toe at a time or use quick-dry drops. If lines look uneven, gently clean edges with a brush dipped in remover.
Finish with a glossy top coat to seal and add shine. Try one navy star on an adjacent toe for balance and visual interest.
8. Clear Gel with Red, White, Blue Confetti Flakes
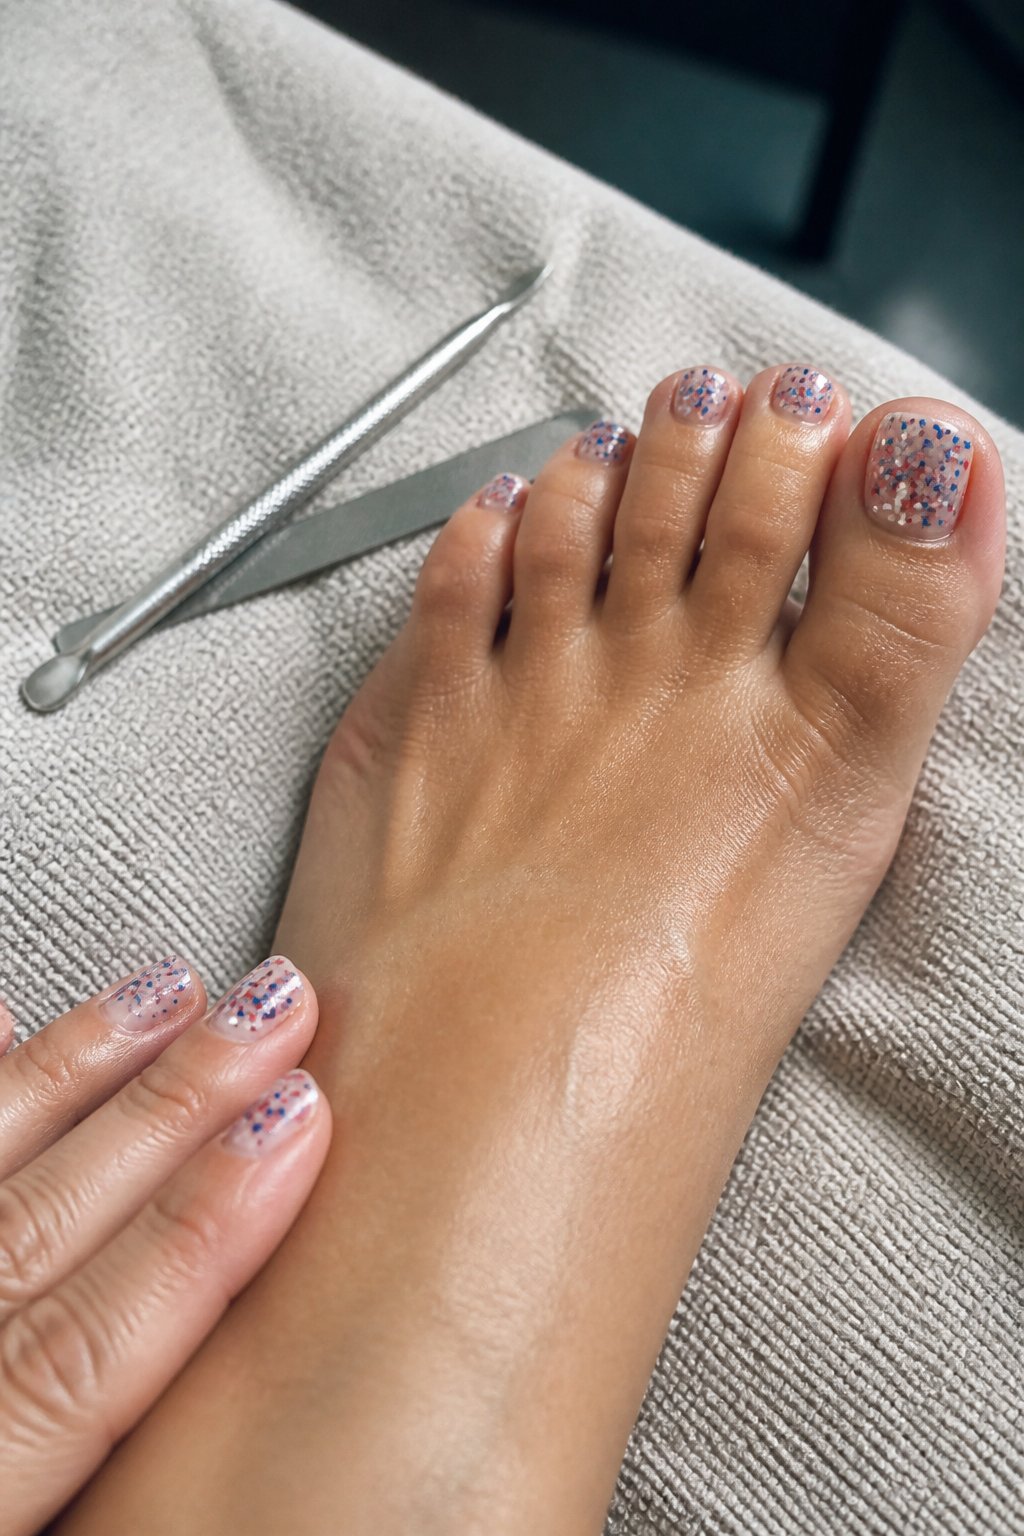
Guide: a simple, showy pedicure you can do at home or in a salon. Start with clean, buffed nails and a thin clear gel base so the confetti sits smoothly.
Press a mix of red, white, and blue confetti flakes into the tacky layer. Place larger flakes near the cuticle and smaller ones toward the tip for depth. Cure each layer briefly to avoid shifting.
Common mistake: piling too many flakes at once — that creates bumps and lifting. Tip: seal with two thin clear gel layers and finish with a glossy top coat for long wear.
If you want sparkle without bulk, scatter flakes on one accent toe only. Try a sheer nude under the confetti for a softer look. Give it a gentle hand-file between layers when needed to keep the surface even.
9. Nude Base with Subtle Flag Stripe on Big Toe
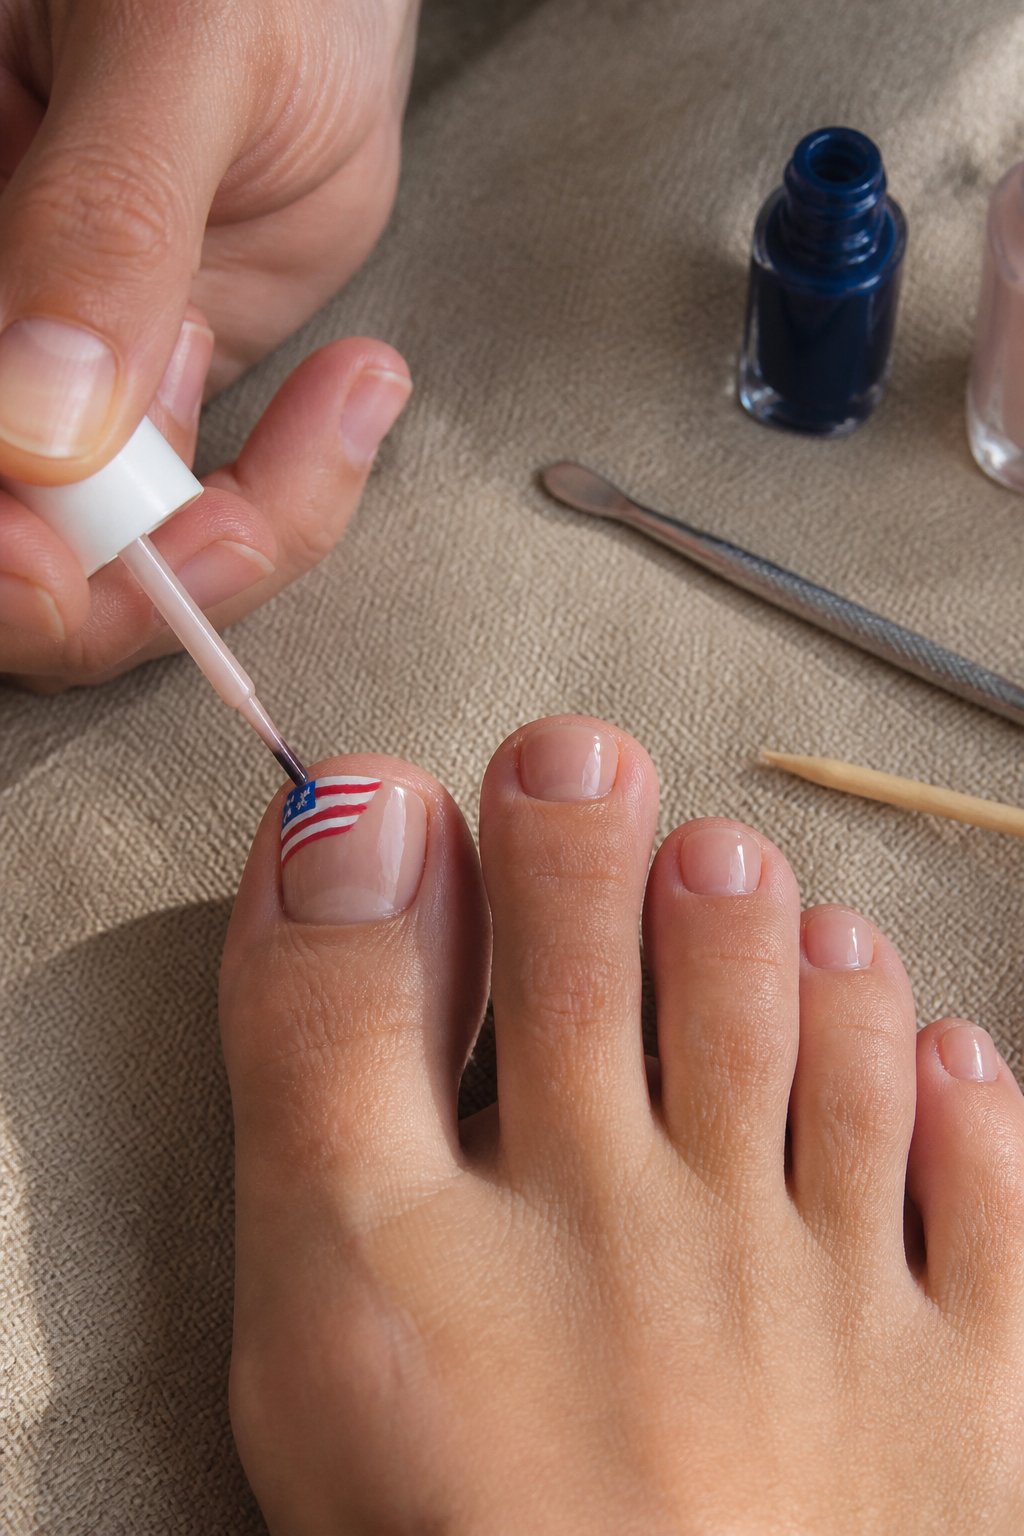
Tutorial: this look keeps most toes neutral while the big toe gets a small flag stripe for a low-key patriotic touch.
Start with a clean, nude base that matches your skin tone. Paint the big toe with a thin blue block near the cuticle, then add tiny white stars or dots. Finish with two slim red and white stripes across the tip for balance.
Common mistakes: using thick polish that blobs, or placing stars too large. Use a fine brush or toothpick and thin coats. Let layers dry fully to avoid smudges.
If you want sparkle, add a light silver glitter over the stripes only. Try this at home or bring a photo to your tech for a quick, classy pedi.
10. Patriotic Floral Accent (roses in red, white, blue)
Tutorial: create a simple, classy rose design for your 4th of July pedicure.
Start with a clean base coat in pale nude or soft white. Paint small rose shapes on two toes—use a dotting tool for the center, then add curved petals with a fine brush. Use true red, pure white, and a deep navy blue for accents.
Vary the size and placement so the look feels natural, not cartoonish. A common mistake is overcrowding the nail; leave breathing space around each rose. Seal with a glossy top coat and dry fully to avoid smudges.
Try one nail with a tiny flag stripe beside the rose for balance. If you prefer low maintenance, use realistic velvet-silk artificial rose stems for inspiration and copy their color flow on your nails.
Color Theory and Symbolism
This section explains how color choices affect mood, meaning, and style for a 4th of July pedicure. You’ll learn why certain shades read as patriotic or chic, and which accents make a set look polished without being gaudy.
Significance of Red, White, and Blue
Intent: guide — pick the exact shades to match your outfit and event.
Red reads energetic and bold. Use a blue-red like “tomato” or “cherry” for a classic look, or a deeper oxblood for evening events. Red hides chips well but can show smudges during application, so apply thin coats and a fast-dry top coat.
White acts as a clean base that brightens other colors. A crisp opaque white creates sharp stripe or star details. A sheer or pearl white gives a softer, more elegant result. Watch for streaks; use a white gel or two thin layers for even coverage.
Blue sets the tone. A bright true blue reads very patriotic; navy reads refined. For toes, choose a blue that contrasts your skin tone—lighter blues pop on darker skin, deep navy flatters fair skin. A matte top coat gives a modern twist; glossy keeps it traditional.
Accent Options for a Festive Look
Intent: tutorial — add accents that look intentional and last through summer activities.
Metallics and glitter add celebration without heavy patterns. Use a single gold or silver stripe on the big toe, or a glitter fade from cuticle to tip. Keep glitter to one or two nails to avoid looking busy.
Stars and stripes read literal but can be styled. Try a single striped accent nail, or tiny star decals near the cuticle. For a subtler effect, paint a navy french tip with a thin red line under it.
Textures and finishes change the vibe fast. Satin or matte top coats make colors feel modern. High-gloss and micro-glitter make nails party-ready for fireworks. Test your finish on one nail first to see how it wears with sandals.
Care and Maintenance Tips
Keep polish chip-free by avoiding long soaks, rough surfaces, and shoes that rub. Moisturize cuticles daily and touch up chips quickly to prevent peeling.
How To Make Designs Last Longer
Intent: practical tutorial to extend your pedicure’s life.
Start with prep: file nails straight across and buff lightly so polish adheres evenly. Push back cuticles and remove lotion or oils with rubbing alcohol before applying base coat. Use a thin base coat, two thin color coats, then seal with a high-gloss topcoat. Thin layers dry faster and resist cracking better than one thick coat.
Drying matters. Let nails cure 3–5 minutes between coats and wait at least 30 minutes before wearing closed-toe shoes. For gel pedicures, follow salon cure times exactly to avoid lifting. When you notice a small chip, file the edge smooth, apply a tiny amount of polish, and re-seal with topcoat—this stops chips from spreading.
Common mistake: skipping base coat or slopping polish on the skin. That causes early lifting. Also avoid long hot baths the first 24 hours; heat softens polish and can ruin clean lines.
Recommended Aftercare Products
Intent: product guide to maintain shine and nail health.
Buy a fast-drying high-gloss topcoat and a separate quick-fix polish for touch-ups. Look for topcoats labeled “chip-resistant” or “long-wear.” Keep a small nail file and a wooden cuticle stick in your bag to smooth snags before they catch. For moisturizing, use a cuticle oil with jojoba or vitamin E twice daily; apply around the nail, not on the polish, and rub in thoroughly.
Use an anti-fungal spray in shoes and a cushioned toe spacer if your pedicure involves detailed art near the cuticle—this reduces rubbing. If you prefer gel, carry an acetone-safe remover pad for controlled fixes at home. Avoid heavy creams right after application; wait ten minutes after oil so the topcoat stays glossy.
Try one small change this week: apply cuticle oil nightly and a fresh topcoat every 5–7 days to keep your 4th of July design looking sharp.
About the Author — Lena Harper
Lena Harper is a fashion writer and content strategist at Fashion Pops, known for creating thoughtful, trend-aware articles that feel both stylish and relatable. With a strong background in fashion journalism, she specializes in turning seasonal trends, outfit ideas, and styling concepts into easy-to-follow inspiration for modern women.
Her writing focuses on practicality without losing creativity — helping readers build outfits that feel current, wearable, and confident. When she’s not working on new articles, Lena enjoys exploring street style trends, discovering unique fashion finds, and curating inspiration boards that shape upcoming content at Fashion Pops.